

A Crafter's Guide to Every Type of Bags You Can Sew
So, you’re ready to dive into the wonderful world of bag making? Fantastic. Knowing the difference between all the unique types of bags is the first real step to creating something you'll be proud to carry. A simple tote and a complex backpack are worlds apart, and this guide is here to be your roadmap.
Unlocking Your Bag Making Potential
Think of it like a chef learning their knives. Understanding the difference between a tote and a clutch isn't just about names; it's about choosing the right tools, fabrics, and techniques for the job. Get this right, and you've built a solid foundation for every project you take on.
We'll walk through the most common styles, taking you from the basics all the way to dreaming up your own custom designs.
But before you start cutting fabric, let’s talk tools. Having the right equipment makes all the difference. For some great advice on this, check out these tips for choosing the right sewing machine.
Now, for the secret weapon to a professional-looking bag: interfacing. This is what stops your creations from looking slouchy and gives them the structure they need to last.
A well-chosen interfacing is the difference between a homemade project and a handmade treasure. It provides the hidden structure that gives your bag shape, durability, and a polished appearance.
For example, adding a layer of something like a quality fusible fleece can instantly give a simple tote that lovely, sturdy feel.
Alright, let's explore the key bag types you can create.
Choosing the Perfect Bag for Your Needs and Skills
Before you even think about cutting your fabric, let’s talk about the most important step: picking the right project. It's so tempting to jump straight to the fun part, but taking a moment to match your project to its purpose—and your current sewing skills—is the secret to a bag you'll actually love making and using.
So, what’s this bag going to do? Is it a simple carryall for a weekly trip to the farmer's market? A chic little clutch for a wedding? Or a workhorse of a bag to survive your daily commute? A quick market tote is a completely different beast to sew than a backpack with a dozen pockets meant to carry a laptop and a lunch.
This little flowchart can help you think through the decision.
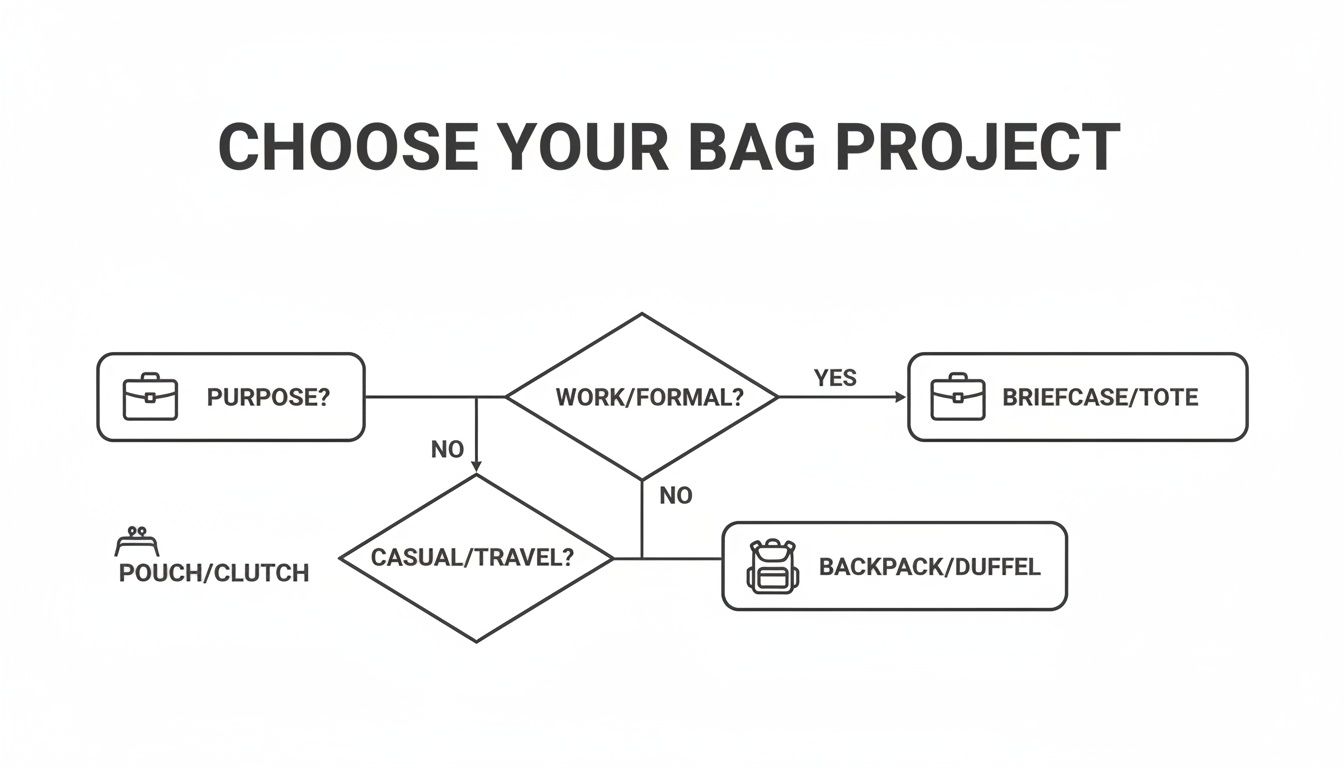
As you can see, figuring out the bag's main job is the first big fork in the road. It immediately helps you narrow your focus to styles that are actually built for work, casual outings, or more formal events.
What's Your Sewing Skill Level? Be Honest!
Okay, you know what kind of bag you need. Now it's time for a frank chat with yourself about your sewing confidence. Bag making is a fantastic journey, with techniques ranging from simple straight seams all the way to installing tricky hardware.
-
Beginner: Just starting out? Welcome! Your best friend is a simple, unlined tote bag. It's the perfect project for mastering straight stitches, learning how to handle slightly heavier fabrics, and attaching straps. Nailing a simple project like this is a massive confidence booster.
-
Intermediate: If you’ve got a few projects under your belt, you’re ready to step it up. Think about bags with linings, zippered pockets, or magnetic snaps. A stylish crossbody bag or a simple backpack are great challenges that will teach you a ton without overwhelming you.
-
Advanced: Feeling comfortable with all sorts of sewing shenanigans? It's time to tackle the really satisfying stuff. We’re talking structured laptop bags with padded compartments, duffel bags with perfect piping, or elegant clutches with metal frames. These projects require precision, patience, and a good seam ripper on standby.
To give you a head start, here is a quick reference table that matches some popular bag styles with their difficulty and ideal use.
Bag Type and Sewing Difficulty Quick Reference
| Bag Type | Sewing Difficulty | Common Uses | Recommended Fabric |
|---|---|---|---|
| Tote Bag | Beginner | Shopping, everyday carryall, beach bag | Canvas, duck cloth, denim |
| Crossbody Bag | Intermediate | Daily use, travel, hands-free errands | Faux leather, corduroy, waxed canvas |
| Backpack | Intermediate to Advanced | School, work, hiking, travel | Nylon, canvas, ripstop |
| Clutch | Beginner to Intermediate | Evening events, weddings, special occasions | Satin, velvet, leather, cork |
| Duffel Bag | Advanced | Gym, weekend trips, sports | Heavy-duty canvas, nylon, cordura |
| Laptop Bag | Advanced | Work, commuting, school | Padded canvas, leather, ballistic nylon |
This table is just a starting point, of course, but it can help you quickly spot a project that feels like a good fit for your next sewing adventure.
Matching Projects to Purpose
The real magic happens when you line up your skill level with the bag's ultimate function. For instance, a beginner who dreams of a travel bag could start with a simple drawstring backpack instead of tackling a massive duffel right away. An intermediate sewist needing a professional-looking work bag might make a structured tote with an interior pocket before trying a full-on briefcase.
Choosing a project that slightly stretches your skills without overwhelming you is the key to growth. You want a challenge that feels exciting, not a struggle that feels defeating.
When you thoughtfully consider what you need and what you can comfortably create, you set yourself up for success. It transforms the whole process from just "making a bag" into genuinely growing your craft, one stitch at a time.
Mastering Totes and Backpacks: The Everyday Workhorses
When you think of a classic, do-it-all bag, two styles probably jump to mind: the tote and the backpack. These are the undisputed workhorses in the world of bags, loved for being so practical and easy to use. Getting to know how they’re put together is a brilliant first step in your bag-making journey, as the skills you learn here will pop up in almost every other type of bags you decide to tackle.

So, let's dive into these two icons. We'll explore the best fabrics, the techniques that make a difference, and the creative twists that make sewing them so much fun.
The Humble and Mighty Tote Bag
At its heart, a tote bag is pure, simple genius. It’s usually a large, open-top bag with two parallel handles, made to carry… well, pretty much anything you can fit inside! It's that perfect grab-and-go bag for groceries, library books, beach towels, or your latest fabric haul from the shop.
The real magic of the tote is its simplicity, which makes it an ideal first project if you're new to sewing. But don't let that fool you; this basic shape is a launchpad for endless creativity. You can add things like interior pockets, recessed zippers, or use gorgeous, high-end fabrics to give it a seriously luxe feel.
A well-made tote is more than just a bag; it's a blank slate. Its simple structure invites creativity, allowing you to experiment with fabrics, pockets, and hardware to make it uniquely yours.
Key Features and Materials
The basic anatomy of a tote is wonderfully straightforward, but choosing the right materials and construction methods is what takes it from homemade to handmade.
- Typical Dimensions: Sizes can be all over the map, but a standard tote is often around 38 cm wide by 43 cm tall, with a base that’s about 10-15 cm deep. This gives you plenty of room without feeling like you're carrying luggage.
- Essential Fabrics: Durability is the name of the game here. You want fabrics that can take a bit of a beating, which is why classics like canvas, duck cloth, and denim are always a solid choice.
- The Power of Interfacing: Ever seen a sad, floppy tote? It was probably made with quilting cotton alone. Adding a medium-weight fusible interfacing to both your main fabric and your lining is the secret. It gives the bag enough body and structure to stand up on its own for a much more professional finish.
Sewing Tips and Project Ideas
Even with a simple tote, technique matters. One of the most important things you can do is reinforce the handles where they join the bag. By sewing a small box with an "X" through the middle, you spread the stress across a wider area and stop the handles from ripping off when the bag is full.
Ready to give it a go? Start with a basic, unlined market tote to get the hang of straight seams and attaching straps. Once you’ve nailed that, try a fully lined version with a simple interior patch pocket for your next challenge.
The Dependable Backpack
For comfortable, hands-free carrying, nothing beats the backpack. It’s designed to spread weight evenly across your shoulders, making it the top choice for students, commuters, hikers, and travellers everywhere. Making one might look complicated, but it’s really just a puzzle you solve one piece at a time.
This style offers a fantastic challenge for sewists who are ready to move beyond the basics. You'll learn how to shape fabric in three dimensions, install zippers neatly, and create padded straps that are actually comfortable to wear.
Key Features and Materials
Backpacks are all about being functional and tough. The materials you pick need to be up for the job of protecting what’s inside and standing up to daily wear and tear.
- Common Dimensions: A typical daypack or school bag usually measures about 30 cm wide, 45 cm tall, and 15 cm deep. This is the sweet spot for holding notebooks, a laptop, and other daily essentials without being bulky.
- Durable Fabrics: Sturdy fabrics are a must. Things like nylon, Cordura, and heavyweight canvas are perfect for the outside. For the lining, a lighter-weight nylon or ripstop fabric works great and won't add too much bulk.
- Essential Hardware: Get ready to meet a whole new world of hardware! You'll be working with zippers, adjustable strap sliders, D-rings, and side-release buckles. Don't let it scare you; each piece has a specific job and is easier to install than you think.
Sewing Tips and Project Ideas
Here's a pro tip for sewing backpacks: use a longer stitch length, around 3.0-3.5 mm, when you're going through thick layers of fabric and interfacing. It helps your machine feed everything through more smoothly and actually creates a stronger seam. Trust me, investing in a zipper foot and a walking foot will make your life so much easier, too.
For your first backpack project, a simple drawstring style is a great way to start. When you're feeling more confident, try a classic zippered backpack with a front pocket and adjustable straps. A great way to take your project to the next level is by using top-notch hardware. For a bag made with unique materials like cork or vegan leather, something like a Cork Lovers Bag Hardware Kit in Nickel can provide that beautiful, durable finish. It's that combination of professional hardware and great fabric that truly separates a good bag from a great one.
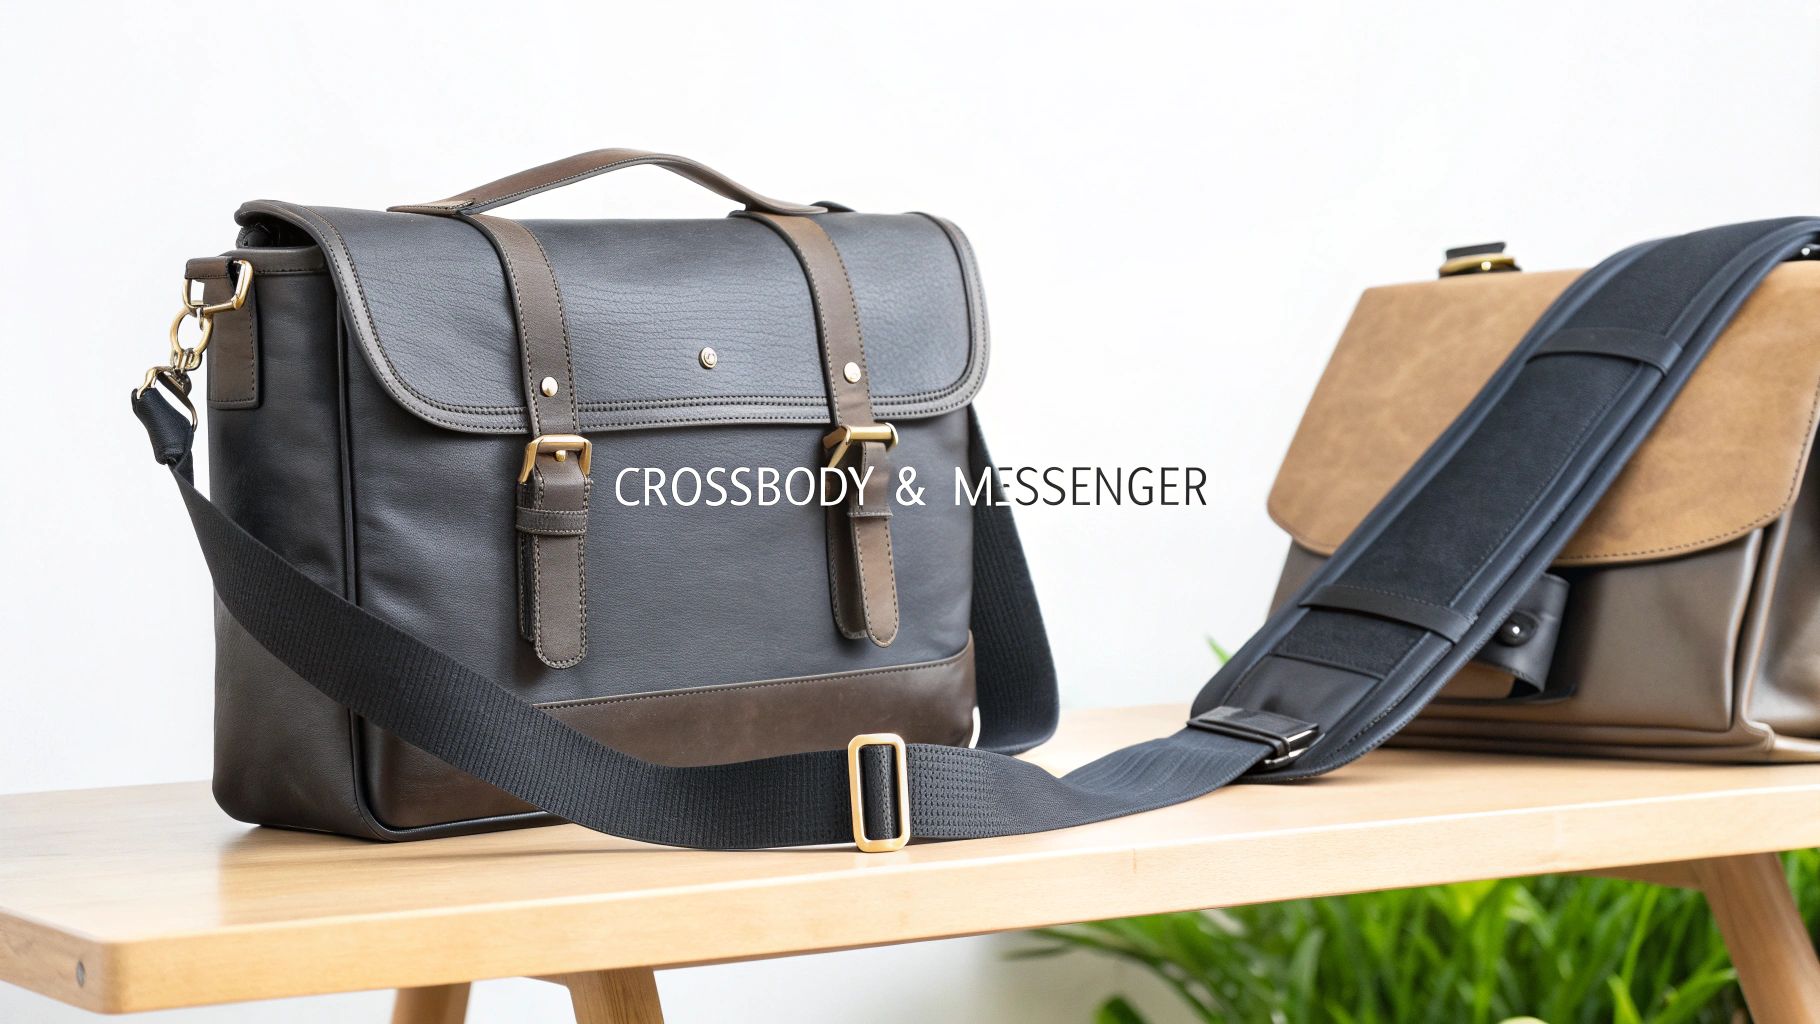
Crafting Crossbody and Messenger Bags for On-The-Go Style
If you're someone who needs to keep their hands free but doesn't want to compromise on style, the crossbody or messenger bag is your best friend. Both are designed to be slung over a shoulder and worn across your body, but they each have their own unique personality and construction quirks that make them fantastic sewing projects.
Learning to make this popular type of bags is a brilliant way to master essential skills like installing hardware and creating adjustable straps—techniques you'll use time and time again.
Let's dive into what makes these bags so incredibly practical and break down the techniques you’ll need to sew a durable, stylish accessory that’s perfect for a life on the move.
Distinguishing the Messenger from the Crossbody
While you'll often hear the terms used interchangeably, there are some key differences between these two styles. A classic messenger bag is usually larger and rectangular, a nod to its history as a courier's go-to. Its most recognizable feature is a big flap that folds over the main compartment, which is often fastened with buckles or clips.
A crossbody bag, on the other hand, is more of a catch-all term. These tend to be smaller and more fashion-forward, and they come in a dizzying array of shapes—circles, squares, camera bag styles, you name it. Their closures are just as varied, featuring everything from zippers and magnetic snaps to fancy turn locks.
Think of it this way: a messenger bag is like a trusty pickup truck, built for function with a classic, no-fuss design. A crossbody is like the entire category of compact cars—diverse, stylish, and adaptable to countless different needs and aesthetics.
Knowing this difference helps you pick a pattern that actually suits your purpose, whether you need a work-ready bag to haul a tablet or a chic little accessory for weekend errands.
Fabrics That Blend Durability with Style
The perfect fabric for a crossbody or messenger bag needs to be tough enough to withstand daily wear while still looking sharp. These bags often take more of a beating from friction and movement than a regular handbag, so your material choice is key to making something that lasts.
Here are a few of my favourite go-to options:
- Waxed Canvas: This stuff is incredibly durable, water-resistant, and develops a gorgeous, rugged patina over time. It’s absolutely perfect for creating that classic, heritage vibe.
- Vegan Leather (Faux Leather): You get the sophisticated look of real leather without the high price tag or special care requirements. Vegan leather is a fantastic choice, and it comes in every colour and texture imaginable.
- Cordura or Ballistic Nylon: For a modern, high-performance bag, these synthetic fabrics offer amazing strength and abrasion resistance. They’re ideal if you’re making a daily commuter bag that needs to be nearly indestructible.
A quick tip: when you're sewing with these heavier materials, do yourself a favour and use a strong needle (like a Denim 90/14 or a Microtex for faux leather) and lengthen your stitch a bit. It makes the whole process so much smoother.
Demystifying Essential Bag Hardware
Hardware is what truly elevates a crossbody from a simple pouch to a polished, fully functional accessory. Don't let all the little metal bits and pieces intimidate you! They are the secret to creating a professional-looking bag with a perfectly adjustable strap.
You’ll most often run into these three key pieces:
- Adjustable Strap Sliders: This is the magic little component that lets the strap length change on a whim. It's a rectangular piece of hardware with a bar in the middle that the strap fabric weaves through.
- D-Rings or Rectangle Rings: These are the anchor points for your strap. You’ll sew fabric tabs holding these rings into the side seams of your bag, creating a super secure spot to clip the strap onto.
- Swivel Clips (or Lobster Clasps): Attached to the ends of the strap, these clips hook onto the D-rings. Their base swivels around, which is a small detail that makes a huge difference—it prevents your strap from getting all twisted up.
Installing this hardware is more straightforward than it looks. For the strap, you just loop the webbing or fabric through the slider and swivel clips in a specific sequence before stitching it all down. For the D-rings, you create small fabric tabs, fold them over the flat edge of the ring, and baste them securely into the bag's side seams before you do the final assembly. A good pattern with clear instructions is your best friend here.
Proper installation is non-negotiable for a long-lasting bag. In fact, one survey found that over 60% of bag failures happen right at the strap connection points. This really drives home how important strong reinforcement is. By sewing a sturdy "X" inside a box pattern at these key stress points, you can be confident your handmade bag will hold up for years to come.
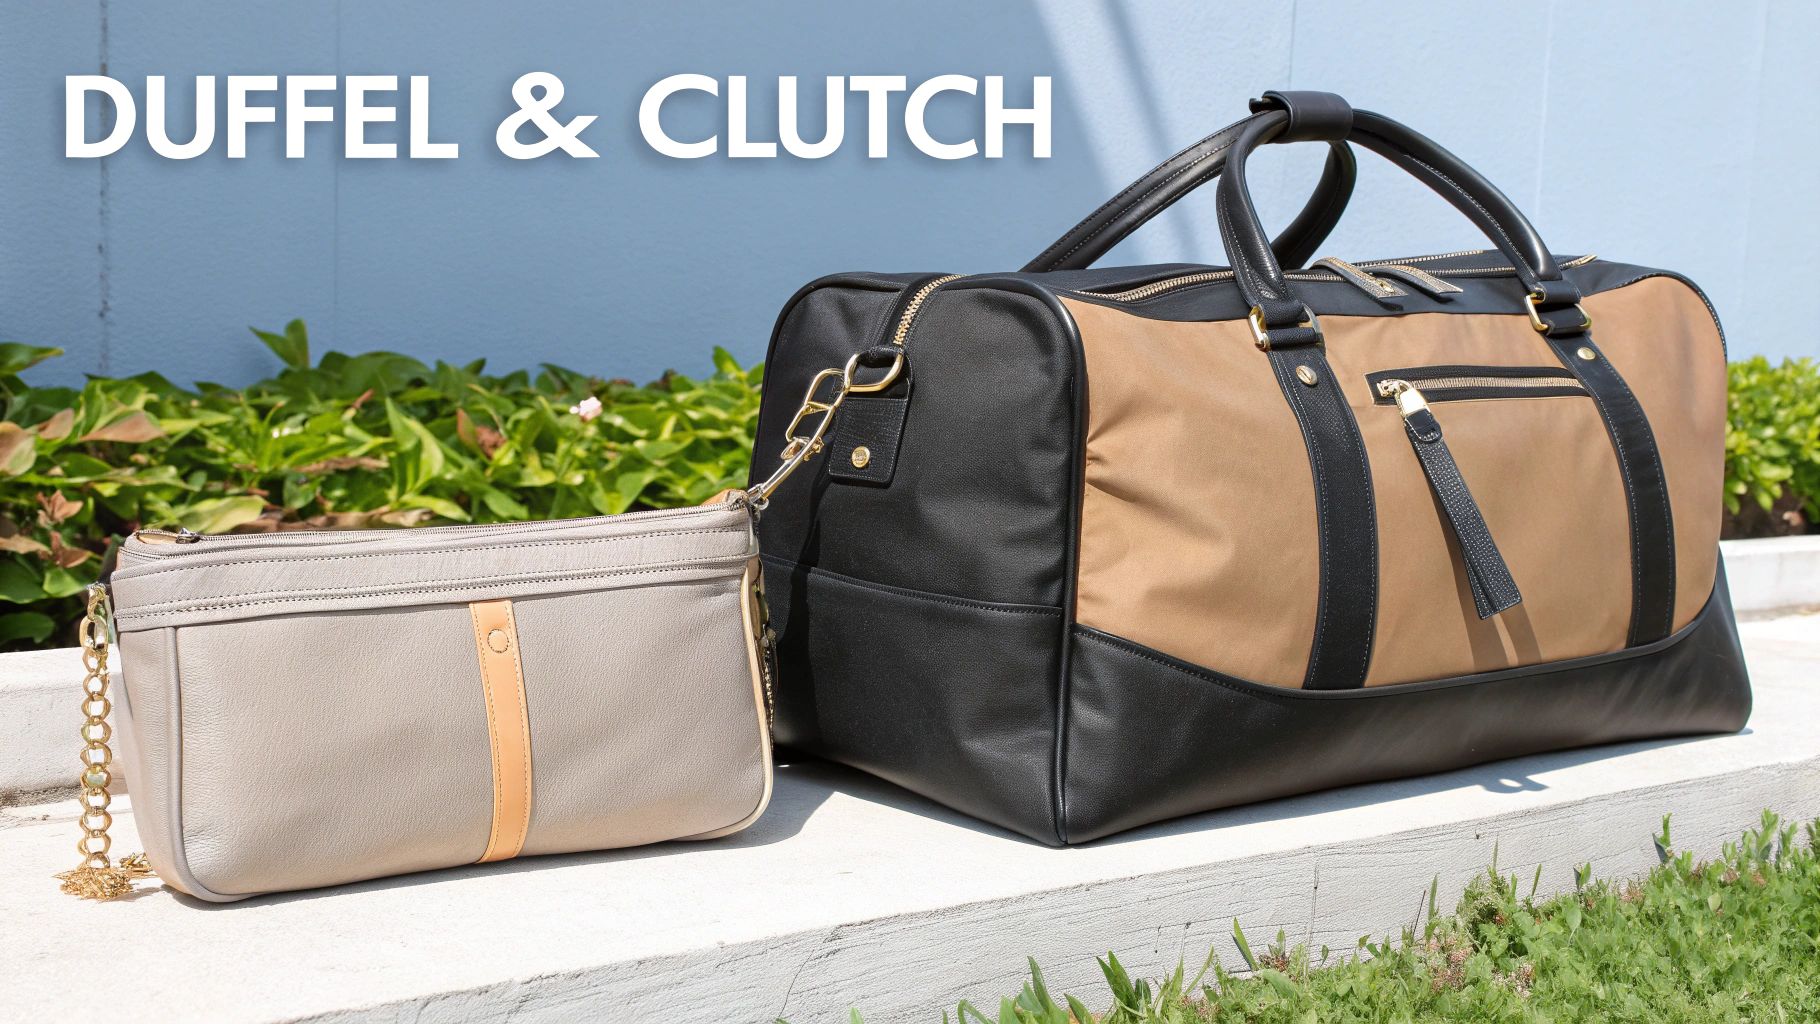
Sewing Duffel Bags and Clutches for Travel and Occasions
Let's dive into two bag styles that couldn't be more different but are equally rewarding to make: the duffel and the clutch. On one hand, you have the big, brawny duffel bag—a true workhorse built for adventure. On the other, the tiny, elegant clutch, designed for a touch of class.
Learning to sew both of these really shows off your range as a bag maker. You’ll get comfortable wrangling heavy-duty, rugged materials for a bag that can be tossed around, and you’ll also master the finer points of working with delicate fabrics for an accessory meant for a special night out.
The Durable and Spacious Duffel Bag
Think of the duffel bag as your portable closet. It's a large, often cylindrical or rectangular bag designed to haul everything you need for a weekend trip, a gym session, or sports practice. Its unstructured shape is what makes it so great—you can just stuff everything in and go.
Sewing a duffel is a fantastic project for stretching your skills. It’s a great way to learn how to handle bulky fabrics and install hardware that can take a real beating. The payoff? A custom bag that’s tougher and has more personality than anything you could find in a store.
Key Features and Materials for Duffels
A duffel's main job is to be tough as nails. The materials you pick and how you put it together are all about creating a bag that will survive years of use and abuse.
- Common Dimensions: A classic weekender duffel is usually around 55 cm long, 25 cm wide, and 25 cm tall. This gives you plenty of room without it being a beast to carry.
- Heavy-Duty Fabrics: This is where you break out the serious stuff. Fabrics like Cordura, ballistic nylon, and heavyweight canvas (18 oz or more) are perfect for the exterior because they stand up to scrapes and tears.
- Robust Zippers: Whatever you do, don't cheap out on the zipper. A weak zipper is the first thing to break on a duffel. Go for a #8 or #10 chunky zipper—the big teeth can handle being yanked and overstuffed.
Sewing Tips for a Tough Duffel
Pushing thick layers of fabric through a domestic sewing machine can feel like a workout, but it's totally doable with the right tricks. A walking foot will be your best friend. It grips and feeds the top and bottom layers of fabric evenly, so you won't get that annoying shifting and puckering.
When it comes to the handles, reinforcement is everything. They have to support the entire weight of the bag, so they need to be anchored like they're never coming off. A brilliant technique is to use one continuous piece of webbing for the handles that runs all the way down the sides and underneath the bag. This spreads the load across the whole bag, not just two little stitch points.
A well-constructed duffel bag is built like a suspension bridge. The strength comes not just from the individual components, but from how they work together to distribute the load across the entire structure.
The Elegant and Compact Clutch
Okay, time for a complete change of pace. Let's talk about the clutch. A clutch is a small, strapless handbag you literally "clutch" in your hand. It's the go-to accessory for formal events like weddings, galas, or a fancy dinner out, holding just the essentials: phone, keys, lipstick, and a cardholder.
It might be small, but making a clutch is a wonderful chance to play with luxurious fabrics and unique hardware you wouldn't normally use on an everyday bag. This makes it a surprisingly fun and satisfying project.
Key Features and Materials for Clutches
The charm of a clutch is all in its delicate, polished details. The fabrics are all about look and feel, and the hardware often becomes the star of the show.
- Typical Dimensions: Clutches are petite, usually about 25 cm wide by 15 cm tall. They’re slim by nature, designed to hold just a few things without looking bulky.
- Sophisticated Fabrics: Here’s your chance to have fun with beautiful materials! Satin, velvet, faux leather, and cork fabric are all amazing choices. You can even use quilting cotton if you back it with a firm foam interfacing to give it that structured, high-end feel.
- Stylish Hardware: Clutches are known for their cool closures. Metal purse frames give a classic, polished look. Magnetic snaps are great for a clean, minimalist vibe, while turn locks can add a bit of vintage flair. Many patterns also include a D-ring tucked into a side seam for an optional wristlet strap—a smart touch for a little extra security.
Sewing Techniques for a Flawless Clutch
The real challenge with a clutch is precision. Because it's so small, every stitch and seam is on display. One of the best tricks is getting the lining to sit perfectly smooth inside. To do this, trim the lining’s seam allowance just a tiny bit more than the exterior’s. This helps it fit snugly inside without any bunching up.
When working with slippery fabrics like satin, use a sharp, fine needle (like a Microtex 70/10) to avoid snags. And for stiff materials like faux leather or cork, ditch the pins and use clips to hold your pieces together—pins will leave permanent holes. These little tweaks to your process make a huge difference, resulting in a chic, professional-looking accessory you'll be excited to show off.
Creating Functional Laptop Bags and Cosmetic Pouches
Moving on from general-purpose bags, let's get into some really specialized projects. Sewing a protective laptop bag or a handy cosmetic pouch solves very specific, real-world problems. These bags aren’t just for carrying things around; they have a focused job to do, which makes them incredibly satisfying to create.
Even though they serve completely different needs, both projects hinge on smart fabric choices and careful construction. One is all about protecting your expensive tech, while the other is about organizing the everyday essentials. Both are a fantastic way to sew something genuinely useful.
Designing a Protective Laptop Bag
When you decide to sew a laptop bag, your number one goal is protection. This isn't just another tote bag; it needs real structure and padding to keep a device safe from the bumps and scrapes of daily life. It’s a great exercise in building something functional and durable that’s also perfectly customized.
The secret weapon for a great laptop bag is foam interfacing. This thick, spongy material is the cushion that absorbs shock and gives the bag a sturdy, protective shape. A ¼-inch foam is usually a great place to start—it offers solid protection but isn’t a nightmare to sew through.
Think of foam interfacing as the airbag for your electronics. It’s the hidden component that provides critical cushioning and turns a simple fabric sleeve into a genuinely protective piece of gear.
For a perfect fit, you have to measure your device carefully. Get the exact length, width, and depth of your laptop. Then, remember to add your seam allowance plus a little bit of wiggle room—about 1-2 cm is perfect—so the laptop can slide in and out without a struggle.
Key Materials and Construction Tips
A truly durable laptop bag needs materials that can handle the daily commute and maybe even a coffee spill. Choosing a water-resistant outer fabric is a brilliant move for extra peace of mind.
- Durable Fabrics: Think tough stuff like waxed canvas, nylon, or even a high-quality vegan leather for the outside. These fabrics can take a beating and offer some much-needed moisture resistance.
- Secure Closures: A sturdy zipper is the most popular and secure choice. You could also design a large flap with buckles or heavy-duty magnetic snaps to keep everything safely inside.
- Project Ideas: If you're new to this, start with a basic zippered laptop sleeve. It's the best way to get comfortable sewing with foam. Once you’ve got that down, you can tackle a full-on briefcase with extra pockets for chargers and a strong handle.
Crafting the Perfect Cosmetic Pouch
Cosmetic pouches are brilliant little projects for honing your skills, especially when it comes to installing a zipper cleanly. Here, practicality is king. The pouch needs to be a breeze to clean and capable of containing any spills from makeup or toiletries.
Because of this, a waterproof or water-resistant lining isn't just a nice-to-have; it's essential. Laminated cotton or PUL (polyurethane laminate) are fantastic options because you can simply wipe them clean. They stop messes from leaking through to the outer fabric, making your pouch way more functional.
Getting a zipper installation right is a core skill for so many bag-making projects, and a small pouch is the perfect place to practice. If you want to dive deeper into techniques for a truly professional finish, a resource like The Zipper Pouch Book can be a huge help.
Answering Your Top Bag-Making Questions
Even the most seasoned bag maker runs into a snag now and then. When you're in the middle of a project and something isn't quite right, a quick tip can be a lifesaver. Here are some answers to the questions we hear most often from fellow sewers.
What's the Best Sewing Machine Needle for Making Bags?
Picking the right needle is a game-changer. For those tough, heavy-duty fabrics like canvas, denim, or Cordura, you’ll want a Denim needle in a 90/14 or even 100/16 size. They have a super sharp, strong point designed to punch through dense weaves without skipping a beat.
Working with vinyl, cork, or faux leather? Switch over to a Leather needle. Its unique chisel-like tip is designed to slice through the material, creating a clean hole rather than piercing it, which prevents tearing.
How Can I Stop My Zippers from Puckering?
Ah, the dreaded wavy zipper. This usually happens when the fabric stretches during sewing. The easiest fix is to apply a thin strip of lightweight fusible interfacing along the fabric's edge, right where you'll be installing the zipper. This stabilizes the fabric beautifully.
Another fantastic trick is to use double-sided basting tape (like Wonder Tape) to hold the zipper perfectly flat and in place before you even get to your machine. And of course, always, always use a zipper foot—it lets you stitch right alongside the teeth for a crisp, professional finish.
Think of interfacing as the secret ingredient for a professional-looking bag. It’s like the skeleton for your fabric; it provides the structure and stability needed to prevent that tell-tale slouchy, homemade look. Your bag will hold its shape perfectly.
How Do I Make Sure My Straps Are Strong Enough?
Straps take all the strain, so they need to be rock-solid. The best way to guarantee they won't fail is to reinforce where they attach to the bag. Simply sew a small box with an 'X' through the middle where the strap end meets the bag body.
For added strength, use a heavier-weight thread for this part. It also helps to add a layer of interfacing inside the strap itself—this simple step prevents stretching over time and makes it feel much more durable.
Here at All About Sewing, we’ve got all the hardware, durable fabrics, and expert advice you need to bring any bag idea to life. Come explore our wide selection of supplies and get started on your next project today at https://all-about-sewing-canada.myshopify.com.


