

Mastering Applique Techniques for Quilting A Hands-On Guide
Appliqué is all about stitching smaller pieces of fabric onto a larger background to create a design. Think of it as painting with fabric. The two most popular ways to do this are with fusible machine appliqué, which gives you really sharp, clean edges, and the more traditional needle-turn hand appliqué, which results in a beautiful, seamless finish. It’s a wonderful way to add intricate details, fun characters, and a bit of your own story to your quilts.
Bringing Your Quilt Designs to Life with Applique

This is where the real artistry in quilting can shine. Appliqué is simply the process of layering fabric shapes onto a background to build up a picture or a pattern. It adds incredible dimension, colour, and personality, turning a simple quilt top into a detailed story or a stunning piece of art.
Whether you're adding delicate flowers to a baby quilt or creating a complex scene from a memory, appliqué is your tool for storytelling in stitches.
Why Quilters Love Applique
What I love most about appliqué is the creative freedom it offers. Unlike traditional piecing, which often leans on straight lines and geometry, appliqué lets you work with flowing curves and all sorts of intricate shapes. The design possibilities are practically endless.
It’s an incredibly versatile skill that works for any style, from modern and minimalist to traditional and ornate.
This craft has a rich history, too. In the Canadian quilting world, appliqué techniques have been a staple since the early 19th century, brought over by immigrant settlers in Ontario. It's not just a historical craft, either. A recent survey showed that 42% of Canadian quilters used appliqué in their latest projects. If you're curious, you can explore more about quilting market trends and see how popular different styles are across the country.
Appliqué is more than just a technique; it’s an invitation to draw with fabric. It gives you the power to add any shape, character, or motif imaginable to your quilts, making each project uniquely yours.
A Quick Look at Common Applique Techniques
There are quite a few ways to approach appliqué, but they generally fall into a handful of main categories. Each one gives a different look and feel, so you can pick the perfect method for your project.
This little table breaks down the most common ones you'll see.
| Technique | Best For | Final Look |
|---|---|---|
| Fusible Machine Appliqué | Beginners, intricate shapes, and speed | Crisp, defined edges with a modern finish |
| Needle-Turn Hand Appliqué | Traditional quilts, heirloom projects, and curves | Soft, rounded edges with invisible stitches |
| Raw-Edge Machine Appliqué | Modern quilts, folk-art style, and quick projects | Casual and textured, with edges that fray |
| Reverse Appliqué | Creating "window" effects, like in Mola quilting | A layered, dimensional look |
| Freezer-Paper Appliqué | Achieving precise shapes and sharp points by hand | A clean, turned-edge finish similar to needle-turn |
Getting familiar with these will help you decide which path to take as you get started on your own appliqué adventure. We'll dive into the specifics of each one a little later in the guide.
Setting Up Your Appliqué Toolkit for Success
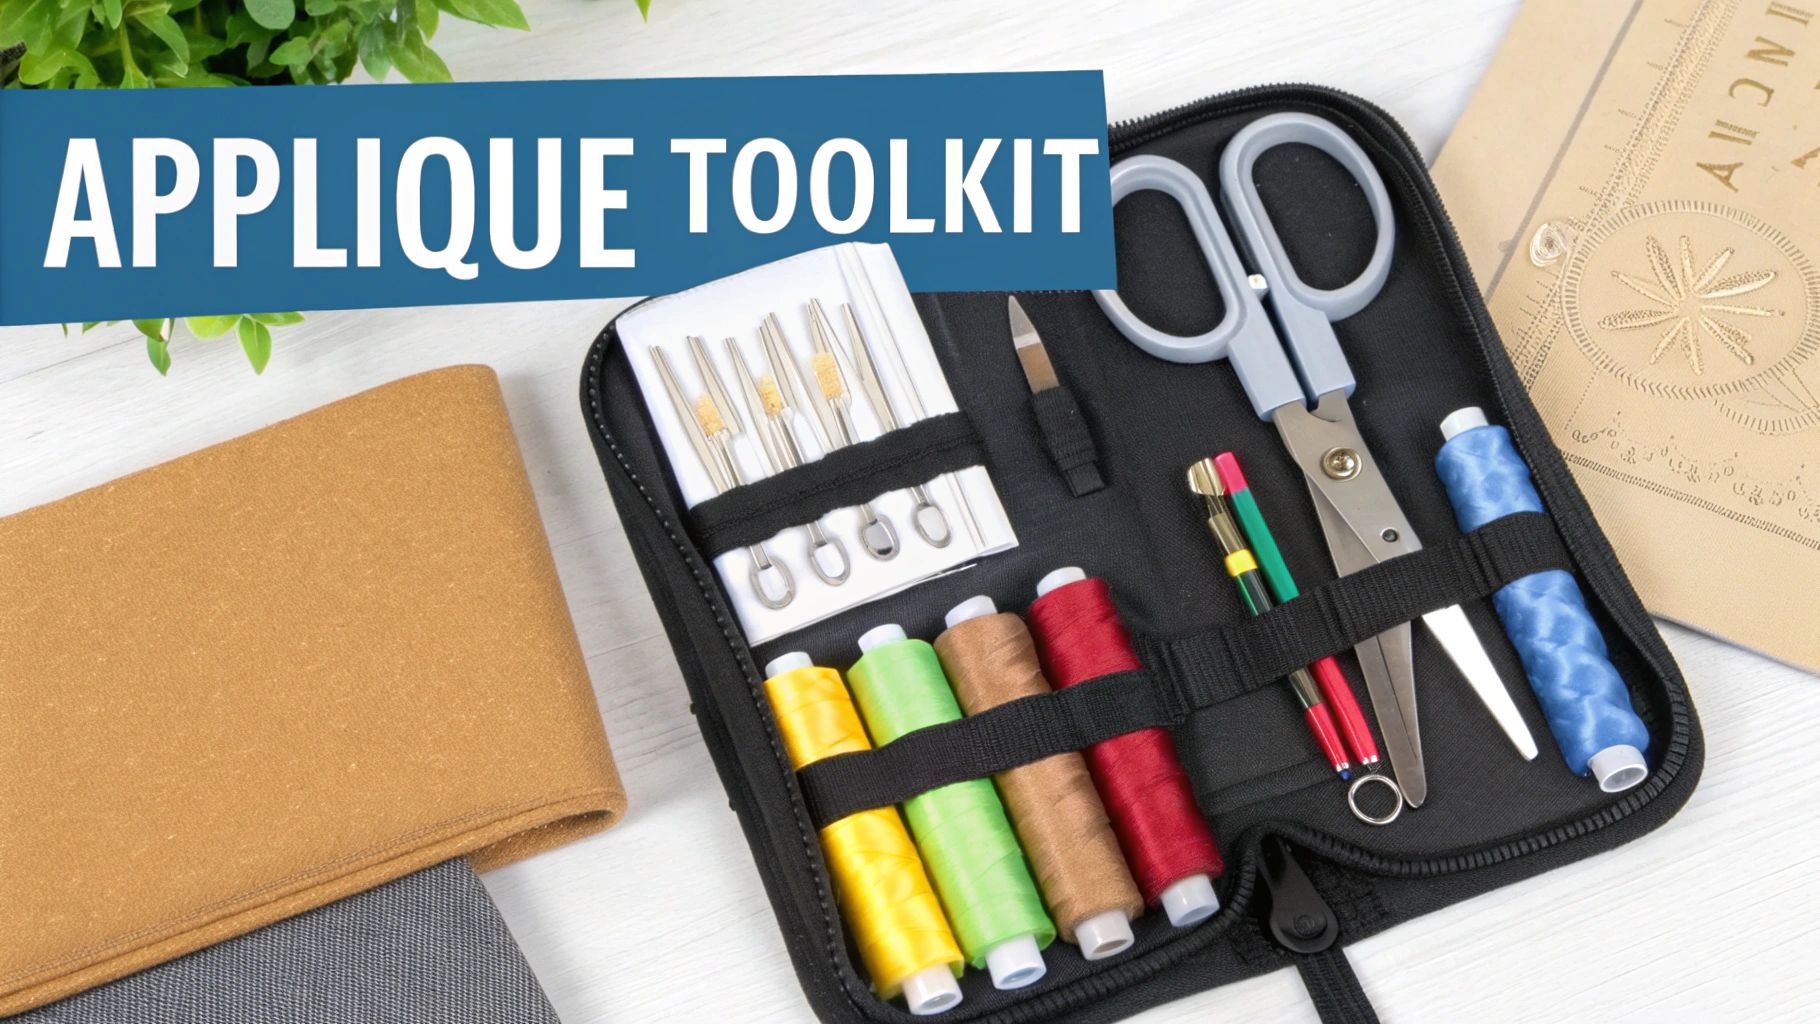
Before you can even think about stitching, getting your tools in order is the first real step in any appliqué project. It's the difference between a joyful, creative flow and a day of pure frustration.
Think of it this way: you wouldn't try to bake a cake without measuring cups and a good mixing bowl. The same principle applies here. Having a well-stocked kit means you can focus on the fun part—bringing your beautiful designs to life. Let's walk through what you'll want to have on hand.
The Non-Negotiables for Any Appliqué Project
No matter which appliqué technique you fall in love with, some tools are simply essential. These are the workhorses of your sewing box, the items you'll reach for again and again.
- Sharp, Precise Scissors: You'll want at least two pairs. First, a small, pointy pair (like embroidery scissors) is crucial for getting into tight corners and cleanly snipping curves. Second, a good pair of dedicated fabric shears for cutting your background fabric and larger appliqué pieces. Keep them sharp!
- Good-Quality Thread: For most machine work, you can't go wrong with a 100% cotton 50-weight thread. It’s strong but still fine enough to blend into your fabric nicely. If you're stitching by hand, you might want something even finer, like a 60 or 80-weight, to make those stitches practically invisible.
- Fabric Marking Tools: Even a simple mechanical pencil is great for tracing patterns onto freezer paper or the back of fusible web. When marking the front of your fabric, though, grab a water-soluble or air-erasable fabric pen. That way, you know your guidelines will disappear without a trace.
Invest in quality here. These core tools form the foundation of your kit and will serve you well across every single project.
Specialised Tools for Different Techniques
Once you've got the basics covered, you can start adding a few specialised items to your collection based on the methods you're most excited to try. This is where you can really tailor your toolkit to your personal style.
If you're jumping into fusible appliqué, your star player is the fusible web itself. Products like Heat'n Bond Lite or Wonder-Under are your best friends. These are essentially paper-backed sheets of adhesive you iron onto your fabric. I usually recommend a lighter-weight version for quilts to keep the final project from feeling stiff.
For those drawn to the classic look of needle-turn hand appliqué, the tool list is a bit more refined.
- Appliqué Needles: They’re much shorter and finer than your average sewing needle, which makes turning the fabric edge and taking tiny, discreet stitches so much easier.
- Appliqué Pins: These little guys are super fine and short. They're perfect for holding small, delicate pieces in place without distorting the fabric or leaving noticeable holes.
- A Good Thimble: Don't skip this! A comfortable thimble saves your fingers and helps you guide the needle through multiple layers with ease.
Here's a tip from experience: Using pins that are too big for appliqué is a common mistake. They can leave permanent holes or stretch the edge of your fabric shape. Switching to proper, fine appliqué pins makes a world of difference in getting a clean, professional finish.
Venturing into the world of freezer-paper appliqué? Your secret weapon is a simple roll of freezer paper from the grocery store. You iron the waxy side to your fabric, and it creates a perfect, crisp template for turning your edges. It’s a fantastic technique for getting super-accurate shapes.
And finally, for anyone doing machine appliqué, I can't recommend an open-toe presser foot enough. It completely opens up your view of the needle and the edge of your fabric, allowing you to stitch with incredible precision. It's a small, inexpensive accessory that truly is a game-changer.
Getting Crisp, Clean Edges with Fusible Machine Appliqué
For those of us who love sharp, precise shapes and a clean, modern finish on our quilts, fusible machine appliqué is a game-changer. It’s the perfect middle ground, blending traditional craft with a bit of modern magic. You can create some seriously complex designs without the intense hand-stitching that needle-turn requires. It's incredibly forgiving for beginners, yet the results are so professional that even seasoned quilters swear by it.
The secret ingredient here is fusible web—a sheet of heat-activated adhesive with a paper backing. Think of it as creating your own custom fabric "stickers." You can place them exactly where you want them on your background fabric before stitching them down for good. No more worrying about pieces shifting or stretching while you sew!
Picking Your Fusible Web
Walk into any fabric shop and the wall of fusible web products can feel a bit much. The two names you'll see over and over are Heat'n Bond and Wonder-Under. They do the same job, but the real difference comes down to their weight.
For quilting, you almost always want a "lite" or "sewable" version.
- Heat'n Bond Lite: This is my go-to for most projects. It gives a strong bond but stays flexible, and best of all, it won't gum up your sewing machine needle.
- Wonder-Under: Another fantastic choice. It creates a really soft bond, which is key to keeping your quilt from feeling stiff or plasticky where you've appliquéd.
Heavy-weight fusibles have their place—think no-sew projects like banners or kids' costumes—but they will make a quilt feel rigid and tough to quilt through. When in doubt, always go for the lightest weight fusible you can find.
Prepping Your Appliqué Shapes
This is where the magic really starts. Getting your tracing and cutting right at this stage is what sets you up for a flawless finish.
First things first, you’ll need your design. Here's the most important tip: remember to trace it in reverse onto the paper side of the fusible web. It's a tiny detail that's easy to forget, but absolutely critical if you're working with anything asymmetrical, like letters or a specific animal shape.
Once it's traced, just cut roughly around the shape, leaving a little border. Now, place the fusible web (adhesive side down) onto the wrong side of your appliqué fabric and give it a quick press with a hot, dry iron. The manufacturer's instructions are your best friend here, but it usually only takes a few seconds to get the adhesive to stick.
Let it cool completely before cutting your shape out precisely along the lines you traced. Peel off the paper backing, and you'll find a shiny, slightly tacky surface, ready to be placed on your quilt block.
A little trick for complex designs: Use an appliqué pressing sheet. It's a non-stick, see-through sheet you can lay right over your pattern. This allows you to build and fuse layered designs, like a flower with all its petals, into a single unit on the sheet. Then, you can just move the whole finished piece over to your background fabric in one go. Easy!
Fusing and Stitching It All Together
With your shapes all prepped, it's time for the fun part: arranging them on your background fabric. This is your chance to play with the layout until it feels just right. Since nothing is permanent yet, you can move things around as much as you like.
When you're happy with the placement, press the pieces firmly with your iron to lock them in. Again, check the product directions for the right temperature and how long to press. This creates a permanent bond that will hold everything securely while you stitch. Let the fabric cool down completely before taking it to your sewing machine.
The stitching is what really brings your fusible appliqué to life. You're essentially encasing the raw edges of your fabric, which stops them from fraying and adds a beautiful, decorative outline to your design. You've got a few different stitches to choose from, and each one gives a totally different vibe.
Choosing the Perfect Machine Stitch
The stitch you pick can completely change the look of your project. The main goal is always to cover the raw edge of the appliqué, creating a finish that's both neat and durable.
Here are the most popular choices I turn to:
-
Satin Stitch: This is just a very tight zigzag stitch that creates a smooth, solid border of thread. It looks so polished. To get this look, set your machine to a zigzag stitch with a width of 2.5-3.5 mm and a very short stitch length, somewhere around 0.3-0.5 mm. The stitches should be so close they touch, creating that classic "satin" finish.
-
Blanket Stitch: If you want a more charming, hand-stitched look, the blanket stitch is a wonderful option. Most modern sewing machines have this stitch built-in. It creates a clean line of straight stitches along the edge with a little perpendicular "bite" into the appliqué piece.
-
Straight Stitch: For a more minimalist or raw-edge fusible look, you can just use a simple straight stitch right inside the edge of your shape. This holds the piece down but lets the very edge fray a tiny bit over time, which can add a lovely, soft texture.
Navigating corners and curves is probably the trickiest part. When you get to an outer point, sew just past the edge, then stop with the needle down in the fabric. Lift the presser foot, pivot the fabric, and you're ready to go again. For inner corners, stop right before the corner, pivot, and continue. On curves, just slow down and gently guide the fabric, using small pivots with the needle down to keep the line smooth.
Finding Your Rhythm with Needle-Turn Hand Applique
For those of us who love the quiet, rhythmic process of stitching by hand, needle-turn applique is something special. It’s a slower, more meditative way to work, connecting you to generations of quilters who created heirlooms with just a needle and thread. This method is cherished for its soft, seamless finish—the stitches are so tiny they practically disappear.
Unlike the crisp, sharp edges you get with fusible applique, needle-turn creates a gentle, rounded look that feels wonderfully organic. The technique itself is simple in theory: you use the tip of your needle to turn the raw edge of your fabric under right before you take each stitch. It sounds a bit fiddly, I know, but once you find your groove, it becomes an incredibly satisfying and portable project. Let’s walk through how to master this classic skill.
Preparing Your Shapes for Hand Stitching
Good preparation is the secret to a happy needle-turn experience. Getting your fabric shapes ready before you settle in to sew makes the whole process smoother and far more enjoyable.
The most important thing to remember is to add a seam allowance when you cut your shapes. This is the extra fabric you’ll be turning under as you stitch. A scant ¼ inch (about 3-5mm) is just about perfect. If you go much wider, you’ll end up fighting with bulky fabric on curves. Too narrow, and you risk the edges fraying before you can stitch them down.
Here are a couple of my favourite ways to prep pieces:
- The Freezer Paper Method: Trace your shape onto the dull side of freezer paper and cut it out right on the line. Iron the waxy side to the wrong side of your fabric. Then, cut the fabric out, leaving that ¼ inch seam allowance all the way around. The paper acts as a perfect, crisp guide to fold your fabric against.
- Marking Directly: This is the more traditional route. Use a temporary marking tool to trace your shape directly onto the right side of the fabric. Cut the shape out, eyeballing your seam allowance as you go. It takes a little more practice to get consistent results, but it’s a great skill to have.
Once your shapes are cut, you just need to place them on your background fabric. A few dabs from a fabric glue stick or some fine appliqué pins will keep everything from shifting while you work.
The process is quite different from fusible appliqué, which is much faster and relies on heat and machine stitching.

As you can see, fusible appliqué is a more modern approach designed for speed and precision, offering a bold contrast to the gentle handwork of needle-turn.
Mastering the Invisible Applique Stitch
The stitch is the heart of this technique. Your goal is a tiny, nearly invisible stitch that catches just a few threads from both the applique shape and the background fabric. It’s a delicate dance between your needle, thread, and fabric.
Start by knotting your thread and bringing the needle up from the back of the quilt block, making sure it emerges right on the folded edge of your applique piece. This keeps the knot completely hidden.
Now for the rhythm: use the tip of your needle to sweep or "turn" a small bit of the seam allowance under, maybe an inch or so ahead of where you are. Hold that turned edge down firmly with your thumb.
I learned a great tip years ago: use a stiletto or even a wooden toothpick to help tuck the fabric. It gives you a lot more precision than just the needle tip and saves your fingers from getting sore, especially on a big project.
To make the stitch, bring your needle down into the background fabric right beside where the thread came up. Travel a tiny distance underneath (about ⅛ inch or 2-3mm) and bring the needle back up, catching the very edge of the applique's fold. Pull the stitch snug, but not tight enough to pucker the fabric.
You'll repeat this motion—turn, hold, stitch—all the way around. The key to making those stitches vanish is using a thread that perfectly matches your appliqué fabric and keeping your stitches small and even. A fine 60 or 80-weight cotton thread is your best friend here.
Handling Curves and Points with Grace
Curves and points are where needle-turn applique truly shines, but they can be a bit daunting when you're starting out. A few little tricks will have you stitching them like a pro.
Outer curves are surprisingly easy. As you turn the seam allowance, the fabric naturally wants to cooperate. The secret is to work in smaller increments. Instead of tucking an inch of fabric ahead, you might only tuck a centimetre at a time, using more frequent, smaller stitches to create a perfectly smooth line.
Inner curves need a bit more coaxing. Before you start stitching, you have to clip the seam allowance almost to your marked line. These tiny snips release the fabric's tension, letting you turn the edge under smoothly without any bunching.
Points require their own special technique to stay sharp.
- First, stitch all the way to the very tip of the point.
- Take one last, secure stitch right at the apex.
- Now, tuck the seam allowance under on the second side, carefully folding the little fabric "dog ear" at the tip neatly underneath.
- Take one more stitch at the very tip to lock it in place, then continue stitching down the other side.
Getting these little details right is what elevates your hand appliqué from simply homemade to true heirloom quality, giving your quilt that timeless, handcrafted look.
Getting Creative with More Advanced Appliqué
Once you've got a good feel for the basics, you can start playing with some truly creative appliqué techniques. These methods are where you can add incredible depth, texture, and a real professional polish to your quilting. You'll start thinking about fabric and layers in a whole new way, moving beyond just placing a shape on top of a background.
Let's dig into a couple of my favourites: reverse appliqué and the game-changing use of stabilizers. Getting these under your belt will give you the confidence to tackle some seriously cool and artistic quilt projects.
Creating Depth with Reverse Appliqué
Instead of sewing a shape onto a background, reverse appliqué is all about layering fabrics and then cutting the top layer away to show the colour underneath. It creates this amazing "window" effect, giving your quilt a sense of depth you just can't get with other methods.
This is a technique you’ll see in the stunning Mola art from the Guna people of Panama, and it's been beautifully adapted for modern quilting.
The process might sound tricky, but the idea is actually pretty simple. You start by layering at least two different fabrics. Then, you stitch your shape through all the layers before carefully snipping away the fabric inside the stitched lines on the top layer.
This method is brilliant for intricate lines and silhouettes. Think of a quilt with autumn leaves where the vibrant colours seem to peek through a solid background, or a geometric design with sharp, inset lines. The results are always striking and add a unique, artistic touch.
Reverse appliqué flips the whole process on its head. It’s less about adding and more about revealing, which can be a powerful storytelling tool in your quilt designs. You really start to think about both positive and negative space.
Why You Need to Be Using Stabilizers
As you get into more detailed machine appliqué, you’ll quickly run into a common frustration: puckering. It happens to everyone, especially when you're using dense stitches like a satin stitch or working with more delicate fabrics. The secret weapon here is a stabilizer.
A stabilizer is a special material, kind of like a type of paper or non-woven fabric, that you place behind your background fabric before you start sewing. It provides temporary support, stopping the fabric from stretching or distorting under the tension of the stitches. I like to think of it as a temporary scaffold that keeps everything perfectly flat and smooth while you work.
The key is picking the right one for the job, as they're all designed for different purposes and fabric weights.
Types of Stabilizers and When to Use Them
Not all stabilizers are created equal. Your choice really depends on your fabric, how dense your stitching is, and whether you want the stabilizer to stay in the finished quilt.
Here’s a quick rundown of the main types you'll find at a shop like All About Sewing:
- Tear-Away: This is the go-to choice for most medium-weight fabrics and moderately dense stitching. Just like the name says, you simply tear away the excess stabilizer from your stitches when you're done. It's perfect for most quilting cottons.
- Cut-Away: If you’re working with stretchy knits or very delicate materials, a cut-away stabilizer is your best friend. It offers more robust support and stays permanently on the back of your work, which is great for wearables or quilts that will be handled a lot. You just trim the excess close to your stitching.
- Wash-Away: This stuff is fantastic for projects where you don't want any trace of stabilizer left behind—think sheer fabrics or freestanding lace embroidery. It dissolves completely in water, leaving your stitches clean and your fabric nice and soft.
For a truly professional finish in machine appliqué, using a stabilizer is non-negotiable. It’s one of those simple additions that makes a huge difference in your final result, turning what could be a puckered mess into a perfectly flat, beautiful masterpiece.
Got Questions About Appliqué? We've Got Answers
Every quilter runs into a few head-scratchers when trying a new appliqué technique, whether you're a total beginner or have been at it for years. From pesky puckered fabric to wondering which stitch to choose, these little hiccups are just part of the creative journey.
Let's sit down and sort through some of the most common questions that pop up right in the middle of a project.
What's the Best Stitch for Machine Appliqué?
Honestly, the "best" stitch is the one that gives you the look you're going for. There’s no single right answer, but a few go-to stitches will give you different, beautiful results.
If you want a bold, clean edge that completely covers the raw fabric, the classic satin stitch is your friend. You can create this with a narrow zigzag stitch (I usually start around 2.0-3.5mm wide) and a really short stitch length (think 0.3-0.5mm). The idea is to pack those stitches tightly together so they form a smooth, solid border.
For a more traditional or decorative vibe, you can't go wrong with a blanket stitch. It has a charming, hand-stitched feel that adds a lovely touch. If you're doing raw-edge appliqué and want a more modern, minimalist finish, a simple straight stitch just inside the edge works beautifully. It tacks the piece down and allows for a bit of soft, textural fraying after washing.
My number one piece of advice? Always, always test your stitches on a scrap sandwich first. Use the exact same fabric, thread, and stabilizer you plan to use on your project. This little pre-flight check lets you nail the tension and settings before your needle ever touches your actual quilt block.
How Do I Stop My Fabric from Puckering?
Ah, puckering—the arch-nemesis of machine appliqué! The good news is, it's almost always preventable. The culprit is usually a lack of support for your background fabric while it’s being stitched.
The most reliable fix is to use a stabilizer. Placing a sheet of lightweight tear-away or leave-in stabilizer behind your background fabric gives it the backbone it needs to handle all that dense stitching without warping. For a perfect satin stitch, this step is non-negotiable.
Also, check your machine's thread tension. If it's cranked up too high, it will pull on the fabric and cause puckers. Try lowering the top thread tension just a touch and see if that eases things up. Finally, remember to let your machine do the work—guide the fabric gently without pushing or pulling it through.
Should I Pre-Wash My Fabrics Before I Appliqué?
Yes, absolutely! I know it feels like an extra chore when you're excited to start, but pre-washing your appliqué pieces and background fabric is a habit that pays off for a couple of critical reasons.
- It Stops Shrinkage Drama: Pre-washing shrinks your cottons before you sew. This prevents that dreaded differential shrinkage later on, where one fabric shrinks more than the other and causes your beautiful work to pucker and warp.
- It Gets Rid of Excess Dye: It also washes out any loose dyes that might otherwise bleed onto your lighter fabrics the first time you wash the finished quilt.
Making pre-washing a standard part of your process is one of those professional habits that leads to quilts that look great and last for years.
What's the Easiest Appliqué Technique for a Beginner?
If you're just dipping your toes into the world of appliqué, I'd steer you towards fusible appliqué. It's easily the most forgiving and is a fantastic confidence-builder.
The process is simple: you iron your fabric shapes onto the background using a fusible web. This "glues" everything down securely, so you don't have to worry about your pieces wiggling around while you sew. It lets you focus on just one thing—getting comfortable with your machine stitching—without having to juggle pins and shifty fabric.
Here at All About Sewing, we have all the essentials you'll need to get started on your next project, from the perfect fusible web to the right stabilizer. You can explore our collection and find the tools to bring your quilting ideas to life.


