Etsy Embroidery Designs: Quick Guide to etsy embroidery designs
So, you've decided to dive into the world of digital embroidery designs on Etsy. Fantastic! Think of these designs as digital recipes. You buy a file from a talented creator, load it onto your embroidery machine, and it tells the machine exactly how to stitch out a beautiful pattern. It's a brilliant way to create incredibly detailed, professional-looking embroidery on anything from jackets to tote bags, all without having to digitize the design yourself.
Your Guide to Getting Started with Digital Embroidery
Welcome! If you've ever marvelled at a crisp, perfectly embroidered logo or a stunning floral design on a pillow and wondered, "How did they do that?", you've come to the right place. This is where the magic of digital embroidery comes to life. Etsy has really become the go-to hub for these patterns, creating a huge community where designers and makers like you can connect. It's less like a store and more like a massive creative library, filled with blueprints for your next project.
Whether you're just unboxing your very first embroidery machine or you've been stitching for years and want to build your digital collection, this guide is for you. I'm going to walk you through everything you need to know, step-by-step, so you can confidently take a simple file from your computer and turn it into something real and beautiful.
What We’ll Cover in This Guide
Getting into a new creative hobby can sometimes feel a bit much, I know. That's why I've broken everything down into simple, practical chunks. My goal here is to give you the real-world knowledge you need to navigate the world of Etsy embroidery designs without any of the usual headaches. We'll start with the basics and build up from there.
Here’s a quick look at what we’ll be going over:
- Decoding File Formats: We’ll make sense of all those confusing file extensions (like PES, JEF, and DST) so you know exactly which one your machine needs.
- Buying and Downloading Safely: I'll show you how to find trustworthy sellers, what to look for in item descriptions, and how to manage your downloaded files—including how to tackle those zipped folders.
- Understanding Your Rights: We'll get clear on the difference between personal and commercial use licences. This is super important so you know what you're allowed to do with the designs you purchase.
- Pre-Stitch Quality Checks: Learn my go-to tricks for checking a design before you even thread your machine. This one habit will save you from so much frustration with tangled threads and puckered fabric.
- Troubleshooting Common Hiccups: We’ll cover quick fixes for common issues like colours stitching out wrong or designs getting distorted when you try to resize them.
By the time you're done with this guide, you won't just know how to buy a file. You'll have the confidence to choose the right one, prepare it properly, and use it to create something you're proud of. Think of this as your roadmap to mastering digital embroidery. Let's get stitching
2. Decoding File Formats and Machine Compatibility
Diving into Etsy embroidery designs can feel a bit like learning a new language, especially with all those different file acronyms floating around. But it's simpler than it looks.
Think of a file format as a specific key made for a particular lock. Your embroidery machine is the lock, and it will only open with the right key—the file format it was designed to read.
Each major machine brand has its own "native" file type, which holds the precise stitch-by-stitch instructions it needs to bring a design to life. Get this right from the very beginning, and you’re setting yourself up for a flawless stitch-out every time.
The diagram below shows the simple journey an embroidery design takes, from a digital file on a marketplace like Etsy to the finished piece on your fabric.
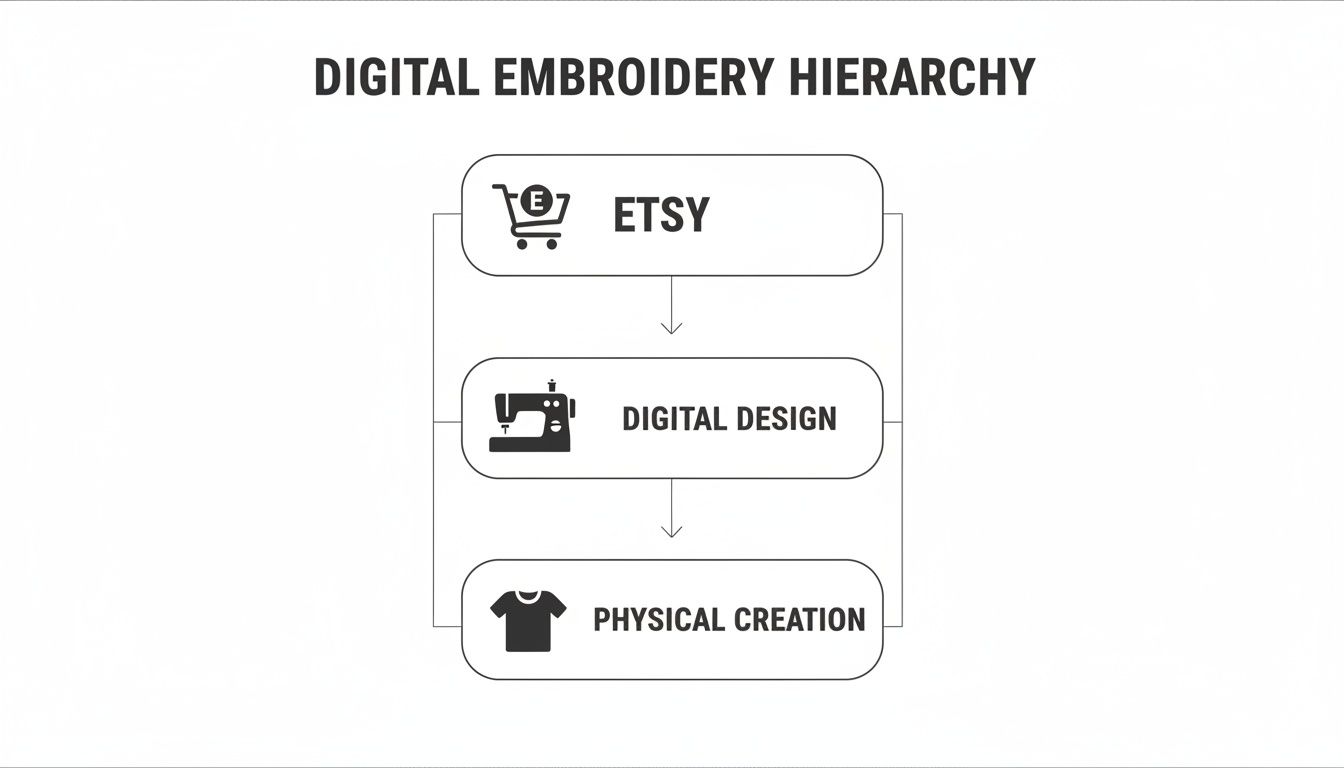
As you can see, that digital file is the critical link between the creator's idea and your finished project. This is why getting the file compatibility right is so important.
The Most Common Embroidery File Types
When you’re browsing designs on Etsy, you'll notice most sellers offer a whole bundle of file types in a single download. They do this to make their designs accessible to as many people as possible, regardless of the machine they own.
While there are dozens of formats out there, you really only need to worry about one: the one that works with your machine.
Here are some of the most common ones you'll see:
- .PES: This is a big one. It's the native format for Brother and Baby Lock machines.
- .JEF: If you're working with a Janome or an Elna, this is your go-to format.
- .DST: This is a universal commercial format originally from Tajima. It's a workhorse and is compatible with most industrial machines and many home models, too.
- .EXP: This is the format used by BERNINA and Melco machines.
Knowing your machine's language is the key to a successful purchase. Always take a second to check the Etsy listing to make sure the seller includes the file type you need before you click that "buy" button.
Stitch Files vs. Object Files: What’s the Difference?
Beyond brand-specific formats, it’s also really helpful to know the difference between stitch files and object files. This becomes especially important if you ever think about tweaking a design you've bought.
A stitch file (like .PES, .DST, or .JEF) is basically a finished set of instructions. It tells the machine, "Put a stitch here, then here, then here..." It's like a printed recipe—you can follow it, but you can't easily change the ingredients. Trying to resize a stitch file by more than 10-20% is a recipe for disaster. You're just stretching the existing stitches, which leads to ugly gaps or dense, thread-chewing clumps.
An object file, on the other hand, is the original source file from the digitizing software. Think of this as the master recipe document in a Word file. It contains all the info about shapes, colours, and stitch types as editable "objects." This is what allows a designer to easily resize a pattern or change stitch densities without wrecking the quality. Most Etsy sellers will only provide you with the stitch files, not their original object files.
To help you out, here’s a quick reference table matching popular machine brands to their file formats.
Embroidery Machine Brands and Their Native File Formats
This handy guide matches popular embroidery machine brands with their primary file format, so you always know you're downloading the right type of design.
| Machine Brand | Common File Format(s) | Notes |
|---|---|---|
| Brother | .PES, .PEC | .PES is the most common format for newer Brother models. |
| Janome | .JEF, .SEW | Newer machines primarily use .JEF. |
| Singer | .XXX, .CSD | The format can vary a lot depending on the machine's age. |
| Husqvarna Viking | .HUS, .VP3, .VIP | .VP3 is the standard for most modern Viking machines. |
| BERNINA | .EXP, .ART | .EXP is more universal, while .ART is specific to BERNINA software. |
| PFAFF | .PCS, .VP3 | Like Viking, newer PFAFF machines often use the .VP3 format. |
Bookmark this or keep it handy. Knowing your machine's preferred format empowers you to shop for Etsy embroidery designs with total confidence, ensuring every file you buy is one your machine can actually use.
How to Safely Buy and Download Your Designs
Buying your first Etsy embroidery design is exciting! But to make sure that beautiful design on your screen actually stitches out well, you need to be a little bit savvy. The whole process is pretty simple once you know what to look for and how to handle the download.
Let's walk through everything you need to know, step-by-step. We'll cover how to find a great seller, what details to check before you hit "buy," and exactly how to get those files from Etsy onto your computer and ready for your machine.
Vetting the Seller and the Design
With thousands of shops out there, your first job is to find a reputable one. A fantastic design from a poor digitizer can turn into a real headache with thread breaks and wonky stitches. A professional, on the other hand, makes the entire experience a breeze.
Before you add anything to your cart, run through this quick checklist.
- Check Shop Reviews and Sales: A shop with a high number of sales and glowing reviews is a great sign. It's solid proof that other stitchers have bought from them and were happy with the results.
- Read the Full Item Description: This is a big one. A good seller will tell you everything you need to know: the final design dimensions, the stitch count, and exactly which file formats (PES, JEF, DST, etc.) are included.
- Confirm Hoop Size Compatibility: The description should clearly state the hoop size required. Always double-check that your machine's hoop is big enough for the design you want.
Pro Tip: Pay attention to how sellers handle negative feedback. A shop owner who responds politely and helpfully to a customer's problem is often a better bet than a shop with a handful of perfect-but-limited reviews.
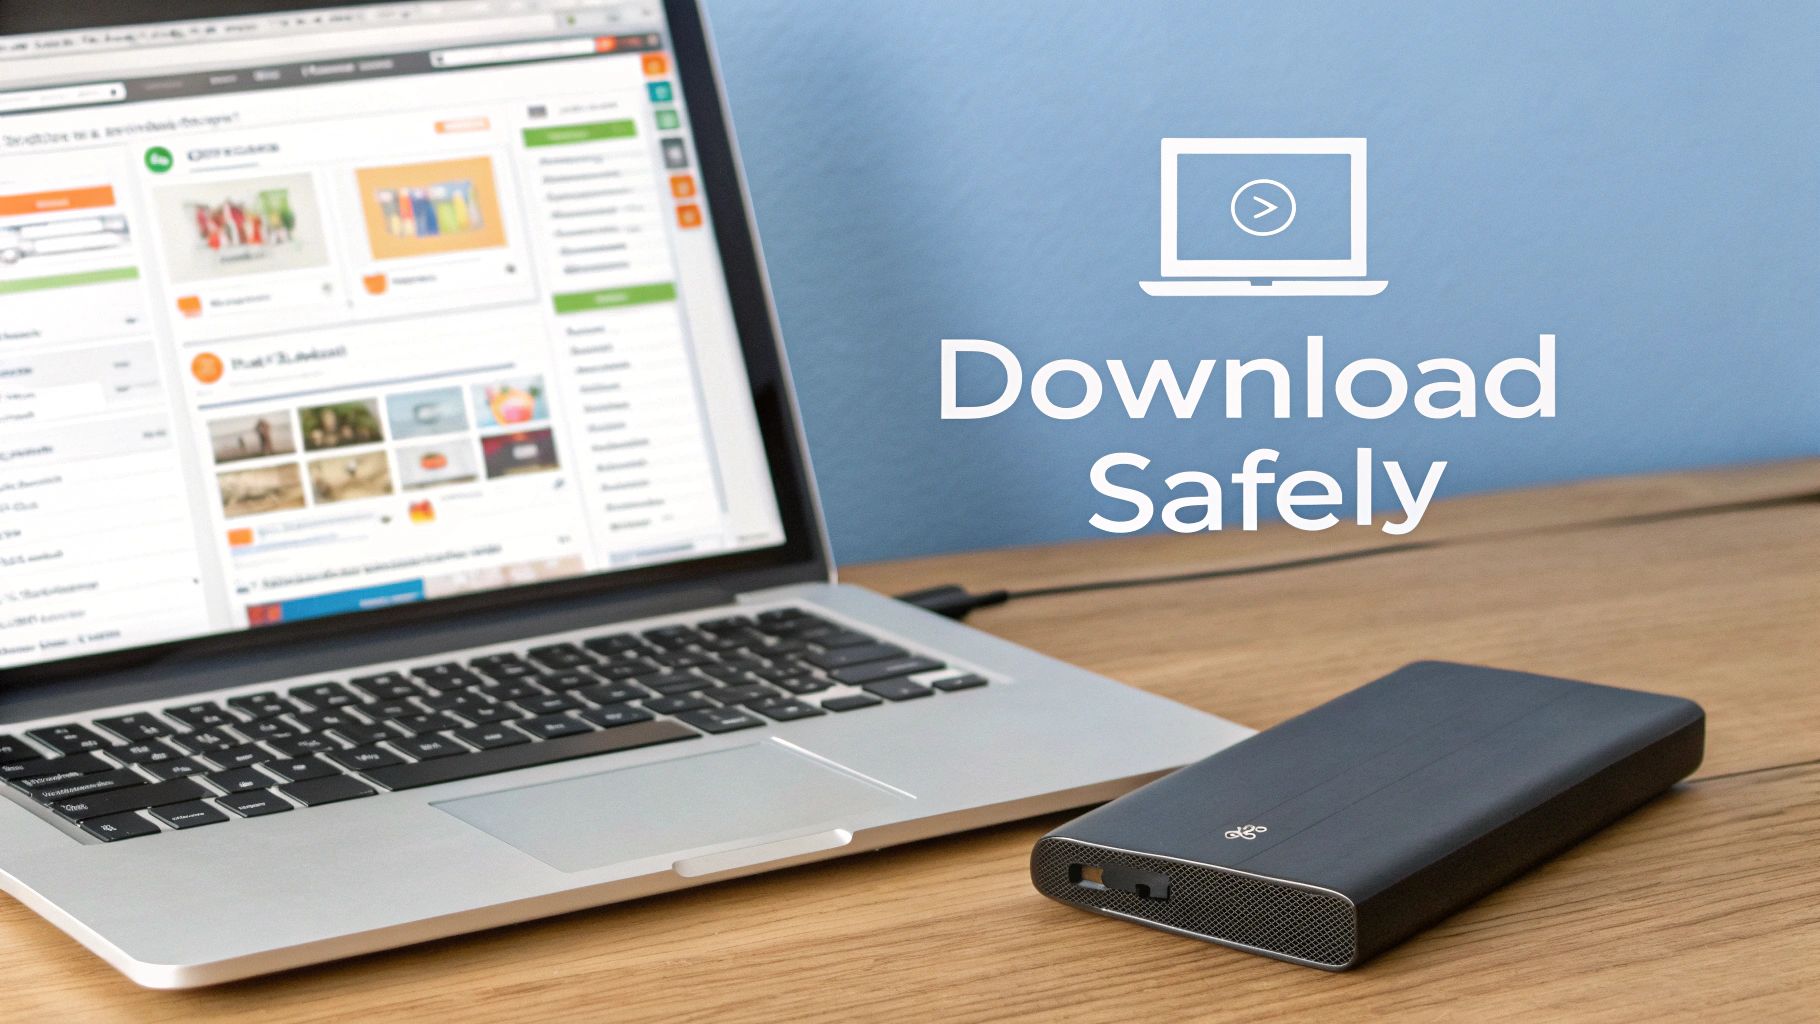
The Download Process Unzipped
Alright, you've made your purchase! Now it's time to get your files. This is where most people run into a common, but easily fixed, snag: actually accessing and opening the designs.
Here’s exactly how to get your files.
- Use a Web Browser, Not the App: This is the most important tip. You cannot download digital purchases through the Etsy mobile app. You need to log in to your Etsy account using a web browser on a computer or tablet.
- Navigate to Your Purchases: Once you're logged in, head to your profile icon and click on "Purchases and Reviews."
- Find Your Order: Locate the order with your embroidery design. You'll see a black button next to it that says "Download Files."
- Download and Organize: Click that button! The files will download to your computer, almost always as a .ZIP folder. This is just a compressed folder that holds all the different file formats neatly together.
Handling ZIP Folders
Think of a ZIP folder as a packed suitcase. You can't use the clothes inside until you unpack it. Your computer needs you to "unzip" or "extract" the embroidery files before it can read them.
It's super easy to do on any computer:
- On Windows: Right-click the ZIP folder and choose "Extract All..."
- On a Mac: Just double-click the ZIP folder.
A new, regular folder will appear, containing all the individual design files (like your .PES or .JEF file) and usually a handy PDF with a colour chart. From there, you can copy the correct file for your machine onto a USB stick and get stitching
Understanding Licensing and Design Copyright
So, you’ve found the perfect embroidery design on Etsy and bought it. It's easy to feel like that digital file is now completely yours, but it's a bit more like buying a song on iTunes or a Kindle e-book. What you've really purchased is a licence—a permission slip, if you will—to use that design according to the creator's rules.
Diving into copyright and usage rights can feel a little intimidating, but getting the basics down is so important. It keeps you out of legal hot water and, just as crucial, it honours the time, skill, and creativity of the independent designer who brought that file to life.
Personal Use vs Commercial Use Licences
Nearly every design you buy will come with a licence that fits into one of two buckets. It’s absolutely vital to know which one you have, because it determines what you're legally allowed to do with your finished, stitched-out creations.
-
Personal Use Licence: This is the go-to for most hobbyists. It means you're free to stitch the design for any project that isn't for sale. Think stitching a cute design on a tea towel for your mum, decorating a cushion for your own sofa, or making a custom t-shirt for your kid. The main rule here is that no money changes hands for the item you've made.
-
Commercial Use Licence: If you dream of selling your embroidered goods, this is the licence you need. It gives you the green light to sell physical items featuring the design. This covers everything from selling embroidered tote bags at a local market, listing custom hoodies in your own online shop, or taking on paid projects for clients.
Always, always read the seller’s terms before you buy. Many commercial licences have strings attached, like a limit on how many items you can sell (e.g., up to 100 physical products). If you're planning on a larger production run, you might need to buy an extended commercial licence to cover it.
Here's a simple way to think about it: a personal use licence is like buying a movie ticket just for you. A commercial licence is like getting the rights to show that movie in a theatre and sell tickets to an audience. Two very different things!
The Golden Rule: Never Share the Digital File
No matter which licence you have, one rule is universal: the digital design file itself is strictly off-limits for sharing. The copyright always stays with the person who created it. This means you can't resell, share, or give away the digital file. Ever.
This includes things like:
- Emailing the file to a friend so they can use it.
- Uploading it to a shared Google Drive or a Facebook group.
- Trying to sell the digital file itself on your own website.
- Tweaking the design a little and passing it off as your own work.
Bending these rules isn't just unfair to the artist; it can get your Etsy account shut down. This system is what protects the intellectual property of thousands of creators. When you see how successful some shops are—with top sellers hitting hundreds of thousands of sales in 2023—you realise there's a massive economy built on these digital goods. Respecting copyright is what keeps it all going. You can learn more about the scale of the top Etsy embroidery shops and their performance to see just how big this community is.
Following these licensing terms is a simple act of respect. It ensures the incredible community of designers on Etsy can keep making the unique, beautiful patterns that we all love to stitch. It keeps the whole creative world healthy for everyone.
Your Pre-Stitch Quality Checklist

There’s nothing more frustrating than spending hours on a project only to pull it out of the hoop and find puckered fabric, a bird’s nest of tangled thread, or a design that looks absolutely nothing like the picture online. Let’s be honest: not all Etsy embroidery designs are made with the same care and expertise. More often than not, a poorly digitized file is the real reason behind our biggest stitching headaches.
The good news? You can often spot these troublesome designs before you even touch your machine. A quick digital inspection can save you a world of grief. This checklist will walk you through exactly what to look for using your embroidery software—even a free viewer program will do the trick.
Think of it as your five-minute prep work. It’s a small step that can save you hours of unpicking stitches and feeling utterly disappointed.
Examine the Stitch Count
First up, take a look at the stitch count in relation to the design's physical size. While there’s no magic number, this can be a huge red flag. A crazy-high stitch count for a small design is a sign of excessive density, which can chew up your fabric and leave it stiff and puckered.
On the other hand, a really low stitch count for a large, filled area might mean the pattern is too sparse, allowing your fabric to peek through. A talented digitizer is all about finding that sweet spot—using just enough stitches for beautiful, solid coverage without completely perforating the material.
Hunt Down Excessive Jump Stitches
Jump stitches are those annoying threads that travel across open areas of your design, connecting one section to another. A few are perfectly normal and can't be avoided. But a design that’s covered in them is a classic sign of lazy digitizing.
You’re the one who has to trim all those little threads by hand, which is a real chore. Worse, too many jumps create a messy-looking back and can even get snagged, potentially pulling your beautiful stitches out of place. A high-quality design will have very few, logically placed jumps that are easy to snip.
When you're previewing the file in your software, zoom right in. Look for long threads crisscrossing the design. A pro digitizer plans the stitch path carefully to minimize these, often hiding the travel path under other layers of stitching.
Confirm Proper Underlay Stitching
Underlay is the unsung hero of great embroidery. It’s a light framework of stitches that goes down before the main, colourful top stitches. This foundation is absolutely crucial for stabilizing the fabric and stopping it from shifting around, which is what causes puckering and poor registration.
In your software viewer, you should see a sparse grid or a simple outline stitch pattern underneath the denser parts of the design. If a file, especially one with large filled areas, is missing this foundational layer, you’re probably in for a frustrating time at the machine.
A well-planned underlay is what makes the final design look crisp, clean, and perfectly aligned. It’s a clear sign that the digitizer knows exactly how thread and fabric work together.
Evaluate Stitch Density and Angles
Finally, get a good look at the stitch density—how tightly packed the stitches are. A design that's too dense will be tough on your fabric, causing needle holes, stiffness, and sometimes even breaking your needles.
Check for spots where multiple layers of thread are piled on top of each other. A skilled digitizer masterfully varies stitch angles to create texture and shading without building up unnecessary bulk. This not only produces a more professional result but is also much kinder to both your machine and your material.
Running through this quick checklist puts the power back in your hands. You’ll be able to spot high-quality Etsy embroidery designs every single time, making sure your projects are a joy to create from that first click to the final stitch.
Troubleshooting Common Embroidery Design Issues
So, you’ve found the perfect Etsy embroidery design, but something’s gone a bit sideways at the machine. Don’t worry, it happens to all of us! A little hiccup is a completely normal part of the embroidery journey. The real trick is knowing how to spot the issue and fix it quickly so you can get back to creating.
Let’s walk through some of the most common snags stitchers run into. We’ll figure out whether the problem is with the file itself, your machine’s setup, or something else entirely.
My Design Is Stitching in the Wrong Colours
This one is probably the most frequent concern I hear from beginners. You load up a beautiful design, but the gorgeous reds and blues you saw online show up on your machine's screen as, say, lime green and hot pink. Take a deep breath—your file isn't broken!
Most embroidery files, especially .DST files, don’t actually store specific thread colour information (like "Madeira Classic 1147"). Instead, they just have simple commands that tell the machine when to stop for a new thread. Your machine then assigns a random default colour from its built-in palette to each stop, which almost never matches what the designer intended.
The solution is simple: always refer to the colour chart that came with your download. It's usually a PDF or image file and it’s your true map for the project.
- Follow the Colour Chart: The designer's PDF is your guide. Use it to pull the right physical thread spools for each step.
- Ignore Your Machine's Screen: The colours on your machine's display are just placeholders. Trust the colour chart and the threads you’ve chosen, not what the little screen is showing you.
The Dangers of Resizing a Stitch File
You've found a design you love, but it’s just a tad too big for your hoop. It seems tempting to just shrink it on your machine or in your software, but this is a classic mistake. Resizing a stitch file (like a .PES or .JEF) by more than 10-20% is a recipe for disaster.
Think of an embroidery file as a finished connect-the-dots picture. When you resize it, you're just stretching or squishing the finished drawing. You aren't changing the number of dots or how they connect, which is what causes major problems.
This leads to issues like:
- Gaps in the Design: When you make a design bigger, the stitches get pulled apart, leaving ugly gaps where the fabric shows through.
- Dense, Puckered Fabric: When you shrink a design, all those stitches get crammed together. This creates a stiff, bulletproof patch of thread that can warp your fabric and even break needles.
The absolute best thing to do if you need a different size is to contact the Etsy seller. Many designers will happily provide a professionally resized version of their Etsy embroidery designs for a small fee. Sometimes, they even have other sizes available in separate listings.
What to Do When You Can’t Find Your File Format
You've downloaded your files, unzipped the folder, and... your machine's format isn't there. Before you panic, pop back to the original Etsy listing and double-check that the seller actually included your format in the description.
If it was supposed to be there, your first move should be to send a friendly message to the Etsy seller. Good designers are almost always quick to respond and will happily email you the correct file. It's easy to make a mistake when bundling files, and most sellers are eager to help.
If the seller doesn't get back to you or the format was never offered, you could use an embroidery file converter. However, I always recommend getting the native file directly from the creator if you can. It’s the only way to be certain you're getting the best possible quality for your stitch-out.
Frequently Asked Questions
Got a few questions before you start stitching? You're not alone. Here are some of the most common things we hear from crafters working with digital embroidery designs, along with our best advice.
Can I Resize an Etsy Embroidery Design Myself?
This is a big one. As a rule of thumb, you should avoid resizing a standard stitch file (like a PES or JEF) by more than 10-20%. Think of it like stretching a finished painting—you’re just pulling the existing stitches further apart, which can create ugly gaps or cause the fabric to pucker from stitches being too dense. It just doesn't work well.
If you need a different size, your best bet is always to get in touch with the original designer. They often have other sizes available or can properly resize the master file for you, which recalculates all the stitches and keeps everything looking crisp and professional.
Why Don't the Colours on My Machine Match the Etsy Picture?
Don't panic! This happens all the time and it’s not a problem with the file. Embroidery files don't usually contain specific thread brand info, just instructions for when to change colours. Your machine just guesses and assigns a random colour from its own internal palette to each step.
The real guide for your project is the colour chart PDF that should have come with your download. Always trust that document. It tells you exactly which thread colours the designer intended you to use and in what order.
What Is a Stabilizer and Why Do I Need One?
Think of a stabilizer as your fabric's best friend during embroidery. It’s a special backing material that gives your fabric the support it needs to handle thousands of fast-moving needle punches without stretching or distorting. Honestly, you can't get a good result without it.
Choosing the right one is key and depends on your fabric and the design itself. Here’s a quick breakdown of the main types:
- Cut-Away: This one sticks around. It provides permanent support and is perfect for stretchy fabrics like t-shirt knits or sweatshirts.
- Tear-Away: Just like it sounds, you can tear it off when you're done. It's the go-to for stable, woven fabrics like cotton or denim.
- Wash-Away: This type dissolves in water, making it ideal for delicate fabrics like organza or for projects like freestanding lace where you want every trace of the stabilizer to disappear.
Using the right stabilizer is just as important as the design file itself for getting that flawless, professional finish.
I Can't Find My Downloaded Files on Etsy! What Do I Do?
This is almost always because you're looking in the Etsy mobile app—which, frustratingly, doesn't handle digital downloads. Your files are safe, I promise!
You just need to log into your Etsy account using a web browser, whether it's on a computer, tablet, or even your phone's browser. From there, head to 'Purchases and Reviews,' find your order, and you’ll see a big 'Download Files' button right next to it. All your purchased Etsy embroidery designs will be waiting for you there.
Ready to bring those digital designs to life? At All About Sewing, we have everything you need, from the perfect stabilizer to high-quality threads and needles. Explore our collection and get expert advice for your next project.


