


How to Embroider Letters a Guide to Flawless Stitching
Embroidering letters is one of those timeless skills that can add a truly personal, handmade touch to just about anything. Think custom tea towels for a housewarming gift, a sharp monogram on a jacket, or a sweet message on a baby blanket. It all boils down to a few key steps: picking a font you love, prepping your fabric properly with the right stabilizer, and then using the best stitches to get crisp, beautiful text, whether you’re working by hand or with a machine.
Honestly, a little bit of prep work goes a long way toward getting a professional result.
Setting Up for Success with Embroidered Letters
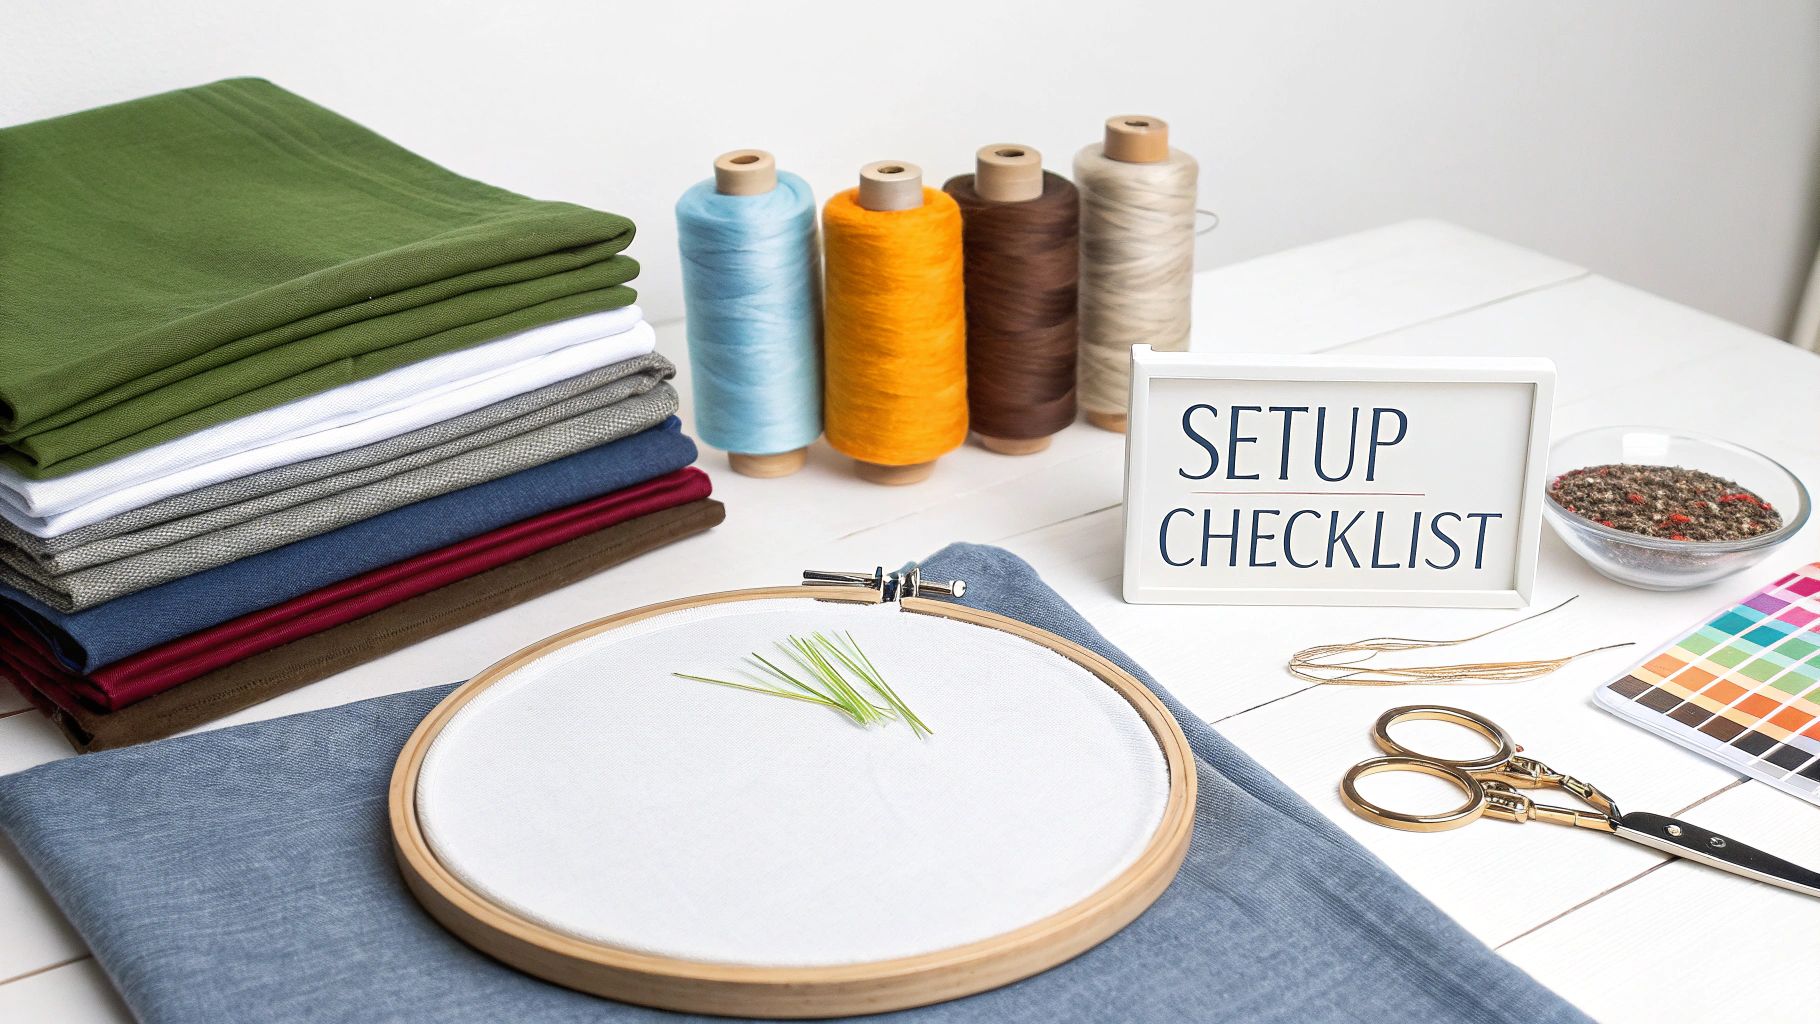
Before you even think about making your first stitch, let's talk setup. Getting this part right is like building a strong foundation for a house. If you skip it, you'll likely run into frustrating issues like puckered fabric, sunken stitches, or uneven letters. Nailing the basics from the get-go is the secret to a project that looks polished and clean.
This isn't just a modern craft, either. Stitching letters has deep roots right here in Canadian history. For over 200 years, girls would demonstrate their needlework skills by creating embroidered samplers, learning their letters in the process. Historical research shows girls as young as 10 were stitching alphabet bands between 1790 and 1845! Lettered embroidery was a fundamental part of their education. You can dive deeper into this fascinating history by checking out this in-depth look at historical samplers.
Choosing the Right Fabric and Stabilizer
Think of your fabric as the canvas for your lettering. If you're just starting out, a medium-weight, non-stretchy fabric like a good cotton or linen is your best friend—it provides a stable base that's super easy to work with. But what about trickier materials like t-shirt knits or delicate silks? That's where a stabilizer becomes absolutely non-negotiable.
A stabilizer is a special backing material you attach to your fabric to keep it from stretching, shifting, or distorting while you stitch. Without it, the needle's movement can push and pull the fabric, leaving you with puckered, wavy, and frankly, disappointing letters.
There are a few main types, and each has its purpose:
- Cut-Away: This one is my go-to for anything unstable or stretchy, like a sweatshirt or jersey knit. It provides permanent support, and you just trim the excess away when you're done.
- Tear-Away: Perfect for stable woven fabrics like denim, canvas, or quilting cotton. As the name suggests, it tears away cleanly once you’ve finished stitching.
- Wash-Away: This is a game-changer for delicate or sheer fabrics like organza or tulle, where you don’t want any backing to show. It completely dissolves in water, leaving nothing behind.
Pro Tip: I can't stress this enough—always do a quick test stitch! Grab a scrap piece of your project fabric, apply the stabilizer, and stitch out a letter or two. This little check will immediately show you if there are any tension or puckering issues before you start on the real thing.
If you’re not sure which stabilizer is right for your project, a great way to experiment without committing to a full roll is with an embroidery stabilizers sampler pack. It lets you try out different types to see what works best.
Selecting Your Needle and Thread
The last pieces of the puzzle are your needle and thread. The goal here is simple: match them to your fabric’s weight and the level of detail in your font.
For fine, delicate lettering, I'll typically reach for a smaller needle (like a 75/11) and a standard 40-weight embroidery thread. This combination works beautifully for most projects.
But if I'm working on something heavy-duty like denim and want some bold, thick letters, I'll switch to a larger 90/14 needle to prevent it from snapping. Using the wrong needle is a fast track to shredded thread and skipped stitches—two of the most common frustrations that are so easily avoided. Getting this simple pairing right ensures your thread glides smoothly through the fabric, creating the flawless letters you're picturing.
1. Choosing and Preparing Your Lettering Design
The final look of your embroidered letters is decided long before you even touch a needle. Think of this as the foundation of your entire project. The font you choose, how you size it, and the method you use to get it onto the fabric will make or break the final result.
We have a world of choices today, but it wasn't always so easy. Back in the early 20th century, printed pattern books started popping up in Canadian homes, finally giving embroiderers dozens of alphabet styles to work with. This shift meant people could create much more consistent and varied lettering without having to draw it all themselves.
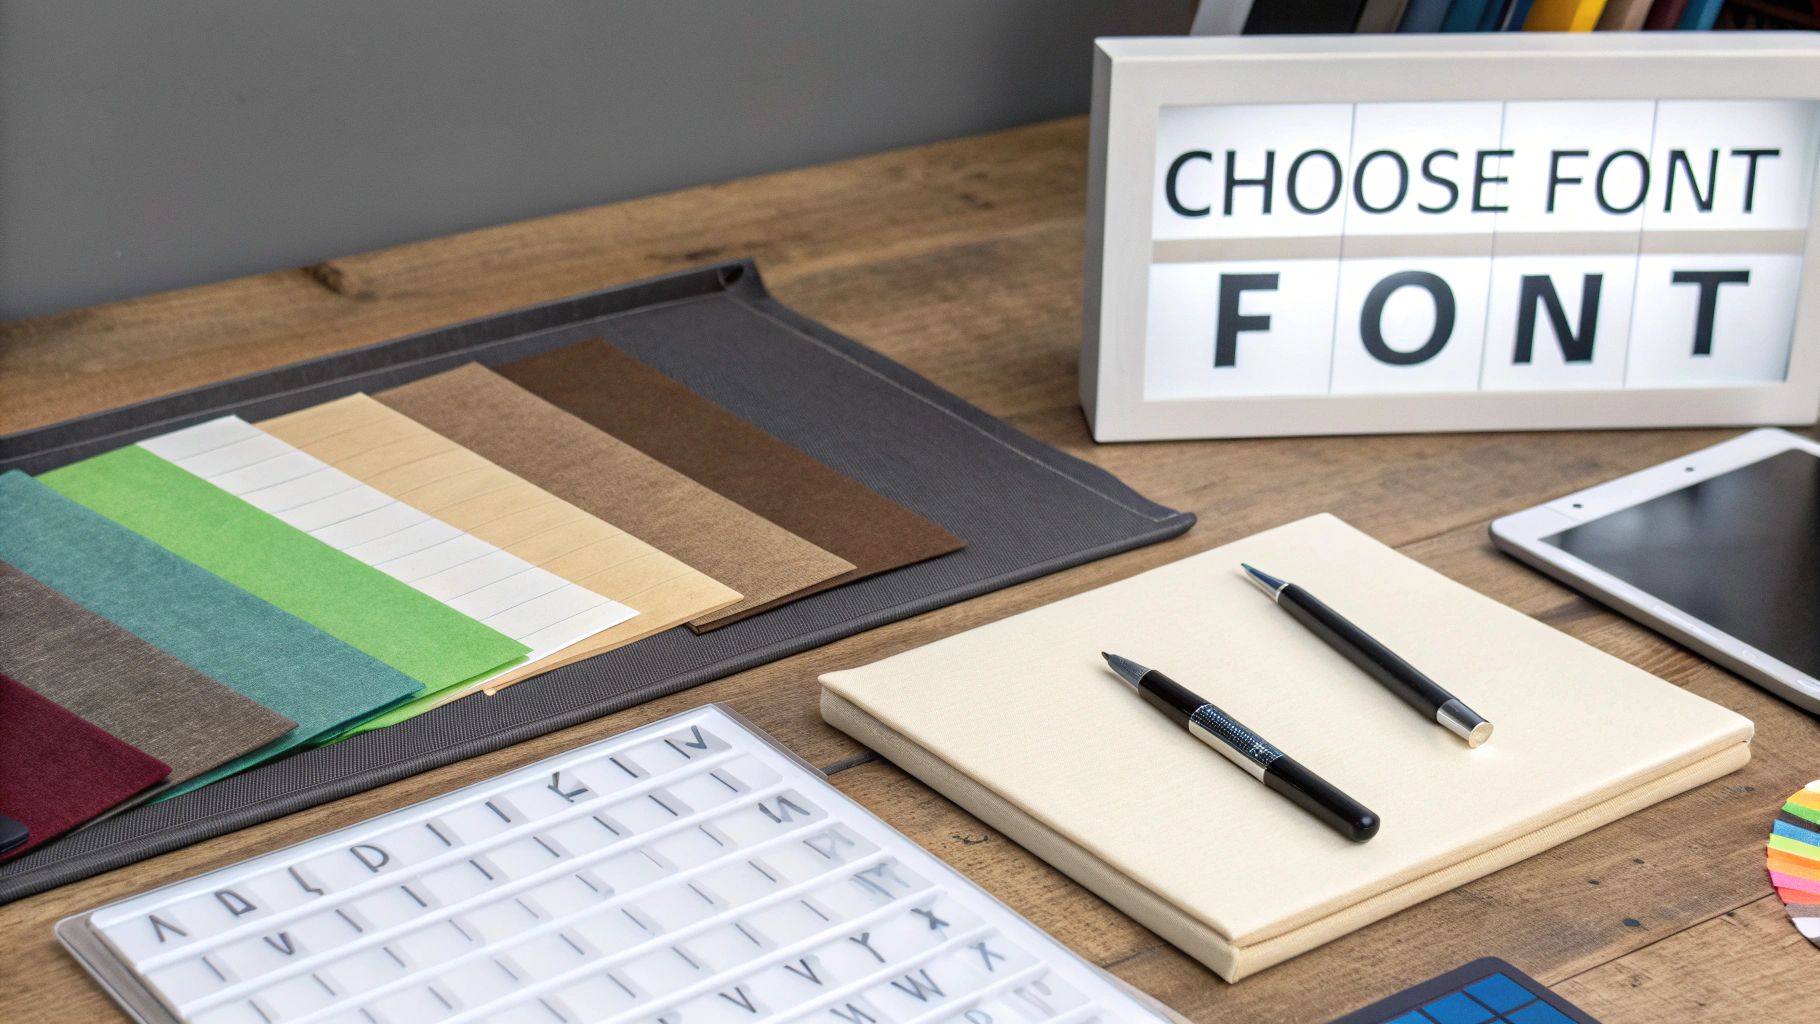
Selecting the Perfect Font
Let's get one thing straight: not all fonts are embroidery-friendly. A super-thin, delicate font might look beautiful on your computer screen but completely disappear once it's stitched. On the flip side, a chunky, bold font can turn into a stiff, dense block of thread if you're not careful.
Here’s what I always keep in mind when picking a font:
- Size Really Matters: Trying to stitch tiny text—anything under a quarter-inch high—is a recipe for frustration. Those tiny serifs and delicate details blur together, and you end up with something unreadable. For small lettering, stick with a clean, simple sans-serif font.
- Think in Stitches: Picture how the thread will actually fill the letter. A flowing script font needs a different approach than a sharp, blocky one. My best advice? Always, always do a test stitch-out on a scrap piece of the same fabric. It’s the only way to truly see how a font translates from pixels to thread.
- Match the Mood: The font needs to fit the project. You wouldn't use a playful bubble font on a formal wedding gift, right? A classic, elegant script would be a much better fit. Think about the item and its purpose, like the distinguished lettering on a Philippines Embroidered Graduation Stole.
To help you get started, here’s a quick-reference guide I've put together to match common font styles with the right kind of project and fabric.
Font Style and Project Suitability
| Font Style | Best For | Stitch Recommendation | Fabric Tip |
|---|---|---|---|
| Sans-serif (e.g., Arial, Helvetica) | Small text, monograms, modern designs, sportswear | Satin stitch for bold letters, backstitch for outlines | Excellent on stretchy fabrics like jersey or fleece |
| Serif (e.g., Times New Roman, Garamond) | Formal projects, towels, classic monograms, linens | Satin stitch works well, but serifs need careful digitizing | Best on stable, medium-weight wovens like linen or cotton |
| Script (e.g., Brush Script, Lucida Calligraphy) | Wedding gifts, personal apparel, decorative pieces | Satin stitch is a must. Avoid fill stitches to keep it delicate | Use a solid stabilizer; not ideal for very thick or textured fabrics |
| Block/Slab (e.g., Rockwell, Courier) | Varsity jackets, children's items, bold statements | Fill stitch or a wide satin stitch | Perfect for sturdy fabrics like denim, canvas, and felt |
Choosing the right combination from this table will save you a lot of headaches and give your project a much more polished, professional look from the get-go.
Transferring Your Design to Fabric
Once you've landed on the perfect font and size, you need a reliable way to get that design onto your fabric. For those of us who embroider by hand, this is a non-negotiable step. Your transferred lines are your roadmap.
Here are a few of my go-to methods:
- Water-Soluble Pens: These are a game-changer, especially for light-coloured fabrics. You just trace your lettering, stitch right over the lines, and then a little spritz of water makes the ink completely disappear. Magic.
- Heat Transfer Pencils: These create an iron-on transfer. You trace your design on paper, flip it onto your fabric, and press it with a hot iron. The big catch is that the lines are permanent, so you have to be confident your stitches will cover them completely.
- Light Box or a Sunny Window: The old-school method still works beautifully. Just tape your printed design to a light source, lay your fabric over top, and trace away. It's simple, cheap, and effective.
A Quick Note for Machine Embroiderers: Your journey involves digitizing—the process of turning your letters into a stitch file your machine can understand. While most machines come with some built-in fonts, they can be limiting. Investing in specialized https://all-about-sewing-canada.myshopify.com/products/premium-pack-ii-embroidery-lettering-software gives you incredible control over the spacing (kerning), stitch types, and sizing, which is the secret to getting that truly professional finish.
Essential Stitches for Hand Embroidering Letters
When you're embroidering letters by hand, the stitches you pick are a lot like choosing a font. Each one gives your text a completely different vibe, from crisp and modern to flowing and elegant. This is where you get to translate a design on paper into something with real texture and character.
Your main goal is to create lines that are smooth and even. Think of each letter as a little roadmap—you just want to follow the path once. Unlike writing with a pen, you don't need to trace back over your lines. A single, clean pass is all it takes to keep your work looking sharp.
The Best Outline Stitches for Crisp Lettering
For letters that need to be clear and well-defined, outline stitches are your go-to. They’re designed to create sharp lines, making them perfect for pretty much any text project you can dream up. There are tons of them, but a few really shine when it comes to lettering.
The backstitch is usually the first stitch anyone learns, and for a good reason. It’s straightforward, strong, and gives you an incredibly neat line that almost looks like it was drawn with a fine-tipped pen. I always suggest beginners start here because it’s so easy to manage, especially on the sharp corners you find in block letters.
My Personal Tip: The real secret to a perfect backstitch is keeping your stitch length consistent. When you hit a curve, make your stitches just a little bit shorter. This tiny change makes a huge difference—it prevents the curve from looking choppy and gives you a much smoother, more professional finish.
Another fantastic choice is the split stitch. This one creates a line that's a bit thicker and has a lovely, braided texture. It's ideal when you want your letters to have a bit more substance and dimension without looking bulky. I often reach for it when I want to add a rustic, handcrafted feel to a piece.
Creating Flow with the Stem Stitch
If you're working with cursive or a flowing script, the stem stitch is the absolute best. It was practically made for creating elegant, sweeping curves. The way the stitches overlap gives the line a beautiful, rope-like twist that naturally follows the graceful swoops of handwritten text.
It's a little trickier than a backstitch, but the stunning result is well worth the effort. The trick is to always keep your working thread on the same side of your needle as you stitch. If you switch from side to side, you'll break up that lovely twisted pattern.
Stitches for Filling in Bold Letters
So, what do you do when your design calls for thick, bold letters? That's when fill stitches come into the picture. Instead of just tracing the outline, you're essentially colouring in the letter with thread.
- Satin Stitch: This is the classic for a smooth, glossy fill. You create it by laying down a series of straight stitches right next to one another until the whole shape is covered. For the cleanest look, always work your satin stitches across the narrowest part of the letter. This helps keep your tension even and avoids long stitches that can sag or snag.
- Chain Stitch: If you want a more textured fill, try working rows of chain stitch side-by-side. It creates a cool, woven look that adds a ton of visual interest and really makes bold letters pop.
Learning to embroider letters is really just about getting comfortable with a few core techniques. Whether you’re using a simple backstitch for a clean monogram or a satin stitch for a bold statement piece, these foundational stitches give you everything you need to bring your words to life.
Getting Pin-Sharp Letters with Your Embroidery Machine
Switching from hand embroidery to a machine changes the game entirely. Where hand stitching is all about your personal technique, machine work is a science of precision. A good machine gives you incredible speed and consistency, but getting those crisp, perfect letters comes down to your setup. One small mistake can lead to puckered fabric, broken threads, or wonky text—all things we want to avoid.
The foundation for great machine embroidery is always a perfectly hooped project. You need to get your fabric taut like a drum skin, but without actually stretching it out of shape. Pairing this with the right stabilizer is just as crucial. For instance, a thin t-shirt will almost certainly pucker without a solid cut-away stabilizer behind it to handle the stitch density.
While this diagram shows the process for hand stitching, the core idea of outlining and then filling is exactly what your machine does, just much, much faster.
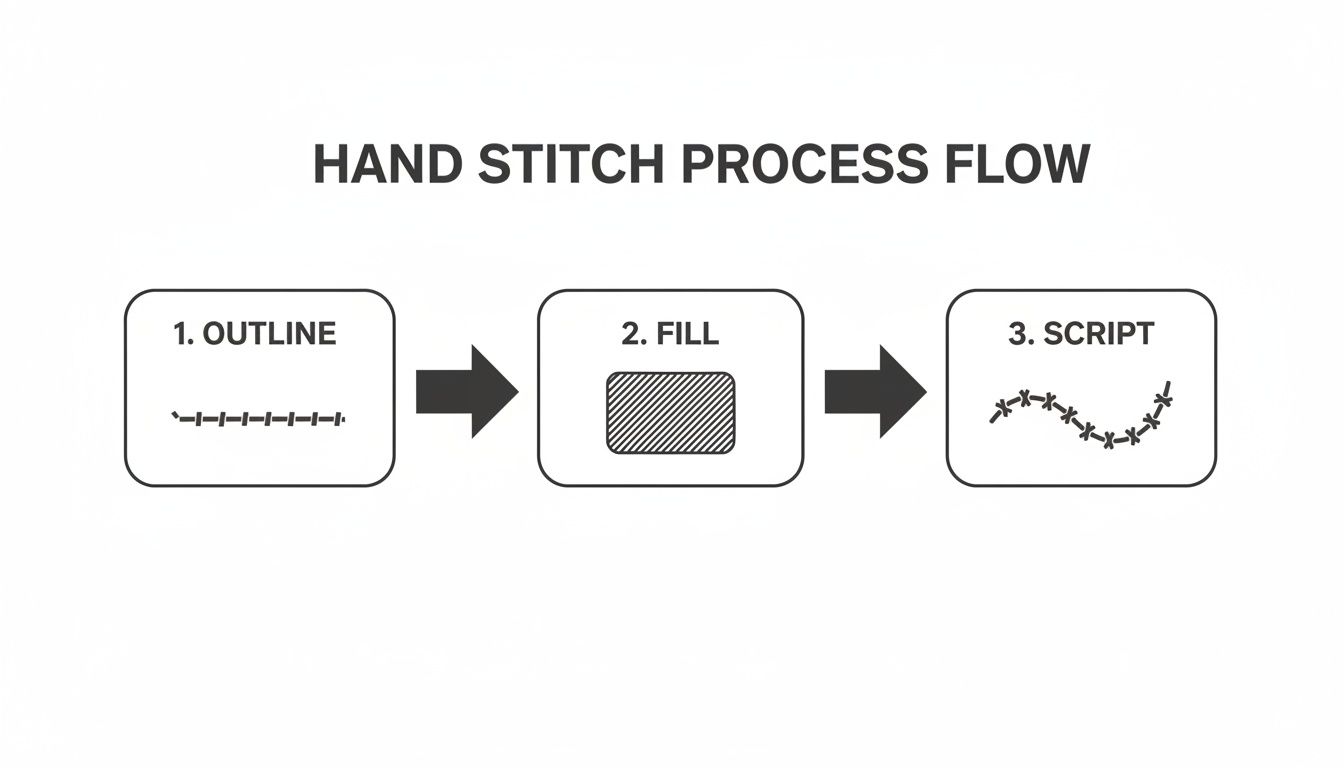
Your machine's settings are what control how well it executes that process, turning a digital design into a flawless finished product.
Dialing in Your Machine Settings
Once your fabric is hooped and ready, it's time to look at your machine's settings. I can't stress this enough: don't just hit 'go' on the default settings. The way tension, density, and speed work together will make or break your embroidered text.
- Tension: Getting your thread tension right is everything. Too tight, and you'll get puckering or thread snapping mid-project. Too loose, and you'll see ugly loops on the front of your work. The classic test is to look at the back of a test stitch-out. You’re aiming for a ratio of about one-third white bobbin thread showing in the centre of two-thirds top thread colour.
- Density: This setting determines how close your stitches are. For tiny, detailed letters, you might actually need to lower the density a bit. Otherwise, the stitches can pile up and turn your delicate text into a hard, unreadable lump. Standard density is usually fine for bigger, bolder fonts.
- Speed: I know it's tempting to run your machine at top speed, but for lettering, slow is smooth and smooth is fast. Slowing things down gives the machine the time it needs to place each stitch perfectly, which is especially important on tight curves and sharp corners.
If you're serious about embroidery, especially lettering, really getting to know your machine is time well spent. Digging into the features on different models, like the amazing options available on Pfaff embroidery machines, can truly elevate your work to a professional level.
Perfect Placement and Alignment
The final piece of the puzzle is getting your design exactly where you want it. Most modern embroidery machines have a grid function or come with placement stickers, and I highly recommend using them. These tools are your best friends for making sure your text is perfectly centred and straight on the final item.
When you're stitching out phrases or multiple lines of text, the spacing between both the letters and the words becomes incredibly important. This is where good digitizing software really proves its worth. It lets you fine-tune the kerning—the specific space between individual letters—to create text that looks polished and is easy to read.
Personalized items are always in demand across Canada, and embroidery is a fantastic way for hobbyists and small businesses to meet that need. Having access to retailers that support multiple brands and offer essential services is a huge help for crafters looking to create beautiful, high-quality work.
Finishing Touches and Troubleshooting Common Issues
Even with the most careful planning, sometimes a project just doesn't want to cooperate. Don't sweat it. Every single person who embroiders, from a total newbie to a seasoned pro, has faced down frustrating issues like puckered fabric or nests of loopy thread. Learning how to fix these hiccups and properly finish your work is what really takes a project from "good" to "great."
Honestly, think of troubleshooting as part of the creative journey. It’s how you really get to know your materials and understand the delicate dance between thread, fabric, and your machine (or your own two hands). These final steps are where you add that last bit of polish that makes your embroidered letters truly pop.
What to Do When Things Go Wrong
When your machine starts making a sound you've never heard before, or your hand-stitched letters just look… off, it's usually down to a few common culprits. Instead of feeling defeated, you can play detective and use a simple process of elimination to figure out what’s going on.
Let's walk through some of the most frequent frustrations and how you can get back on track.
It's a familiar feeling: you're in the zone, and suddenly you spot an issue that threatens to derail your beautiful lettering. Whether you're working by hand or with a machine, most problems can be traced back to a handful of common causes. This quick-glance table should help you diagnose the problem and find a solution fast.
Common Lettering Problems and Solutions
| Problem | Potential Cause | Hand Embroidery Solution | Machine Embroidery Solution |
|---|---|---|---|
| Puckered Fabric | The fabric is too loose in the hoop, or the stabilizer isn't up to the job. | Re-hoop your fabric, making sure it’s taut like a drum but not stretched out. You might need to switch to a more robust stabilizer. | Use a stronger stabilizer—a cut-away is a lifesaver for stretchy knits. Double-check that your fabric is hooped correctly: smooth and firm. |
| Looping Threads | Your thread tension is off. | Make sure your thread isn't catching on anything. Focus on maintaining a consistent, even tension with every stitch. | It's time to check the top thread tension. If that doesn't work, re-thread your machine from scratch and check your bobbin. |
| Uneven Stitches | Inconsistent stitch length or direction. | Practice makes perfect here. Focus on keeping your stitch lengths uniform, especially around curves. A hoop stand can be a game-changer, freeing up both hands for better control. | This is almost always a digitizing issue. Dive into your design file and check the stitch density and underlay settings. |
| Shredding Thread | The needle is old, damaged, or simply the wrong type for your thread. | Swap in a new needle. An embroidery needle with a larger eye can make a world of difference. | Put in a fresh needle. For thicker threads or tough fabrics like denim, go up to a 90/14 needle. Slowing down the machine's speed also helps reduce friction. |
Remember, just figuring out the root cause is half the battle. Once you know what to look for, a few small tweaks can make a massive difference in the quality of your finished lettering.
Cleaning Up: Removing Stabilizer and Securing Threads
Once all the stitching is done, it's time for the final cleanup. The goal here is a clean, professional finish on both the front and the back of your project.
How you get rid of your stabilizer depends entirely on which type you chose:
- Tear-Away: Gently tear the stabilizer away from your stitching. I always use my fingers to support the stitches as I tear to prevent any accidental pulling or distortion.
- Cut-Away: Grab a small pair of curved embroidery scissors. You'll want to carefully trim the excess stabilizer as close to the stitching as you can without snipping any of your hard work.
- Wash-Away: Simply follow the manufacturer's directions and submerge your project in water. It's oddly satisfying to watch the stabilizer completely dissolve.
If you've been working by hand, secure your threads by weaving the tail end through the back of several stitches before you trim it. It’s so much neater and more durable than tying knots, which can leave little bumps on the front of your work.
The Final Press
The very last step is giving your project a good press, but whatever you do, don't iron directly on top of your stitches! This will crush the threads and completely flatten the beautiful texture you worked so hard to create.
My Go-To Trick: Always press your embroidery from the back. Lay your project face down on a thick, fluffy towel and then gently press with your iron. The towel acts as a cushion, protecting the stitches by giving them a soft place to sink into, which keeps their dimension and texture intact.
By taking the time for these finishing steps, you're making sure your embroidered letters not only look fantastic but are also built to last. It’s this kind of attention to detail that truly elevates your work and gives it that professional, polished feel.
Your Questions on Embroidering Letters Answered
It's one thing to read a guide, but it's another to be in the middle of a project with a question that just won't wait. We get it. Here are some of the most common questions we hear from fellow stitchers, with practical answers straight from our own experience.
What Is the Best Stitch for Small Letters by Hand?
When you're working with tiny letters, it's all about legibility. For this, the backstitch is king. It gives you a clean, solid line that looks almost like it was drawn on, keeping your small text crisp and readable.
The secret to really clean small letters is to adjust your materials. Try using just one or two strands of embroidery floss instead of the usual six. You'll also want to shorten your stitch length. Smaller stitches are much better at handling tight curves, giving you a smooth line instead of a jagged one. A smaller needle helps with precision, too.
How Can I Make My Hand-Stitched Letters Bolder?
Need your lettering to pop? You can either beef up the outline or fill it in completely.
For a thicker, more substantial outline, give the split stitch or chain stitch a try. The split stitch has a beautiful braided texture, while the chain stitch creates a bolder, rope-like effect. Simply using more strands of floss—say, three or four—is another easy way to get a bolder line.
If you're working with block letters, you can fill them in for maximum impact. The satin stitch is your best friend for a smooth, almost glossy finish. For something with a bit more texture, try working rows of chain stitch right next to each other to fill the space.
Key Takeaway: The easiest route to thick, impactful letters is a fill stitch. The satin stitch offers a sleek, modern look, while rows of chain stitches can give your work a wonderful, handcrafted texture.
Why Do My Machine-Embroidered Letters Look Messy?
Nine times out of ten, messy machine-embroidered letters come down to either a tension or a stabilizer problem. Before you panic, completely re-thread your machine, checking both the top thread and the bobbin. You’d be surprised how often an incorrect threading path is the culprit.
Next, check your stabilizer. If it's not sturdy enough for your fabric or the design's stitch density, the fabric will shift and pucker. For most clothing, especially anything with stretch like a t-shirt, a cut-away stabilizer is your safest choice because it provides lasting support. As a final tip, try slowing down your machine's stitching speed, particularly for really detailed or complex fonts.
At All About Sewing, we believe that with the right tools and a little bit of guidance, anyone can create something beautiful. Whether you're looking for a new machine, the perfect thread, or just some friendly advice, we're here to help you every stitch of the way. Explore our full range of embroidery supplies and machines at https://all-about-sewing-canada.myshopify.com.