Choosing and Using Waterproofing Spray for Fabric
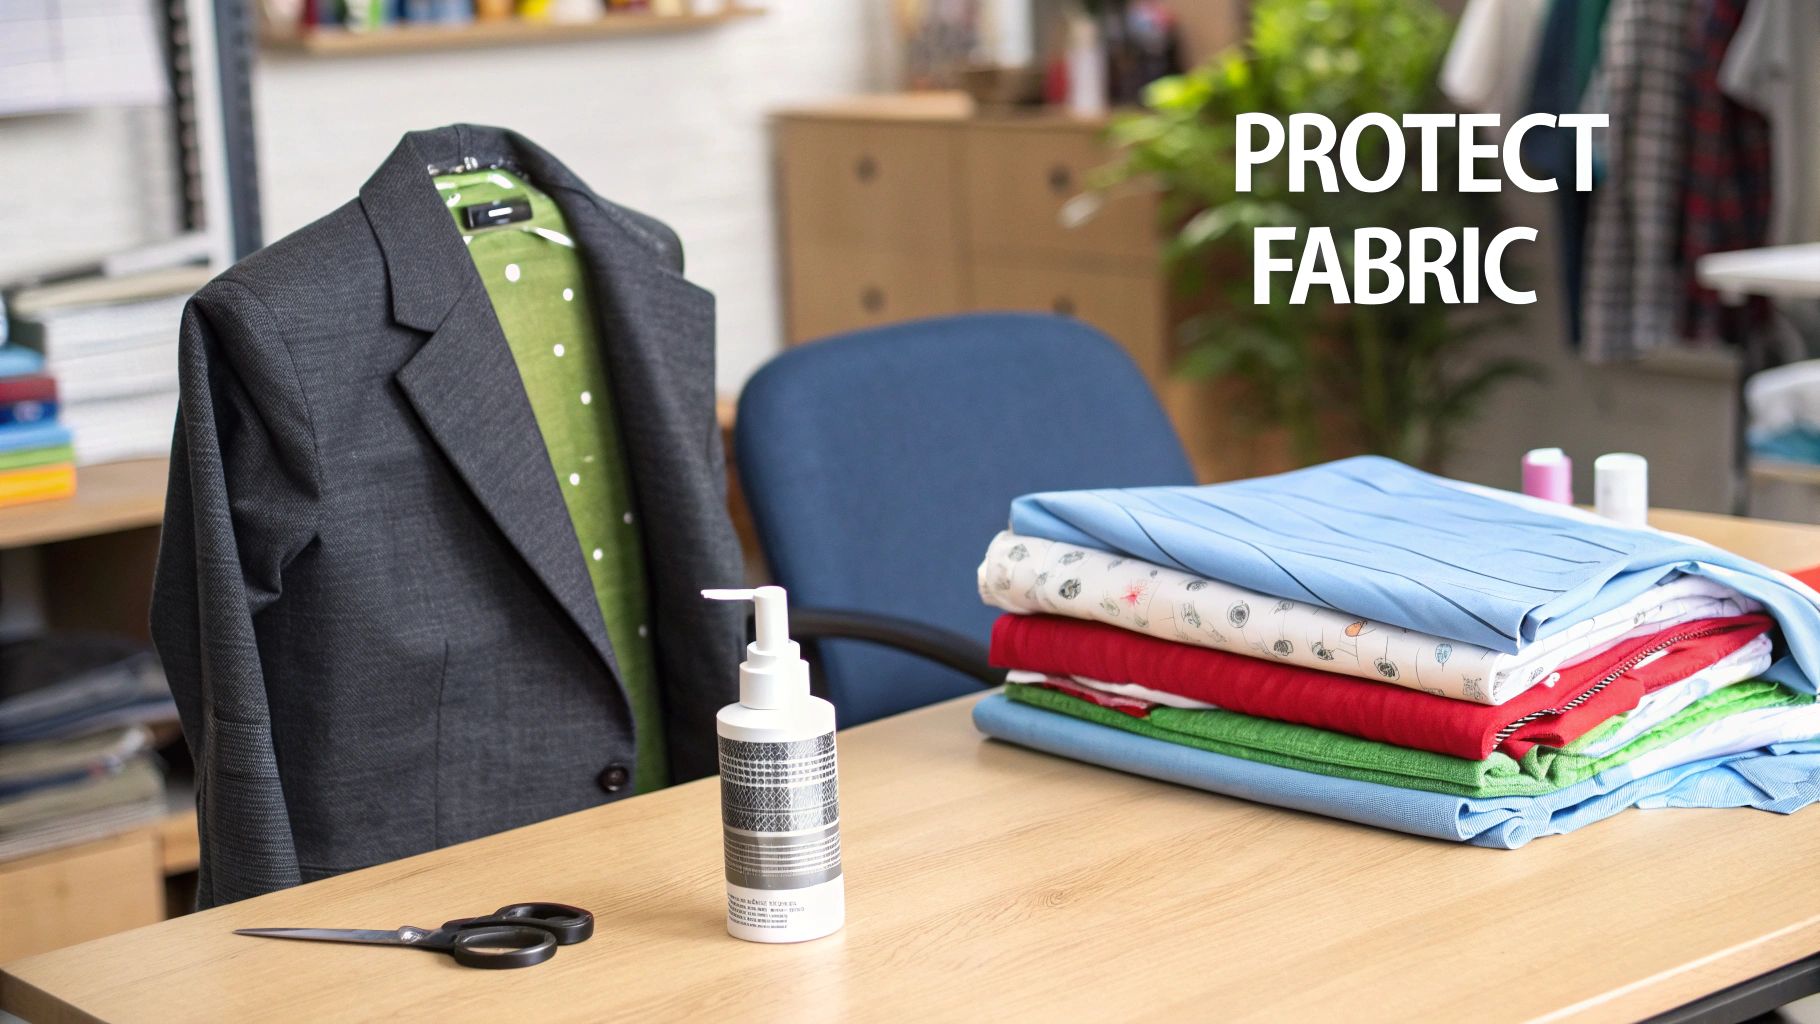
A good waterproofing spray for fabric is one of those secret-weapon tools every crafter should have. It creates an invisible shield that protects your sewing, quilting, and upholstery projects from moisture and stains, adding years to their life. Think of it as the final, protective touch for everything from handmade jackets to outdoor cushions, ensuring all your hard work stays beautiful.
Your Guide to Protecting Fabric Projects
We've all been there. You spend countless hours piecing together a stunning quilt, and then a spilled coffee threatens to ruin the whole thing. Or maybe you've crafted the perfect outdoor patio cushions, only to see them get damp and mildewed after the first spring rain. It’s frustrating, and it’s exactly what a good waterproofing spray is designed to prevent.
Think of it as an insurance policy for your craft. When you apply a waterproofing spray, you're creating a hydrophobic (water-repelling) barrier right on the surface of the material. This barrier does more than just stop water—it also helps fend off everyday messes like dirt, grime, and even oil-based stains, which makes cleanup so much easier.
Why Waterproofing Matters for Your Projects
For anyone who sews, quilts, or works with fabric, the benefits go way beyond simple stain prevention. Protecting your fabric ensures your finished pieces last longer and work better, especially for items meant for the outdoors or those that will get a lot of use. A properly treated fabric holds its shape, colour, and texture for much longer than an untreated one.
The best part? The process is surprisingly simple, even for beginners. The trick is to understand a little about how these sprays work and which type is right for your specific material. A heavy-duty canvas tote bag, for instance, needs a different kind of protection than a lightweight, synthetic raincoat.
Ultimately, protecting your fabric is about preserving the time, effort, and creativity you pour into every single stitch. A quick spray can be the difference between a project that lasts a season and one that becomes a durable, cherished piece for years.
In this guide, I'll walk you through everything you need to know. We’ll look at the science behind these sprays (don't worry, I'll make it easy!), figure out how to match the right product to your fabric, and I'll give you step-by-step instructions for getting a perfect finish every time. My goal is to give you the confidence to shield your projects so they stay as functional and beautiful as the day you finished them.
How Waterproofing Sprays Create a Protective Shield
Ever wondered how a simple spray can turn a piece of fabric into a water-repellent shield? The science is actually pretty cool and, believe it or not, it mimics nature. Picture a lotus leaf after it rains—the water beads up and rolls right off, leaving the leaf completely dry. A waterproofing spray for fabric is designed to create that exact same effect on your sewing projects.
When you spray a piece of fabric, you aren't coating it in a solid, plastic-like film. Instead, you're covering each individual fibre with a microscopic layer that hates water. This makes the surface hydrophobic, which literally means "water-fearing."
This new hydrophobic surface bumps up the fabric's surface tension in a big way. Water droplets can't soak in, so they’re forced to hold their round shape and simply roll away. It’s like thousands of tiny, invisible umbrellas popping open all over your material, each one pushing moisture away before it gets a chance to seep through.
The Chemistry Behind the Shield
Not all waterproofing sprays get the job done in the same way. The two most common types you’ll find use different chemical compounds to bond with fabric fibres. Knowing the difference will help you pick the right product for your project, whether you're making a durable outdoor cushion or a breathable jacket.
Here are the main players:
-
Silicone-Based Sprays: Think of these as the heavy-duty workhorses of fabric protection. Silicone creates an incredibly durable and highly water-resistant barrier by forming a tough, rubbery coating over the fibres. It’s a fantastic choice for items that need to stand up to the elements, like tents, tarps, and rugged canvas bags.
-
Fluoropolymer-Based Sprays: This type is often the go-to for clothing and gear where you still need the fabric to breathe. Fluoropolymers create a shield that repels not only water but also oil-based stains by lowering the fabric's surface energy. The molecules essentially stand up on the fibres like tiny bristles, stopping liquids from ever settling in.
Here's a simple way to think about it: silicone is like a classic, tough raincoat that offers maximum protection. Fluoropolymers are more like a high-tech windbreaker that sheds rain while letting air pass through, keeping things comfortable and functional.
This is a big market, especially in countries with unpredictable weather. In Canada, for instance, the demand for textile waterproofing agents is growing fast, thanks to our love of the outdoors and weather that can turn on a dime. It just goes to show how essential good fabric protection has become for everyone from big manufacturers to home crafters. For a closer look at these trends, you can explore the full research on textile waterproofing agents from Transparency Market Research.
Modern Eco-Friendly Alternatives
As more of us become environmentally conscious, new kinds of waterproofing sprays have started to appear. The most promising are C0 treatments, which are made without the perfluorinated compounds (PFCs) often found in older fluoropolymer formulas. These newer sprays give you great water repellency without the same environmental baggage.
C0 treatments use shorter-chain polymers or other PFC-free chemistries that still create that all-important hydrophobic surface. They might need to be reapplied a bit more often than the traditional stuff, but they strike a great balance between performance and sustainability. This makes them a perfect choice for projects where environmental impact matters just as much as protection, like kids' outerwear or things you use every day. By choosing a C0 spray, you can protect your creations and make a more planet-friendly choice for your workshop.
Finding the Perfect Waterproofing Spray for Your Fabric
Think of choosing a waterproofing spray like picking the perfect thread for a new project. The right match ensures everything holds together beautifully, but the wrong one can be a disaster. Using a spray that isn't compatible with your fabric can, at best, do nothing at all. At worst? It could completely ruin the texture, breathability, or even the colour of your hard work.
Not all sprays are created equal, and they certainly don’t work on every material. A heavy-duty silicone spray that works wonders on a rugged canvas tote bag would suffocate a lightweight polyester jacket, clogging its pores and killing its breathability. So, let’s break down which spray to use for the most common fabrics you’ll find in your sewing, quilting, and upholstery projects.
Natural Fibres: Cotton and Canvas
Cotton and canvas are the workhorses for so many projects, from handmade bags to outdoor furniture covers. Because they're natural fibres, they love to soak up water, which means you need a serious barrier to keep them dry.
For these materials, a silicone-based waterproofing spray is usually your best bet. Silicone essentially creates a tough, rubbery coating right on the surface of the fibres, giving you excellent water resistance for anything that's going to get a lot of use. It’s perfect for projects that will face the elements head-on, like patio cushions or a homemade tent. Just remember, this heavy-duty protection comes at a price: breathability. It's not a great choice for clothing.
Synthetic Fabrics: Polyester and Nylon
When you're working with polyester and nylon, you're already starting with fabrics that are pretty durable and water-resistant. You'll find them in raincoats, activewear, and all sorts of outdoor gear. The goal here isn't to create a barrier from scratch but to boost their natural abilities without messing up their performance—especially their breathability.
This is where a fluoropolymer-based spray really shines. These formulas create a barrier that repels both water and oil without completely sealing up the fabric's weave. That means rain stays out, but the sweat and moisture from your body can still escape. This is absolutely critical for any kind of clothing to keep you comfortable. The newer C0 formulas give you all these benefits without the environmental baggage of older PFC-based products.
Pro Tip: Always, always apply waterproofing spray to clean, dry synthetics. Dirt and oils on the surface can stop the spray from bonding properly with the fibres, leaving you with a patchy, useless finish. A quick spin in the wash before you treat it makes a world of difference.
Delicate Materials: Suede and Leather
While maybe not in every sewist's daily rotation, suede and leather pop up in all kinds of projects—bags, upholstery, and stylish garments. These materials are notoriously vulnerable to water, which can leave them spotted, stiff, and discoloured forever.
Protecting suede and leather calls for a specialist. You need to look for sprays made specifically for them. These are usually non-silicone formulas designed to be gentle on these delicate surfaces, protecting them without changing that unique texture or soft nap. Grabbing a generic fabric spray off the shelf is a surefire way to cause permanent damage, so it's well worth investing in the right product from the start.
Fabric Compatibility Guide for Waterproofing Sprays
To make things even easier, here’s a quick reference table. Use it to find the best waterproofing spray for common fabrics used in sewing, quilting, and upholstery projects.
| Fabric Type | Recommended Spray Type | Key Considerations |
|---|---|---|
| Cotton & Canvas | Silicone-Based | Gives you maximum water repellency but kills breathability. Best for things you don't wear, like tote bags, tarps, and outdoor upholstery. |
| Polyester & Nylon | Fluoropolymer-Based or C0 | Keeps the fabric breathable while repelling water and oil. Perfect for jackets, activewear, and gear where airflow is a must. |
| Wool | Lanolin-Based or Fluoropolymer | Wool is naturally water-resistant; a light spray just gives it a boost. Lanolin is a great natural option, while fluoropolymers add stain protection. |
| Suede & Leather | Suede/Leather Specific Formula | Absolutely essential for stopping stains and water spots without damaging the delicate finish. Stay away from silicone-based sprays. |
By taking a moment to choose a waterproofing spray for fabric that truly suits your material, you can make sure your finished pieces are not only shielded from the weather but also keep the exact look, feel, and function you worked so hard to create.
Applying Waterproofing Spray for Flawless Results
Getting a durable, invisible finish with a waterproofing spray for fabric is all about technique. A rushed job can leave you with patchy coverage or a stiff, sticky mess. But with a careful, methodical approach, you can give your projects the flawless protection they deserve.
Think of it less like quickly painting a fence and more like applying a delicate, even varnish to a piece of fine furniture. It’s a process that rewards patience.
The whole thing boils down to three key stages: preparing the fabric, applying the spray, and letting it fully cure. Nailing each step is what creates that strong, long-lasting barrier that works with your material, not against it.
This simple workflow shows the path to success.
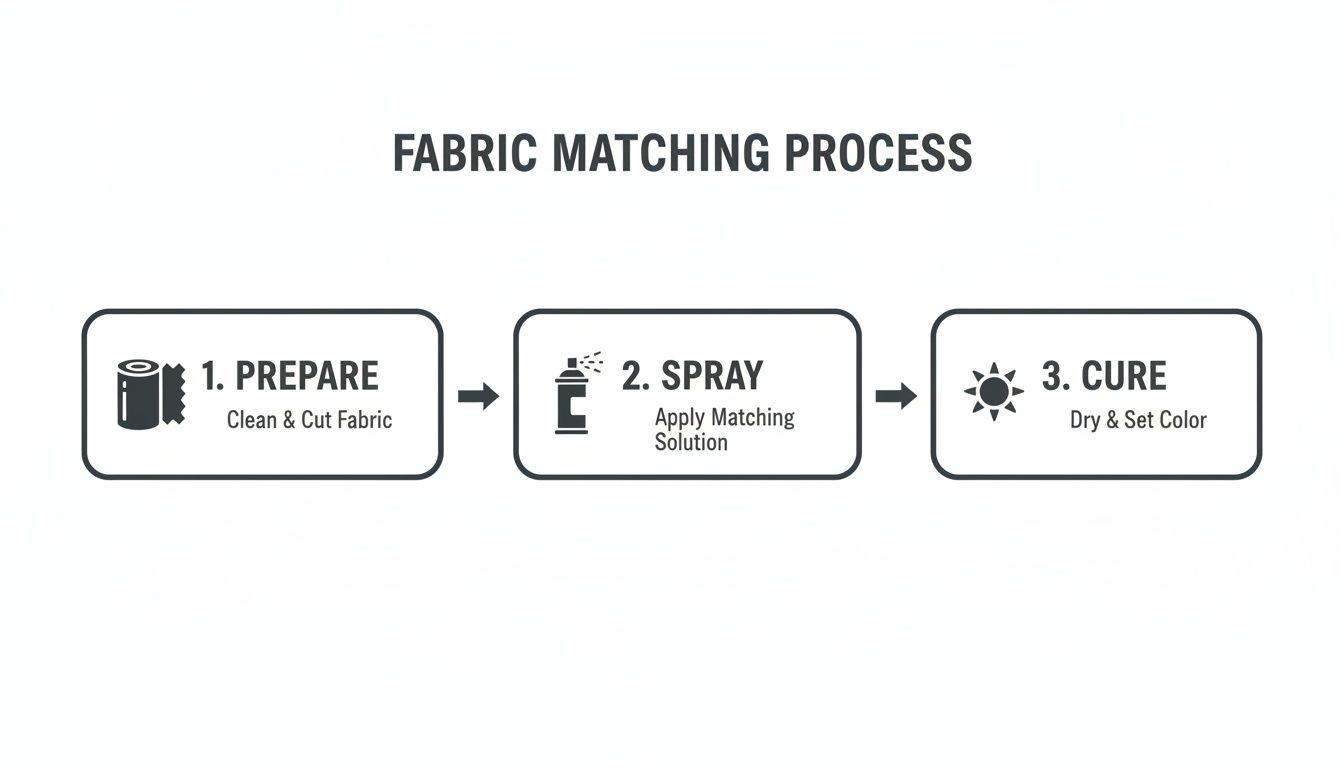
As you can see, success starts long before you press the nozzle and isn’t finished just because the fabric feels dry.
Step 1: Prepare Your Fabric and Workspace
You absolutely cannot skip the prep work. This is what sets the stage for a perfect finish. Any dirt, dust, or oils on the fabric will stop the spray from bonding to the fibres, leaving weak spots that are guaranteed to fail.
First, make sure your item is completely clean and dry. For brand-new projects, a quick once-over with a lint roller might be all you need. For anything that’s been handled or used, a proper wash according to its care label is a must. Let it air-dry completely—even a hint of dampness can ruin the result.
Next, get your workspace ready. Good ventilation is non-negotiable, as these sprays release potent fumes. Working outdoors on a calm day is ideal, but a well-ventilated space like an open garage works too. Lay down a drop cloth or some old newspapers to protect surfaces from overspray.
Step 2: Master the Spraying Technique
With your area prepped, you're ready to spray. But hold on—before you go all-in on your project, always do a spot test. Pick a small, hidden area like an inside seam or use a scrap of the same fabric. Apply the spray, let it dry, and check for any weird changes in colour or texture.
Once you’re confident the spray is playing nice with your fabric, follow these steps for a perfectly even coat:
- Shake the Can Well: Give the can a really good shake for at least a minute. You need all those active ingredients to be properly mixed.
- Keep Your Distance: Hold the can upright, about 15–20 centimetres away from the fabric. If you get too close, you’ll saturate the material, which leads to stiffness and dark patches.
- Use a Sweeping Motion: Apply the spray using a light, steady, back-and-forth motion. Overlap each pass just slightly to ensure you don’t miss any spots. The goal is an even mist, not a drenching.
- Check for Missed Spots: After the first coat, take a look at the fabric under good light. It should look uniformly damp, but not soaked. If you spot any dry patches, give them another very light pass.
Step 3: Allow for Proper Curing Time
This last step is where the real magic happens, but it’s the one most people rush. Drying and curing are not the same thing. Your fabric might feel dry to the touch in an hour, but the chemical compounds need a lot more time to fully bond with the fibres and create that tough, water-repellent shield.
Curing is the chemical process where the protective barrier hardens and locks onto the fabric fibres. Rushing this is like taking a cake out of the oven too early—it might look done, but it hasn't set properly on the inside.
Hang your treated item in a well-ventilated area, away from direct sunlight or heat. Let it cure for the full time recommended on the can, which is usually 24 to 48 hours. Resist the urge to fold it, use it, or mess with it during this period.
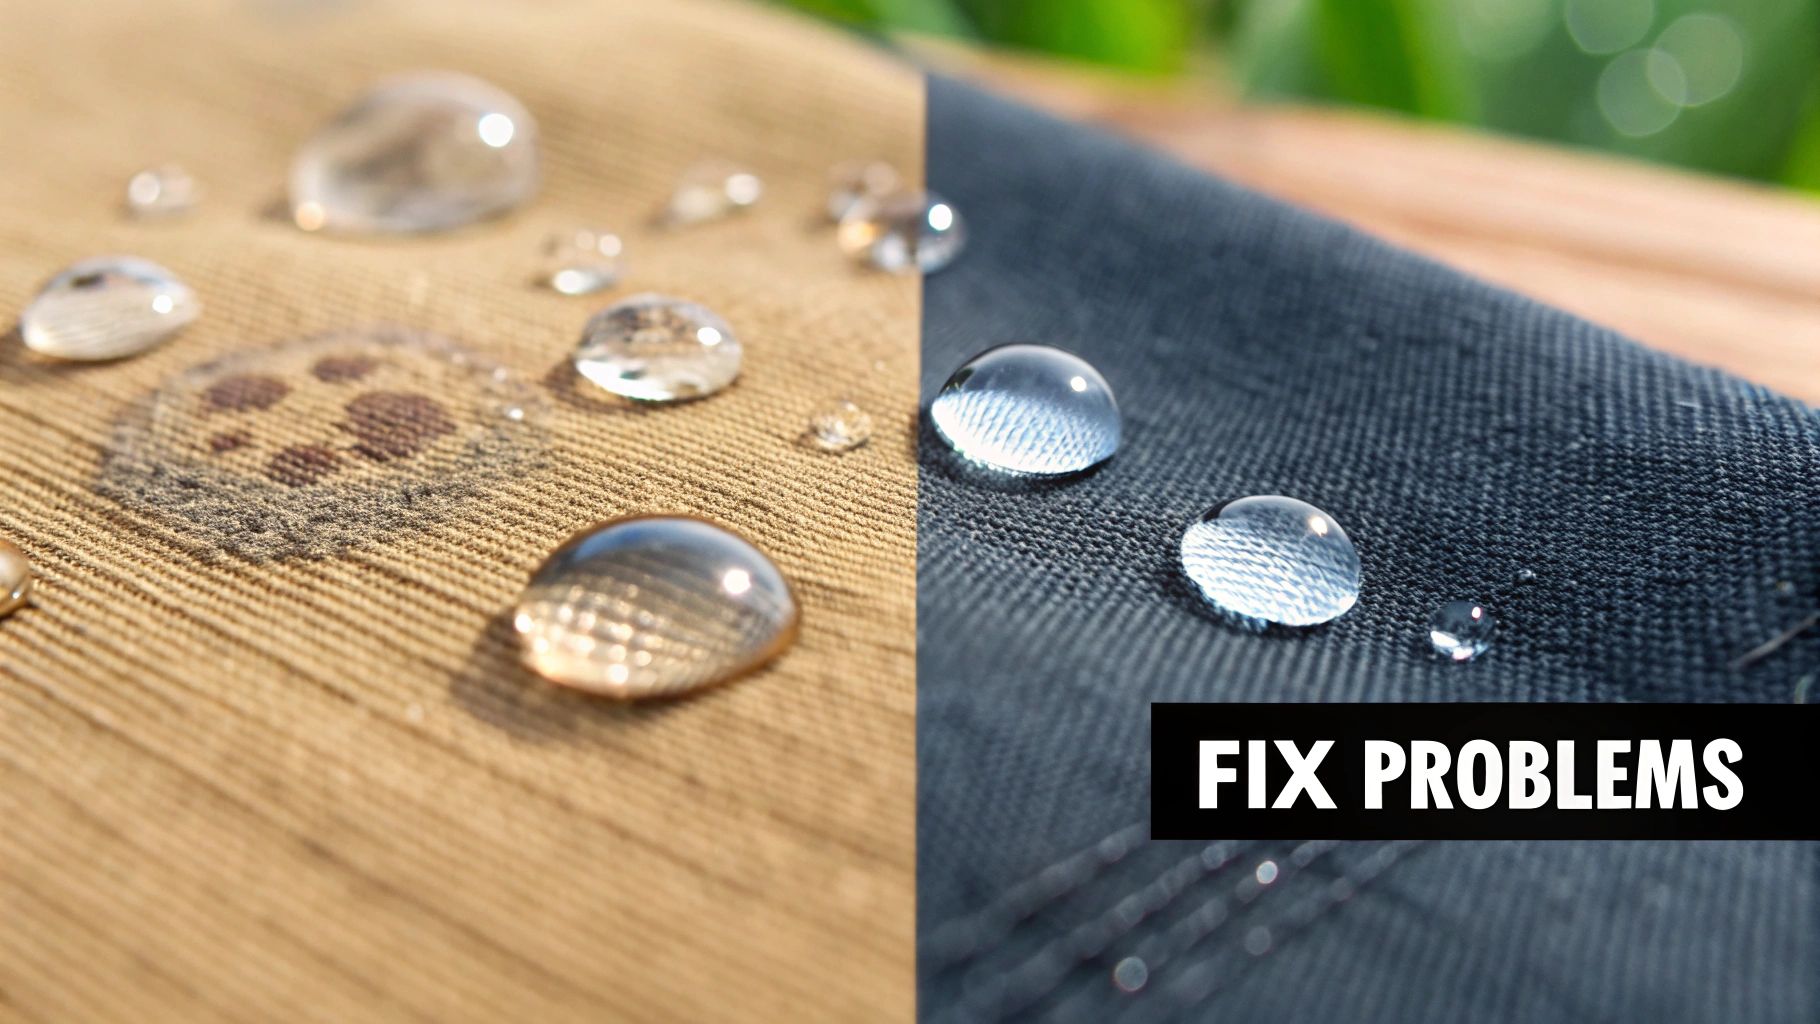
Once it's fully cured, you can do the fun part: test your work! Flick a few drops of water onto the surface. If they bead up and roll right off, you’ve nailed it.
Keeping Your Gear Protected: Maintenance and Reapplication
So you’ve sprayed your project, and it looks great. But that invisible shield you just created won't last forever. Think of it less like a permanent coat of paint and more like sunscreen—it needs to be topped up to keep doing its job. Regular use, friction, and even washing will eventually wear down the waterproof barrier.
But don't worry, maintaining that protection is pretty straightforward. A few simple tweaks to how you care for your items can make a world of difference, ensuring your handmade jackets, tote bags, and patio cushions stay dry and look great for a long, long time.
How to Clean Waterproofed Fabrics
When your treated item needs a wash, the golden rule is to be gentle. Your biggest enemies here are harsh detergents and high heat, as both can aggressively strip away the protective coating.
To keep that waterproof layer happy, just follow these tips:
- Pick a Mild Soap: Look for a detergent that's free of additives. Special soaps made for technical outdoor gear are fantastic, but any gentle, clear detergent without fabric softeners, bleach, or heavy scents will do the trick. Those extras leave behind a residue that can break down the waterproofing.
- Wash Cool and Gentle: If you're using a washing machine, stick to a cool, gentle cycle. I always recommend running an extra rinse cycle, too. It helps wash away any lingering soap, which can actually attract water if left on the fabric.
- Skip the High Heat: High heat is a no-go. Air-drying is always your best bet. If you need to use a dryer, choose the lowest, gentlest setting. Fun fact: some treatments actually get a little boost from about 20 minutes of low heat in the dryer, as it can help reactivate the coating. Just be sure to check the instructions on your specific spray first.
Spotting the Signs: When Is It Time to Reapply?
How do you know when your fabric needs another coat? Trust me, it’ll tell you. The most obvious clue is when water stops beading up and starts soaking in, creating dark, damp spots. This is often called "wetting out."
If you see this happening during a light drizzle, that’s your signal. It means the spray’s ability to create surface tension has faded, and it can no longer effectively push water away.
The Droplet Test: A quick way to check is to sprinkle a few drops of water onto the fabric. If they form tight little beads that roll right off, you’re still good. If the water spreads out and starts to sink in, it's time for a touch-up.
How often you’ll need to reapply really depends on how much action the item sees. A rain jacket you wear every day might need a fresh coat every couple of months. On the other hand, outdoor cushions you bring inside for the winter might only need a refresh once a year. Just keep an eye on how your projects are performing and give them a light, even coat when they start to look thirsty.
Troubleshooting Common Waterproofing Problems
So you’ve followed all the steps, but your waterproofing project didn't quite go to plan. It happens! Don’t get discouraged—most of the common hiccups are surprisingly easy to fix and even easier to avoid next time around.
Think of this as your troubleshooting cheat sheet. We'll walk through everything from stiff fabric to strange discolouration. Once you know what causes these little setbacks, you can correct them with confidence and get that invisible, durable shield you were hoping for. Let’s get your project sorted.
Correcting Stiff or Sticky Fabric
Is your fabric feeling stiff, tacky, or even a bit greasy to the touch after treatment? This is one of the most frequent issues people run into, and it almost always comes down to a simple mistake: applying too much spray.
When a waterproofing spray for fabric is laid on too thick or sprayed too close, it can't properly bond with the fibres. The excess product just sits on top, forming a film that never quite cures. I see this a lot with silicone-based sprays, especially on tightly woven materials.
How to Fix It:
- For minor stiffness: Before you do anything else, try tumbling the item in your dryer. A low or no-heat setting for about 20 minutes is perfect. The warm air and gentle movement can often soften the finish right up.
- For serious stickiness: If it's really tacky, you’ll probably need to wash the item. Use a gentle cycle with a mild, residue-free detergent. This will likely strip away the waterproofing, but it will also remove that sticky feeling, giving you a fresh start to reapply the spray—just with a lighter hand this time!
Dealing with a Chalky White Residue
Ever finish a project only to find a faint, dusty white film on the fabric once it dries? That chalky residue is another classic sign of oversaturation. It usually happens when the spray has pooled in certain areas and dried unevenly.
This problem is most noticeable on dark fabrics, of course. It can turn a beautiful, deep navy or black into a dull, dusty-looking mess. It's simply the solids from the spray that couldn't soak in and were left sitting on the surface.
If there’s one thing to remember, it’s that less is more. You're aiming for a light, even mist that makes the fabric look uniformly damp, not completely soaked.
To get rid of it, start by grabbing a soft-bristled brush and gently brushing the surface. This is often enough to whisk away the loose particles. If that chalky film is a bit more stubborn, try wiping the area with a damp cloth to lift the excess product without having to do a full wash.
What to Do About Uneven Patches or Dark Spots
You’ve let your project cure, so you run a little water over it to test your work. Some spots bead up perfectly, but others soak the water right in. Frustrating, right? You're dealing with an uneven application. This can also show up as dark, splotchy spots where the spray was too concentrated.
These imperfections are almost always caused by an inconsistent spraying motion—maybe you paused in one spot for too long or held the can at different distances from the fabric.
To Fix and Prevent Unevenness:
- Start Clean: Make sure your fabric is totally clean before you even think about spraying. Any hidden dirt or oils can prevent the spray from bonding properly.
- Keep a Steady Hand: Use a smooth, sweeping motion as you spray, moving back and forth across the entire piece. Overlap each pass just a little bit to guarantee you don't miss any spots.
- Correcting a Patchy Finish: If the finish has already cured, your best bet is to clean the fabric and reapply. This time, focus on a very light, even coat, paying extra attention to the areas you missed before.
Your Top Questions About Fabric Waterproofing, Answered
Working with waterproofing sprays for the first time? It's natural to have a few questions. To help you feel confident and get the best results for your sewing projects, I've put together answers to the most common queries I hear.
Can I Use Just One Type of Spray for Everything?
This is probably the most important question, and the simple answer is no. Think of it like paint—you wouldn't use wall paint on a metal gate, right? Waterproofing sprays are much the same; they’re formulated for specific types of materials.
Using the wrong spray can do more harm than good. For example, a heavy-duty silicone spray is fantastic for a sturdy canvas tote bag or outdoor upholstery. But if you were to put that same spray on a lightweight polyester jacket, you'd clog the fabric’s weave. Suddenly, your breathable jacket feels clammy and stiff because air can't pass through.
My best advice: Always match the product to the material. Fluoropolymer or the newer C0 sprays are usually your best bet for clothing and gear where breathability matters. Save the silicone sprays for heavy-duty, non-wearable items. The first thing you should always do is read the can and test a small, hidden spot.
How Often Do I Need to Reapply It?
That protective barrier you've sprayed on isn't permanent. Over time, things like friction, washing, and just general use will wear it down. How often you need to re-spray really comes down to how much action the item sees.
- High-Wear Items: Think about a rain jacket you wear all the time. The shoulders and cuffs get a lot of rubbing, so you might need to touch it up every few months.
- Low-Wear Items: What about those outdoor patio cushions you store for the winter? A single application at the start of the season is probably all they’ll need.
The easiest way to know for sure is to do a quick water test. Just sprinkle a few drops of water on the surface. If it beads up and rolls right off, you’re still good. If it starts to soak in, it's time for another coat.
Will This Make My Fabric Stiff or Change Its Colour?
When you apply it correctly, a good quality waterproofing spray shouldn't change the feel or look of your fabric at all. If you do notice stiffness, a weird film, or any discolouration, it’s almost always for one of two reasons: you’ve either put on way too much, or you've used the wrong type of spray for your fabric.
Putting on too much spray is the most common mistake. When the fabric is oversaturated, the formula can't bond properly with the fibres. Instead, the extra product just dries on the surface, leaving that stiff, sometimes chalky, residue. The trick is to apply a light, even mist. Hold the can about 15-20 centimetres away and sweep it across the fabric. This gives you great protection while keeping the original look and feel of your hard work.
Ready to give your handmade projects the durable protection they deserve? At All About Sewing, we have the tools and expertise to help. Explore our selection of fabric care products today. Find your perfect solution at https://all-about-sewing-canada.myshopify.com.


