Sew the Perfect Kids Cat Costume A Simple Guide
There’s something truly special about a homemade kids cat costume. It’s more than just a fun outfit for Halloween or dress-up; it’s a project that turns simple fabric into a cherished memory. This guide will walk you through everything you need to know, making it easy for any skill level to create a unique and comfy costume your little one will absolutely love.
Why Make a Kids Cat Costume Yourself?
Sure, you could buy a costume off the rack, but sewing one yourself is a completely different experience. It’s a chance to craft something that fits your child perfectly, both in size and personality. A store-bought costume is fine, but one made with love and care? That’s a memory in the making, and it’s an experience you can even share with your child.
The real magic of a DIY kids cat costume is the creative freedom. You’re in control! You can choose the perfect soft grey for a sweet tabby, a sleek black for a mini panther, or even go wild with vibrant colours for a fantasy cat. It’s this personal touch that makes the final costume truly one-of-a-kind.
A Timeless Favourite for a Reason
The cat costume is a classic for a good reason—it’s adorable, instantly recognizable, and incredibly versatile. Here in Canada, it’s a beloved choice that never goes out of style. With over 6.2 million trick-or-treating-aged kids in 2024, it’s estimated that at least 500,000 will be prowling the streets as cats this Halloween, making it a true festive staple. If you're curious about these trends, you can explore the latest data from Statistics Canada.
What You'll Find in This Guide
I've designed this tutorial to guide you through every step, making the whole process feel smooth and fun. We’ll break down the project into easy, manageable chunks, so it’s perfect whether you’re just starting out or have been sewing for years.
Here’s a quick look at what we'll cover:
- Picking Your Materials: We’ll talk about the best fabrics—from cozy fleece to cuddly minky—and list all the tools you'll need to get started.
- Sewing the Main Pieces: You'll get straightforward, step-by-step instructions for the bodysuit, ears, and tail.
- Creating Cute Details: Learn how to add those charming finishing touches like facial features and paw pads that bring your little cat to life.
- Getting the Fit Just Right: I’ll show you how to take measurements and adjust the pattern for a costume that’s both comfortable and safe to play in.
Remember, by following this guide, you’re not just sewing a costume—you’re crafting a keepsake. The skills you pick up here will build your confidence and can be used on so many other creative projects down the road.
My goal is to make this project feel less like a daunting task and more like a creative adventure. So, let’s get our supplies ready and start making an amazing kids cat costume!
Before we dive into the nitty-gritty, here's a quick overview of what the project involves. This table will give you a bird's-eye view of the main stages and a rough idea of how much time to set aside for each.
Kids Cat Costume Project Overview
| Project Stage | Key Tasks | Estimated Time |
|---|---|---|
| Preparation & Cutting | Selecting a pattern, choosing fabric, washing/prepping fabric, cutting all pieces. | 1.5–2 hours |
| Sewing the Body | Assembling the main bodysuit or clothing base. | 2–3 hours |
| Creating Accessories | Sewing the ears, tail, and paws. | 1.5–2 hours |
| Adding Details & Finishing | Attaching accessories, adding facial features, hemming. | 1–1.5 hours |
This timeline is just an estimate, of course. Feel free to take your time and enjoy the process! Now, let’s get to the fun part.
Choosing the Right Materials and Tools
The secret to a fantastic kids' cat costume isn’t just in the sewing; it’s in the materials you start with. Picking the right fabric and having your tools ready makes the whole process smoother and a lot more fun. Plus, it’s the difference between a costume that’s just okay and one that’s comfy, durable, and absolutely adorable.
Think of it like getting all your ingredients ready before you start baking. It saves you from that mid-project scramble, hunting for a matching spool of thread when you’re in the zone.
Selecting the Perfect Fabric
The fabric is really the star of the show here—it sets the whole look and feel of the costume. What you choose will probably depend on your climate and the kind of cat you're imagining. For a chilly Canadian Halloween, you’ll definitely want something warm.
Here are a few of my go-to options:
- Fleece: Honestly, this is a brilliant choice, especially if you're new to sewing. It’s soft, warm, doesn't fray much (a huge bonus!), and has a bit of stretch, which is very forgiving when it comes to fit. Perfect for a cozy, playful cat.
- Minky: If you want that next-level softness, minky is your best friend. It has a plush, luxurious feel that kids absolutely love—it’s the closest you’ll get to petting a real cat. A little heads-up: it can be slippery to work with, so don't be shy with your pins!
- Cotton Knit or Flannel: For something lighter and more breathable, a good-quality cotton knit or a soft flannel works wonders. These are great for indoor parties or if you know your little one will be wearing layers underneath.
A little tip from experience: always buy a bit more fabric than the pattern suggests. An extra half-metre is usually a safe bet. It gives you a buffer for any cutting mistakes or for those last-minute creative additions.
Here’s a pro tip I swear by: always pre-wash your fabric before cutting. This simple step gets rid of any surprise shrinkage after you’ve put all that work in, making sure the perfect fit actually lasts.
Patterns: Commercial vs. DIY
Once you've landed on a fabric, you need a blueprint. You can either go with a commercial pattern or get adventurous and draft your own.
Using a commercial pattern from a trusted brand like Simplicity or McCalls is a reliable route. They come with detailed instructions, multiple sizes, and professionally drafted pieces that just work. For anyone new to making garments, this is often the easiest way to get a great-fitting cat costume.
Feeling a bit more creative? Drafting your own pattern is a rewarding challenge. A simple way to start is by tracing a pair of your child’s well-fitting pyjamas onto paper to get a basic bodysuit shape. This method gives you total freedom over the design, but be prepared for a bit more trial and error.
Essential Sewing Tools and Notions
With your fabric and pattern sorted, it's time to raid your sewing stash. Having the right notions on hand will make every step cleaner and more professional.
Here's a quick checklist of what you'll need:
- All-Purpose Thread: Grab a quality polyester thread that matches your main fabric. It's strong and will handle the entire project beautifully.
- Sewing Machine Needles: A universal needle (size 80/12) is a good all-rounder. But if you chose a knit fabric like fleece or minky, be sure to switch to a ballpoint or stretch needle—it’s the key to preventing skipped stitches.
- Sharp Fabric Scissors or a Rotary Cutter: Nothing is more frustrating than dull scissors. A dedicated, sharp pair is a must for clean cuts. I personally love using a rotary cutter and mat for speeding through straight lines with precision.
- Pins or Sewing Clips: These are non-negotiable for holding your pieces together accurately.
- Measuring Tape: Crucial for taking your child's measurements to pick the right pattern size.
- Stuffing (Poly-Fil): You’ll need this to give the cat tail its classic fluffy shape and bounce.
- Fusible Interfacing: This is the secret weapon for perky cat ears that don't flop over. A stiff, fusible kind is what you’re looking for.
Getting all your supplies in one place before you start is the best way to set yourself up for a smooth and successful sewing session. Now that you’re all set, you’re ready to bring that adorable kids' cat costume to life
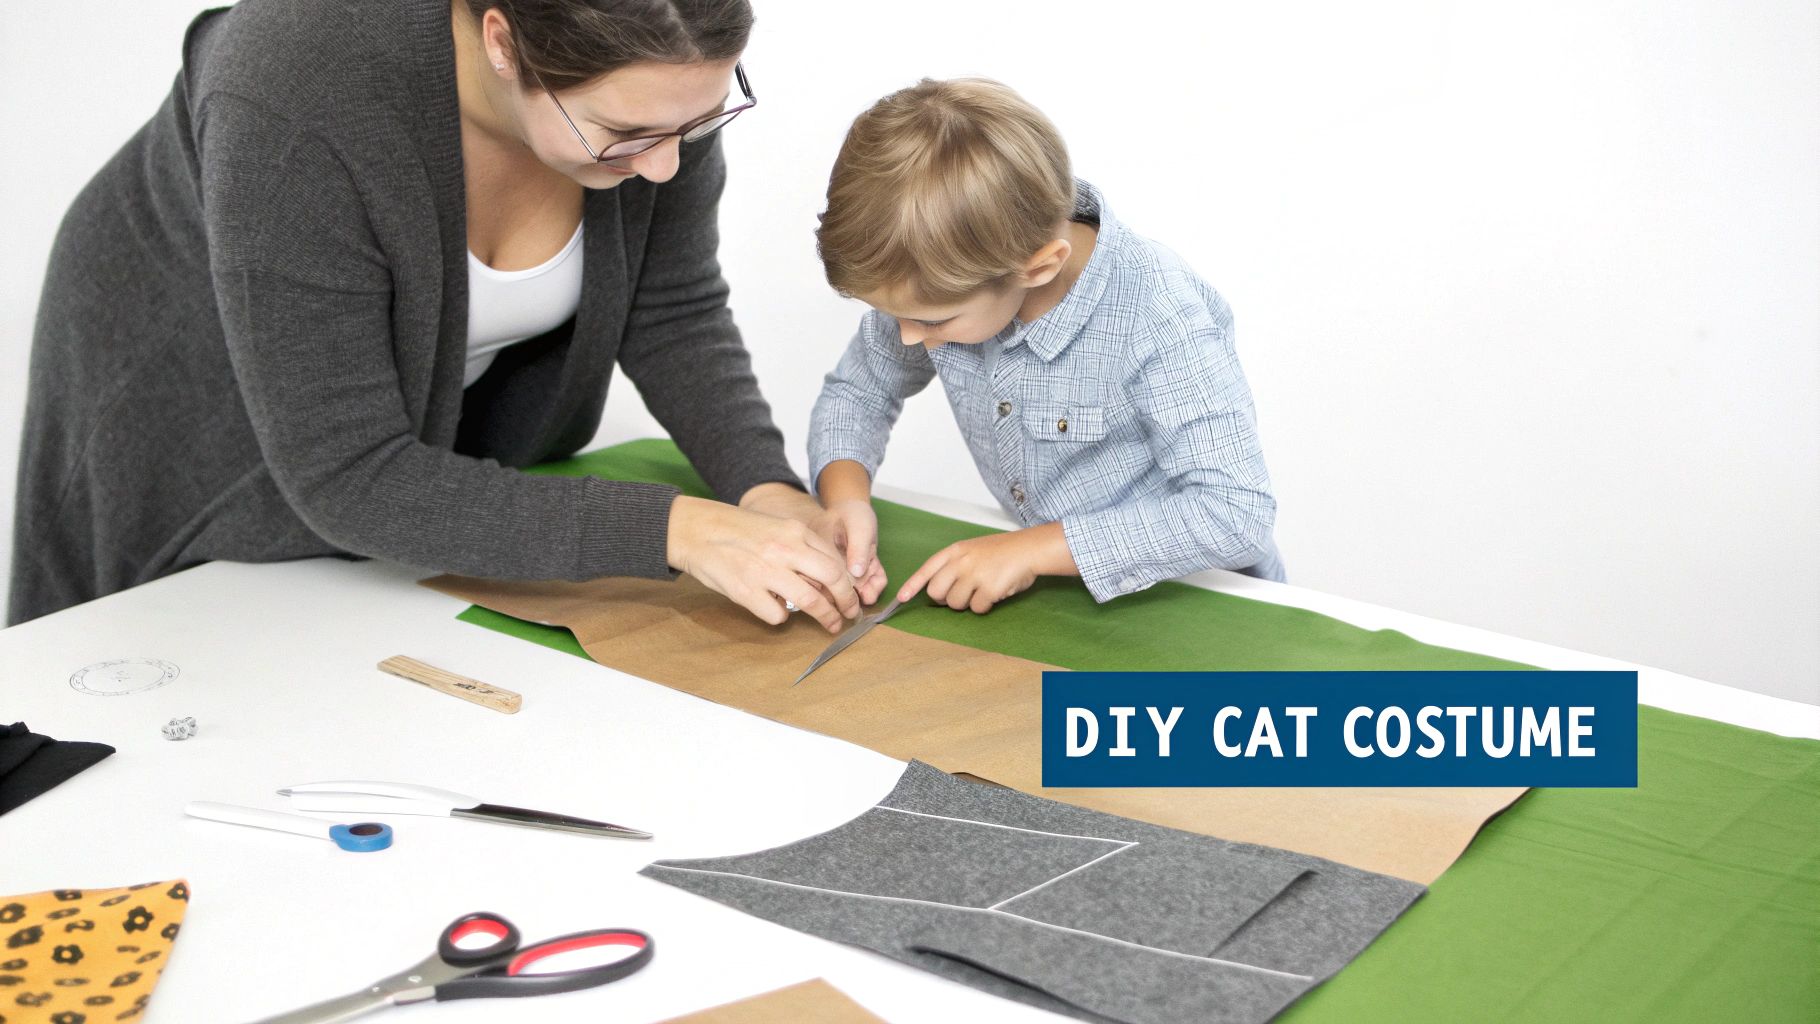
Sewing the Bodysuit and Cat Features
Alright, with all your pieces cut and your supplies gathered, we get to dive into the best part—the actual sewing! This is where the magic happens, and you’ll see those flat fabric pieces start to turn into a proper costume. We'll kick things off by putting together the main bodysuit, then move on to all the fun, feline details.
Just remember to breathe and enjoy the process. There's no need to rush. Every stitch is a step closer to bringing your creative idea to life.
This little visual sums up the basic workflow beautifully, from picking your materials to getting them ready for the sewing machine.
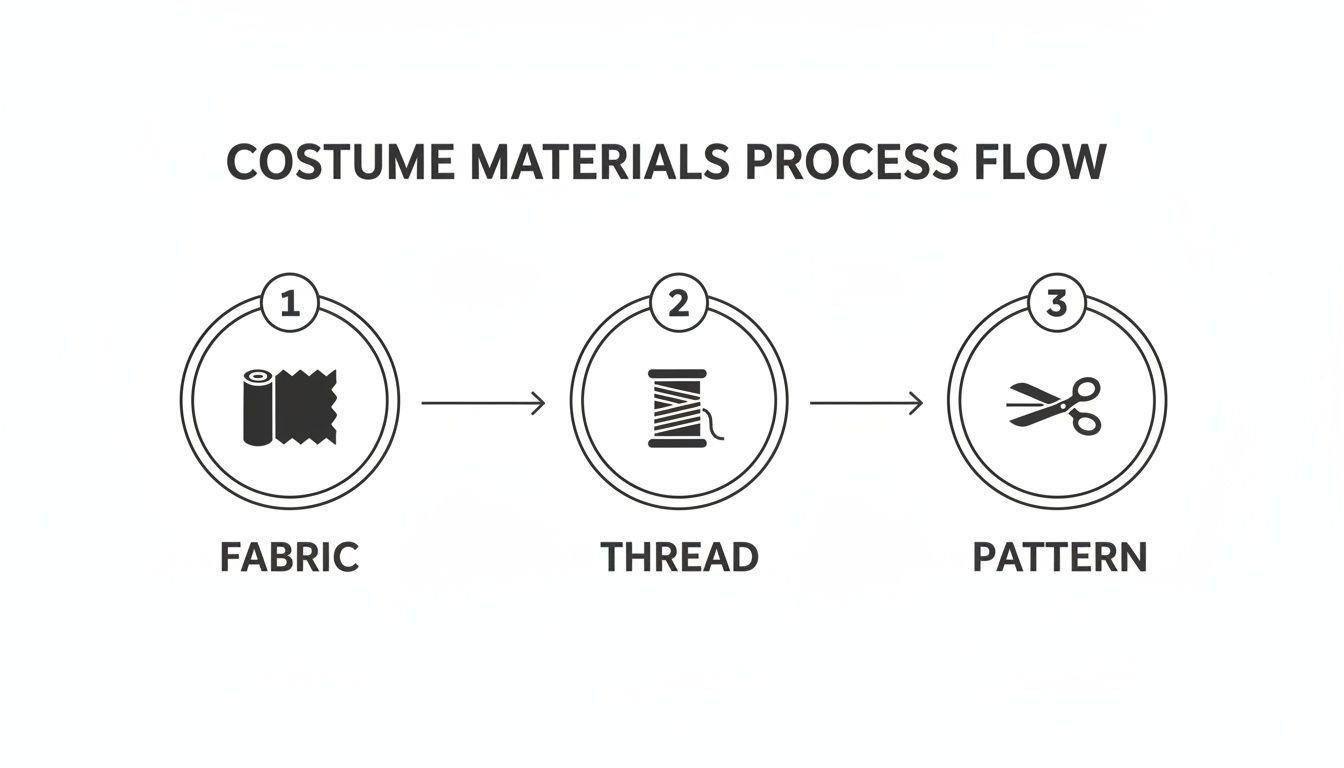
Nailing this simple flow—fabric, thread, and cutting—is really the secret to a smooth, stress-free sewing project.
Assembling the Main Bodysuit
First up is the bodysuit. I always start by sewing the shoulder seams first, which joins the front and back pieces. This lets you lay the whole thing out flat, making it much easier to attach the sleeves later on.
If you’re working with a stretchy fabric like fleece or minky, your zigzag stitch is going to be your best friend. A regular straight stitch has no 'give' and will snap the second your little one stretches or plays. A narrow zigzag, maybe 2.0 mm wide and 2.5 mm long, gives the seam just enough stretch to move with the fabric.
With the shoulder seams done, it's time for the sleeves. The key here is to match the centre notch of the sleeve cap perfectly with the shoulder seam. This is what prevents puckering and gives you a professional-looking shoulder. Don't be shy with the pins!
A quick tip from experience: Even if you're using fleece that doesn't fray, I strongly suggest finishing your seams. A quick pass with a serger or even just a wide zigzag stitch along the raw edges makes the inside of the costume look so much cleaner. More importantly, it adds a ton of durability for all the running and tumbling it's bound to endure.
Once the sleeves are attached, you can sew the long side seams, starting at the sleeve cuff and going all the way down to the ankle in one go. See? It’s already starting to look like a real garment!
Installing a Zipper for Easy Wear
For a kids' costume, a zipper is almost always the most practical choice. A front zipper is generally the simplest to install, though a back zipper can give you a slightly cleaner, more seamless look.
Here's a straightforward way to put one in:
- First, press the seam allowance where the zipper will go to the wrong side of the fabric.
- Next, place the zipper underneath this opening, get it centred just right, and pin it securely.
- Using a zipper foot on your machine, just stitch down both sides, staying close to the zipper teeth.
This topstitching method is fantastic for stable fabrics. If your material is super stretchy, you might want to iron a thin strip of lightweight interfacing along the opening first. This little trick works wonders to stop the fabric from stretching out and creating waves as you sew.
Crafting Perky Cat Ears
You can't have a cat costume without the ears! The secret to making them stand up and look perky instead of floppy is a good, stiff fusible interfacing.
You’ll need to cut four ear pieces from your main fabric and two from your interfacing. If you're adding a different colour for the inner ear, cut two of those as well. Start by ironing the interfacing onto the wrong side of two of the main fabric pieces.
Now, take one interfaced piece and place it right-sides-together with a non-interfaced piece. Sew around the two long, pointed sides, but leave the flat bottom edge open. Before you turn it, snip the corner at the very tip to get rid of some bulk. Then, turn the ear right-side out, give it a good press, and you’re halfway there.
You can pop these finished ears onto a simple fabric-covered headband, or if your costume has a hood, just sew them right into the seam for an integrated look.
Making a Fun, Swishy Tail
The tail is what really brings the character to life! Cut a long tube from your fabric—a good rule of thumb for length is about two-thirds of your child’s height.
Fold this tube in half lengthwise with the right sides facing in. Sew along the long edge and one of the short ends, making either a point or a gentle curve at the tip. Leave the other end open.
Turning a long, skinny tube like this can be a bit fiddly. A loop turner tool is a lifesaver here, but a large safety pin attached to one end works just as well. Once it's right-side out, it's time for stuffing. Use small bits of Poly-Fil at a time, pushing them down with a ruler or a wooden dowel to make sure it fills evenly without getting lumpy.
To attach it, tuck the raw edges of the open end inward and hand-sew it securely to the back of the bodysuit. Use a strong thread and go around the base of the tail a few times to make sure it can withstand being pulled and played with.
Interestingly, this kind of project taps into a huge trend. There are 6.2 million pet-owning households in Canada, and the love for our furry friends is spilling over into kids' costumes. Creating a custom cat costume fits right into this, with so many families loving the idea of matching outfits for their kids and pets. In fact, analysis shows Canada’s pet costume market is expected to reach $45 million in 2025 and grow to $90 million by 2032. You can read more about this amazing growth in the pet costume market here.
Finishing the Cuffs and Neckline
The last bit of construction is cleaning up the raw edges at the wrists, ankles, and neckline. The quickest way is to simply fold the edge under twice and topstitch it down. Easy.
For a more polished finish, you could add cuffs and a neckband from a stretchy rib-knit fabric. This not only looks great but also creates a snug, comfy fit that keeps sleeves from slipping down. Once these final touches are done, the main construction is complete
Adding Personality with Finishing Touches
With the main bodysuit, ears, and tail all sorted, your kid’s cat costume is really starting to look the part. Now for the fun bit—sprinkling in the charm that transforms it from a simple outfit into a character bursting with personality. Honestly, these little details are what make a homemade costume truly special.
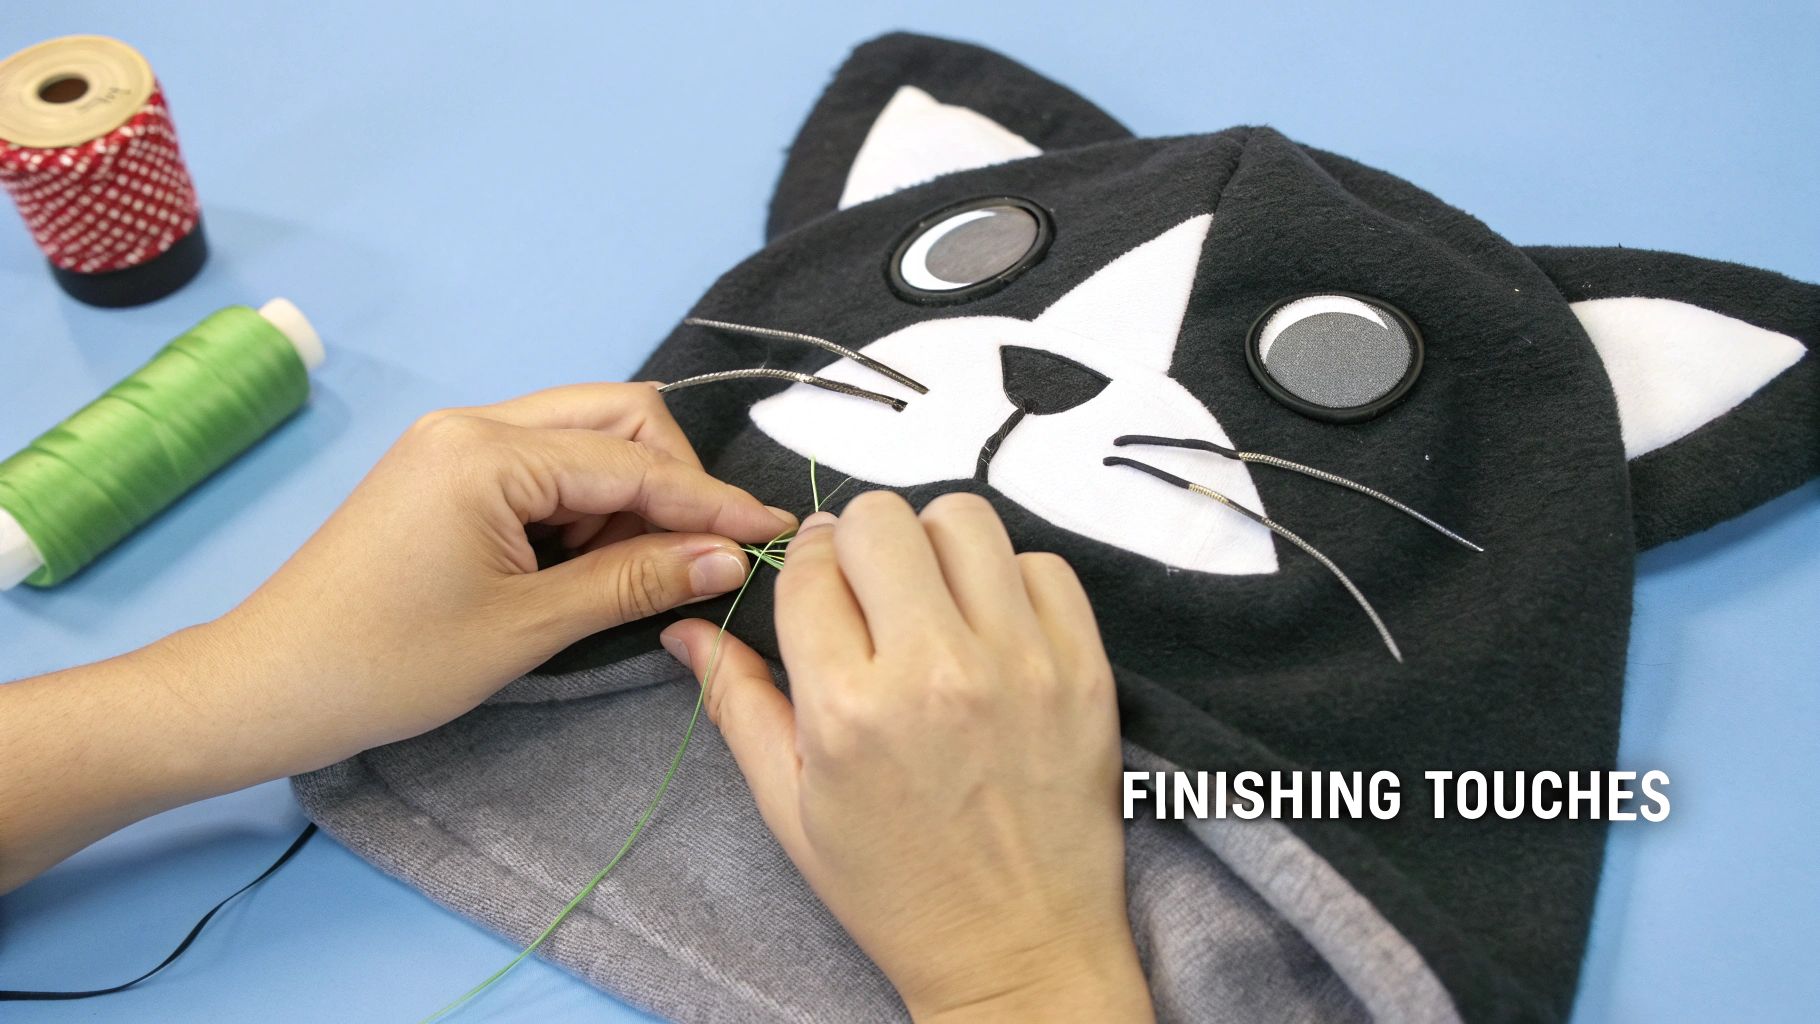
This is where you get to be creative. Whether you’re going for a sweet little kitten or a mischievous tabby, these final touches will bring your vision to life. Let's walk through a few simple but really effective ways to add those adorable features.
Creating a Cute Cat Face
The face is everything, isn't it? It’s the focal point, and there are so many ways you can go about it, depending on your skill level and the look you want. You don’t need to be an expert embroiderer to make something incredibly cute.
Often, a simple felt appliqué is the quickest and easiest way to get a great result. A small, pink felt triangle makes a perfect nose. Just cut it out, pop it on the hood, and secure it with a neat whipstitch or even a blanket stitch using some matching embroidery floss.
For the whiskers, you’ve got a few great options:
- Embroidery: A simple backstitch with black or white embroidery floss works wonders. Just stitch three or four straight lines fanning out from either side of the nose. It's durable and totally safe for even the littlest kids.
- Felt Strips: If you want a bit more dimension, cut some very thin strips of black or grey felt and stitch them down securely right in the centre.
- Fabric Paint: Not keen on tiny stitching? A steady hand and some good-quality fabric paint can create sharp, clean whisker lines.
You can add expressive eyes with felt cutouts, too—simple ovals or crescents look beautiful. If you’re feeling a bit more ambitious, a satin stitch with embroidery floss can create shiny, lifelike eyes that really pop.
A little trick I love for a super clean look is to use a double-sided, fusible adhesive like Heat'n Bond. You just iron it onto the back of your felt, cut out your shapes, peel off the paper, and iron them onto the costume. I still like to do a quick decorative stitch around the edges to make them extra secure and add a lovely, polished detail.
Adding Adorable Paw Pads
To really take your costume to the next level, don't forget the paws! Adding simple paw pads to the sleeves or on a pair of separate mittens gives the whole costume a delightful, finished feel.
For each paw, cut one large oval and three or four smaller circles from a contrasting colour of felt or fleece. Pink on a black or grey costume is a classic choice that always looks sweet. Just arrange them on the ends of the sleeves or on the palm area of a mitten and stitch them in place.
This is one of those details that kids go wild for, especially when they hold up their hands to show off their "paws." It’s these small, interactive elements that make a costume so much more fun to wear.
The Classic Tummy Panel
A contrasting tummy panel is another one of those iconic details that adds instant charm. It’s a simple addition that breaks up the main colour and gives the costume so much more visual interest.
To make one, just sketch a large oval or a soft, rounded rectangle onto some paper first. Hold it up to the front of the bodysuit to get the size and placement just right before you cut into your fabric. A white or a lighter shade of your main colour usually works great.
Pin the panel securely onto the front of the bodysuit, making sure to tuck the raw edges under by about a centimetre. A simple topstitch all the way around is all you need to attach it. A zigzag stitch can also be a nice decorative touch here.
This one detail does so much to elevate the overall look, giving it that professional, store-bought quality but with all the love of something you made yourself.
Customizing Your Cat Character
Now’s your chance to get really creative and tailor the costume to whatever your child is dreaming up. Is their cat a striped tabby, a spotted leopard, or maybe even a magical rainbow cat?
- For Stripes: Cut long, slightly wavy strips of fabric and appliqué them onto the back and tail.
- For Spots: Use felt and cut out various organic shapes to create a cheetah or leopard pattern.
This is what makes a DIY costume so special. It also reflects a huge trend. In Canada, as more families get pets, we're seeing a creative boom in pet-inspired themes. The Canadian pet costumes market is projected to surge from $25 million in 2019 to over $90 million by 2032. It just goes to show how much families love this kind of fun! You can discover more insights about this fascinating market growth on datainsightsmarket.com. Your little cat costume project taps right into that spirit of creative, animal-themed play.
Getting the Perfect Fit (and Keeping It Safe)
A brilliant kids' cat costume is more than just cute ears and a tail—it has to be comfortable and safe. An outfit that’s too tight, too loose, or just plain awkward can put a damper on the fun pretty quickly. Let’s take a few moments to get the sizing just right so your little one can pounce, play, and prowl without a single costume complaint.
This is all about tailoring the costume to your child, not the other way around. We'll walk through how to measure properly, tweak your pattern for a bespoke fit, and keep some really important safety tips in mind.
Taking Accurate Measurements
Before you even think about picking up your scissors, grab a measuring tape. It’s tempting to just go by their usual clothing size, but we all know how different brands can be. For a truly comfy costume, you need your child's real-time measurements.
Ask your child to stand as naturally as possible. You want the tape measure to be snug, but not digging in.
- Chest: Measure around the fullest part of their chest, keeping the tape just under the armpits.
- Waist: Find their natural waist—it’s usually the narrowest part of their torso—and measure around it.
- Hips: Wrap the tape around the widest part of their hips and bum.
- Torso Length: This one is a game-changer for bodysuits! Measure from the big bone at the base of the neck, down the front, to the crotch. It stops any uncomfortable pulling.
- Inseam: Simply measure from the crotch down the inside of the leg to their ankle bone.
Now, take these numbers and compare them to your pattern’s sizing chart. Don't be surprised if your child is a size 4 in height but a size 5 in the chest—that's completely normal and exactly why we adjust patterns!
Adjusting the Pattern for a Custom Fit
Altering a pattern can sound intimidating, but I promise it's not. Most patterns have printed "lengthen/shorten" lines right on the paper pieces, which makes your job so much easier.
If you need to add length to a sleeve or pant leg, just cut the pattern along that line. Slide the two pieces apart by the amount you need and tape a scrap of paper in the gap to bridge them. To shorten a piece, you do the opposite: fold the pattern along the line to overlap and remove the extra length, then tape it down.
Need a little more room in the tummy? That's simple, too. You can add a bit of width along the side seams. Just remember to add the same amount to both the front and back pattern pieces to keep it all balanced.
My absolute best tip for a flawless fit? Make a quick and rough version—what we call a "muslin"—out of some cheap fabric first. It lets you spot-check the fit and make changes before you cut into that lovely, more expensive material.
Practical Tips for a Safe and Comfy Costume
A great kids' costume also needs to be practical. Here in Canada, we know Halloween night can get chilly, so I always build in some flexibility.
Using elastic in the waistband or cuffs is a great trick. It allows the costume to be pulled on easily over a warm base layer and gives them a bit of growing room, so you might even get another year of dress-up out of it.
Of course, safety is always number one. Make sure the costume isn't so long that it becomes a tripping hazard. More importantly, if your costume has a hood or mask, double-check that it doesn't block their peripheral vision. Kids need to see clearly, especially when crossing streets.
For little ones, be extra careful with add-ons. If you're using bells, buttons, or other small decorations, make sure they are sewn on securely so they don't become a choking hazard. And whenever you can, opt for flame-resistant fabrics.
Answering Your Cat Costume Questions
Even the most seasoned sewist runs into a little head-scratcher now and then. When you’re deep in a project like a kids’ cat costume, a few questions are bound to pop up. I’ve heard just about all of them, so I’ve gathered the most common ones here to help you get unstuck and back to the fun part.
Think of this as your personal troubleshooting guide. We'll tackle the bits that often cause the most grief—like perky ears and a sturdy tail—so you can sew with confidence, whether you're using a machine or stitching by hand.
What's the Best Fabric for a Kids' Cat Costume?
Honestly, the best fabric depends on where you live and the look you're going for. For a classic chilly Canadian Halloween, you just can't beat fleece or minky. They’re cozy, super soft, and a dream for beginners because they have a bit of stretch and don’t fray much. They give you that perfect, cuddly kitten vibe.
If the costume is for an indoor party or you're lucky enough to have a warmer trick-or-treating night, a good cotton knit or even a sturdy flannel are fantastic choices. They're much more breathable but still comfy enough for a kid on the move. My biggest piece of advice for newcomers? Stay away from slippery fabrics like satin. They can be a real headache to work with and might just frustrate you.
How Do I Make the Cat Ears Stand Up Straight?
Ah, the floppy ear problem! It can really deflate the whole look, but the fix is simple: stiff fusible interfacing. This stuff is my secret weapon for perfectly perky ears. Before sewing your ear pieces together, just iron a piece of interfacing to the wrong side of one of the fabric cuts for each ear.
That simple inner layer gives the fabric the backbone it needs to stand tall once you've stitched the two sides together. If you're using a heavier fabric or just want extra insurance, you can even slip a small piece of craft foam inside before sewing the bottom shut. It adds great structure without any real weight, so the ears will stay up through a whole night of fun.
The real trick is in the prep work. Taking a moment to add interfacing before you even start stitching is a tiny step that makes a world of difference to how your finished costume looks.
How Can I Securely Attach the Tail?
A droopy tail is a common costume fail, and a lost one is even worse! The key is to create a solid anchor point, not just tacking the tail onto a single layer of fabric.
Here's what I do: sew a small, square patch of a tough, non-stretch fabric (like a scrap of denim or canvas) onto the inside of the costume, right where you want the tail to go. Then, from the outside, you’ll hand-sew the base of the tail right through the costume fabric and that reinforcing patch. I recommend using a heavy-duty upholstery thread and stitching around the base a few times. That tail won’t be going anywhere, no matter how much it gets tugged on.
Can I Make This Costume Without a Sewing Machine?
You absolutely can! A sewing machine is a time-saver, for sure, but a kids' cat costume is a wonderful project to do completely by hand. All you need is a good hand-sewing needle and some quality, all-purpose thread.
For your main seams, the backstitch is your new best friend. It’s incredibly strong and looks a lot like a machine stitch. When it comes to adding details like a nose, paw pads, or a tummy patch, a simple whipstitch or a blanket stitch works beautifully and adds a really lovely, handmade charm. There’s something so relaxing and rewarding about creating a costume stitch by stitch.
Here at All About Sewing, we’ve got all the materials, tools, and friendly advice you need to get creating. From beginner-friendly fleece to professional-grade notions, you can find everything for your next sewing adventure in our shop.


