Sew Your Dream Dress A Guide to the Perfect Maxi Dress Pattern
A great maxi dress starts with a great pattern. Think of it as the blueprint for a garment you'll reach for again and again. The goal is to find a design that balances style with your sewing skills and the perfect fabric—something that doesn't just look good on the envelope, but feels like you when you wear it.
How to Choose Your Perfect Maxi Dress Pattern
Finding the right pattern is easily the most important first step. This isn't just about picking a pretty picture; it’s about being honest about your sewing level, knowing what shapes you love to wear, and understanding how a flat paper pattern translates to a three-dimensional dress on your body. Get this part right, and you're setting yourself up for a really enjoyable project.
One of the first things you'll decide is whether to go with a pattern from a large company (like McCall's, Simplicity, or New Look) or from an independent, or "indie," designer. They each have a different vibe.
- The "Big 4": These are the brands you’ll see in the big catalogues at the fabric store. They have a massive selection and are usually more affordable. Their instructions can sometimes be a bit sparse, as they often assume you've got some sewing experience under your belt.
- Indie Designers: Think of brands like Closet Core Patterns or Helen's Closet. They tend to offer incredibly detailed instructions with photos for every step, almost like a mini-sewing class in a booklet. They also cultivate strong online communities around their specific design aesthetic.
Digital patterns have completely opened up the world for Canadian sewists, and indie designers are really shining in this space. While indie brands are growing worldwide, many Canadian pattern houses have become local heroes. They offer timeless designs like the Cielo Dress or Myosotis Dress that are perfect for hacking into stunning maxis. If you're curious, you can learn more about the vibrant Canadian sewing scene to discover your next favourite designer.
Decoding the Pattern Envelope
Treat the pattern envelope like your project’s command centre. It’s packed with all the critical info you need before you even cut your fabric. Don't just look at the photo—spend a few minutes reading the back.
First, find the body measurement chart. This is where you’ll determine your starting size. It's so important to take your actual measurements (bust, waist, and hips) and compare them to this chart. Forget about your usual store-bought clothing size; pattern sizing is a totally different system.
Next, hunt for the finished garment measurements. This chart tells you the final dimensions of the dress once it's sewn. The difference between your body measurements and the finished garment measurements is the ease—that's the extra room included for comfort and movement. A flowy, oversized style might have 15 cm of ease at the bust, while a fitted bodice might only have 5 cm.
Pro Tip: Understanding ease is the key to getting a fit you love. If the pattern photos look a bit looser than you'd like, you might be able to size down. Want it extra breezy? You could size up or grade between sizes. This concept is a total game-changer.
A Look at Popular Indie Maxi Dress Patterns
Indie designers offer some truly fantastic maxi dress patterns, each with its own unique flair. Here’s a quick comparison to help you find a style that speaks to you.
| Pattern Name | Designer | Style/Silhouette | Recommended Skill Level | Best Fabrics |
|---|---|---|---|---|
| Charlie Caftan | Closet Core Patterns | Caftan with deep V-neck, inset centre panel, and optional waist ties | Confident Beginner | Light- to medium-weight wovens like linen, cotton lawn, rayon challis |
| Zadie Jumpsuit | Paper Theory | Wrap-style with wide legs (easily styled as a dress) | Advanced Beginner | Woven fabrics like linen, viscose, Tencel, or crepe |
| Myosotis Dress | Deer and Doe | Tiered shirt dress with collar stand and button placket | Intermediate | Lightweight wovens with drape, such as rayon, Tencel, or viscose crepe |
| Gilbert Top | Helen's Closet | Button-up camp-style shirt easily hacked into a maxi dress | Advanced Beginner | Lightweight wovens like cotton poplin, linen, or chambray |
This is just a small sample, of course. The indie pattern world is huge and full of creative designs perfect for your next maxi dress project.
Finding a Silhouette for Your Style
Maxi dresses come in so many beautiful shapes. The best one for you is simply the one that makes you feel amazing.
Here are a few popular styles to consider:
- A-Line: This is a true classic. It's fitted through the bodice and then gently flares out to the hem, skimming over the hips in a really flattering way. It's a go-to for a reason!
- Tiered or Gathered: If you love a romantic, boho look, this is it. These dresses use multiple gathered panels to create tons of volume and beautiful movement. A great example of a dramatic tiered look is McCall's M8506.
- Fit-and-Flare: This silhouette nips in at the waist before flaring out into a full skirt, creating that classic hourglass shape. New Look 6665 is a lovely version that uses pleats to add even more fullness.
- Sheath or Column: For a more modern, streamlined vibe, a sheath or column dress follows the body's curves without a lot of extra flare. It’s an effortlessly chic and sophisticated option.
Think about where you'll be wearing your dress. Are you picturing a casual linen maxi for a beach trip, or do you need something more elegant in silk for a summer wedding? The silhouette you choose, combined with your fabric, will really set the tone.
Mastering the Fit Before You Cut
The secret to a stunning maxi dress? It’s all in the fit. And that perfect fit doesn’t happen at the sewing machine—it happens long before your scissors ever touch that beautiful fabric you’ve been saving. This is where you take a standard paper pattern and truly make it your own.
Think of a commercial pattern as a starting point, not a final blueprint. It's totally normal to find that your bust fits a size 14, your waist is a 12, and your hips are a 16. Honestly, almost nobody fits one size perfectly right out of the envelope. This is where the real fun of sewing begins.
Taking Accurate Body Measurements
First things first, grab a flexible measuring tape. For the best results, get a friend to help you, as it’s tricky to get accurate numbers on your own.
- Bust: Measure around the fullest part of your bust. Make sure you're wearing the kind of bra you plan to wear with the finished dress.
- Waist: Find your natural waist, which is usually the smallest part of your torso. Don't suck in! Just measure comfortably.
- Hips: Wrap the tape around the fullest part of your hips and bum. This is super important, especially for styles that are more fitted through the hips.
- High Bust: Measure right under your armpits, above your bust. This number is the key to figuring out if you need to do a bust adjustment later on.
Once you’ve got your numbers, compare them to the chart on the back of the pattern envelope. Don’t panic if your measurements fall into two or three different sizes. That’s my reality, and it's where the magic of blending sizes comes in.
This quick visual shows how your measurements bridge the gap between picking a style and choosing your fabric.
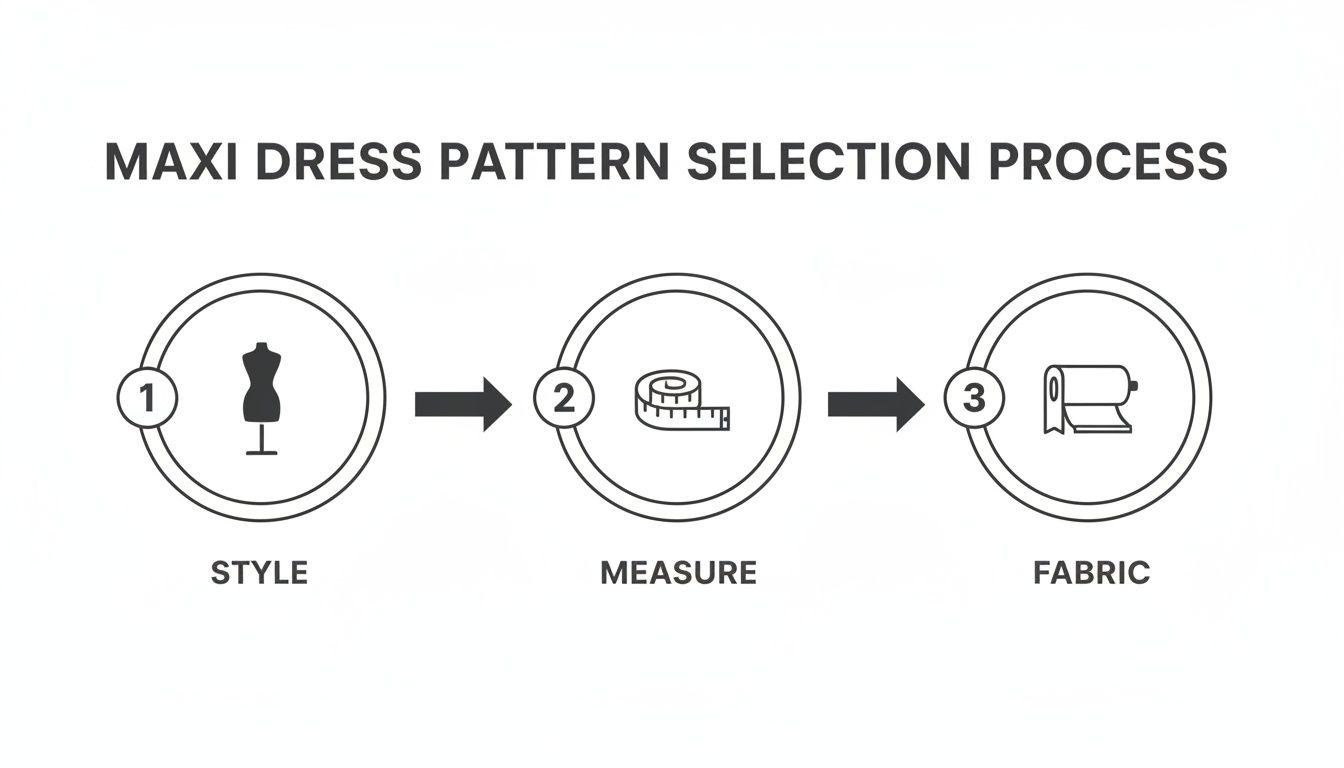
Getting this part right ensures everything that follows—from fabric shopping to the final stitch—goes smoothly.
Blending Between Sizes
"Grading" or blending between sizes sounds intimidating, but I promise it's not. Let's imagine your bust is a size 14 and your waist is a 12. You'll start by tracing the size 14 lines around the armhole and bust. Then, using a curved ruler or just a steady hand, you'll draw a smooth new line connecting down to the size 12 line at the waist.
It’s the same process if you need to go from a size 12 waist to a size 16 hip. The goal is a gentle, natural-looking curve, not a sharp, pointy angle. This one little skill is a total game-changer for getting a custom fit.
The Non-Negotiable Toile
A toile (or a muslin, as it’s often called) is just a practice version of your dress made from cheap fabric. Trust me on this: skipping this step is one of the biggest mistakes you can make, especially with a more fitted maxi dress. It feels like an extra step, but wasting a few dollars on some scrap fabric can save you from ruining that gorgeous, expensive bolt you fell in love with.
You don't even have to make the whole dress! A "bodice toile" that ends around your hips is often all you need to check the most important fit points:
- How the bust, shoulders, and neckline sit.
- If the waistline hits you at the right spot.
- Whether the armholes are comfortable or cutting into you.
Whipping up a quick toile lets you see exactly how the pattern works on your body. You might discover the bust darts are way too high, the waist is too low, or you need a bit more room across your back. These are all easy fixes on a toile but an absolute nightmare to deal with on your final dress.
One of my students found that even though she followed the pattern perfectly, the finished bodice was too short for her larger bust. For her next version, she plans on lengthening the bodice by two to three inches—a simple tweak she would have caught instantly with a quick toile.
Common Pattern Adjustments
After you’ve diagnosed the fit issues on your toile, it's time to alter the paper pattern. The Full Bust Adjustment (FBA) is probably the most common one out there. If your full bust is more than two inches larger than your high bust, you'll likely need an FBA. It cleverly adds room just at the front of the bodice without making the shoulders or back bigger, getting rid of that dreaded pulling and gaping.
Another big one is lengthening or shortening. Most patterns are drafted for someone who is about 5'6". If you're taller or shorter, you’ll need to make some changes. Look for the "lengthen/shorten" lines on your pattern pieces—there’s usually one on the bodice and a couple on the skirt. Adding or removing length at these specific lines keeps the whole design in proportion. It's these small adjustments that take your maxi dress from looking homemade to looking like it was made just for you.
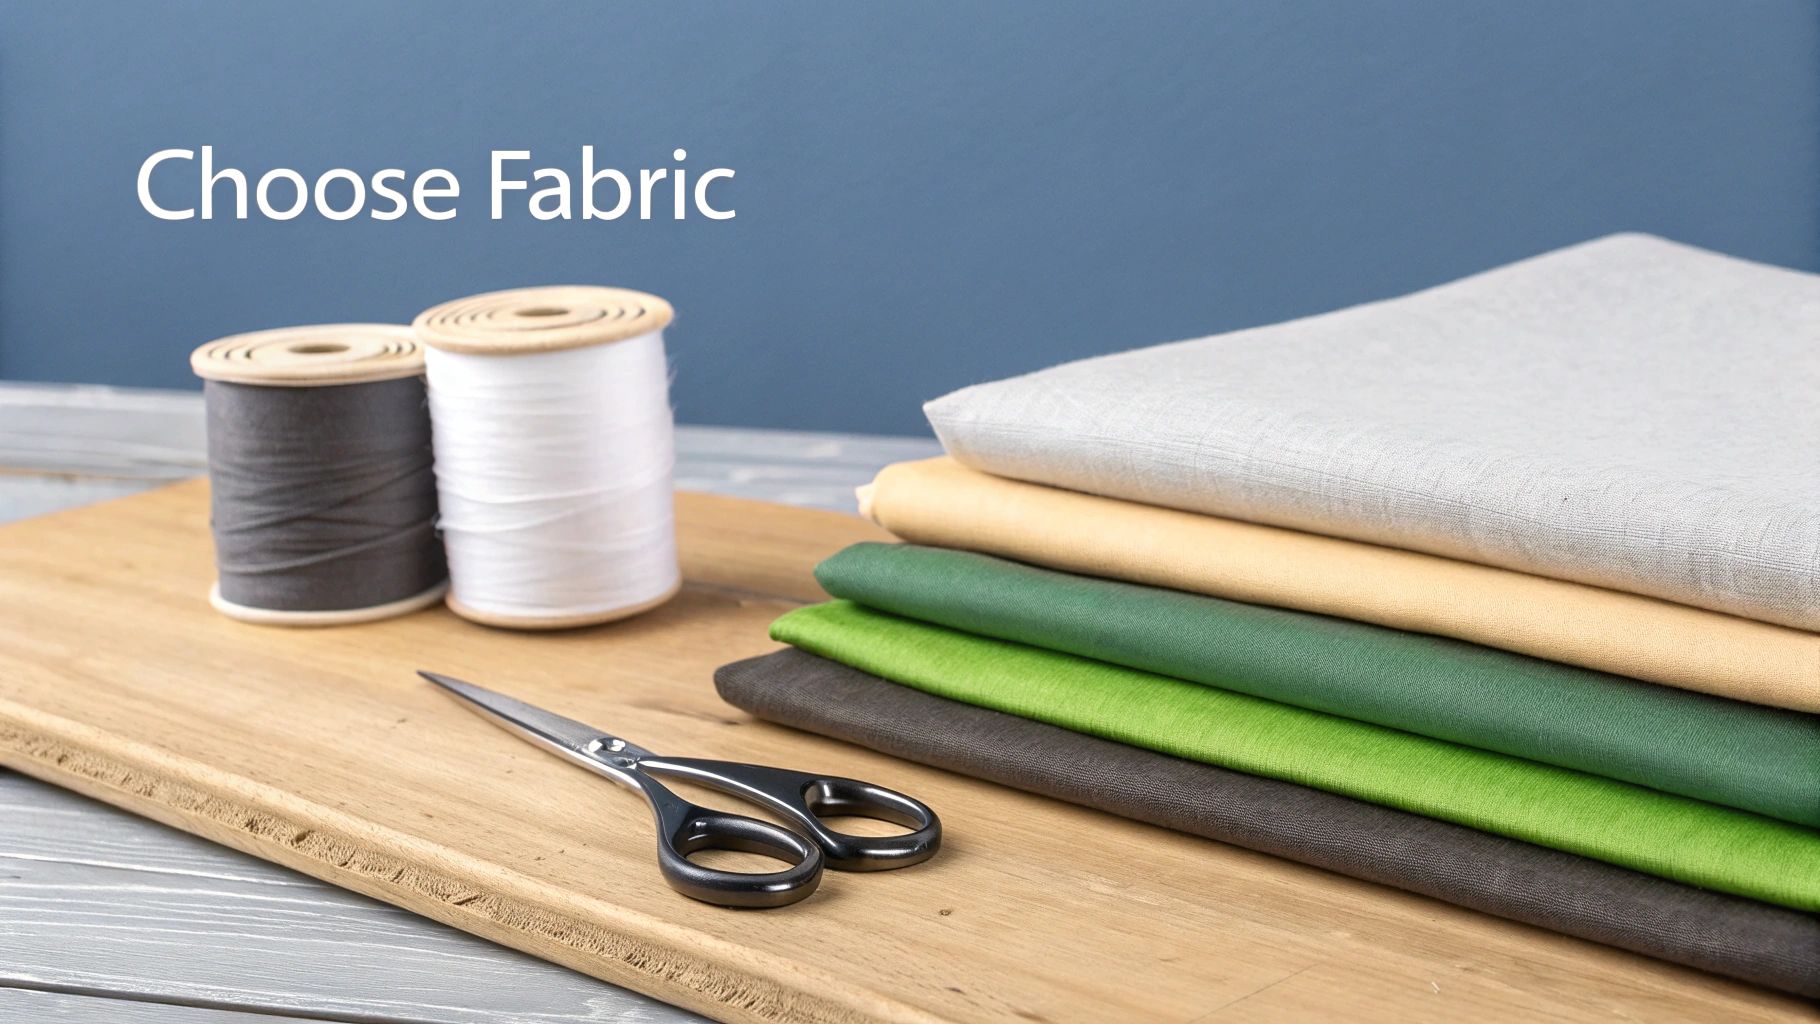
Finding the Right Fabric and Notions
So, you’ve got your maxi dress pattern tweaked and ready to go. Now for the fun part: choosing the fabric and notions that will really bring your vision to life. This is where the magic happens! The fabric you pick is the soul of your dress—it determines how it hangs, how it feels, and the overall vibe it gives off.
Think of it this way: a pattern designed for a flowy, drapey fabric like rayon just won't look right if you make it in a crisp, stiff cotton. It might not even hang properly. The pattern and the fabric need to be a team.
Fabric Choices for Every Style
The style of your maxi dress is your biggest clue for what fabric to buy. A floaty, tiered dress begs for something lightweight with beautiful movement, while a more structured design might need a fabric with a little more body.
Here are some of my go-to options:
-
For a Dreamy Drape: When you want that gorgeous, fluid look, reach for rayon challis, viscose, or Tencel. These fabrics are lightweight and move like a dream, making them perfect for gathered skirts and romantic styles. Imagine a simple tiered dress made up in a stunning geometric rayon challis—it's an instant showstopper.
-
For Breathable Structure: If you need a fabric that holds its shape a bit more, look no further than linen or cotton poplin. A midweight European linen, for example, is fantastic for a fit-and-flare maxi. It gives the skirt enough body to look full and intentional while still feeling incredibly comfortable and cool.
-
For Everyday Comfort: You can't go wrong with cotton lawn or voile for a breezy summer maxi you'll want to live in. They are wonderfully lightweight, super soft, and a pleasure to sew and press, which makes them a great pick if you're a confident beginner.
The love for these dresses isn't just a home-sewing thing; it's a huge retail trend. In Canada, sales of women's dresses and suits hit about 383.05 million Canadian dollars in a single quarter recently. This massive figure shows just how much people love styles like the maxi. You can dive deeper into the data on this robust market, which is projected to grow to $8.6 billion by 2026.
Your Complete Notions Checklist
Once you've fallen in love with a fabric, it's time to gather its supporting cast: the notions. These are all the little bits and bobs you'll need to construct your dress professionally. Trust me, having everything you need before you start sewing makes the whole process so much more enjoyable.
Here’s what you'll want to have on hand:
- Thread: Always go for a high-quality, all-purpose polyester thread (like Gütermann) that matches your fabric colour.
- Needles: Start with a fresh machine needle that's right for your fabric. A universal 70/10 or 80/12 is great for most light- to mid-weight wovens, but you might want a microtex needle for very fine, delicate materials.
- Closures: Your pattern will tell you exactly what you need. It's often an invisible zipper, so just be sure to get the length specified on the pattern envelope.
- Interfacing: For areas that need a little extra stability, like facings, collars, or button plackets, you'll need interfacing. A good rule of thumb is to choose a weight that's slightly lighter than your main fabric.
- Marking Tools: A chalk pencil or a disappearing ink pen is a must-have for transferring important pattern markings like darts and notches onto your fabric.
- Cutting Tools: There's no substitute for sharp tools. A good pair of fabric shears or a rotary cutter and mat are essential for getting clean, accurate cuts.
A Crucial Reminder: Don't skip the pre-wash! Just about every fabric, especially natural fibres like cotton, linen, and rayon, will shrink the first time you wash it. Tossing your fabric in the wash and dryer before you cut means your finished dress will still fit perfectly after its first real laundering.
Matching Fabric to a Pattern
Let's look at a couple of real-world examples. Say you’re making a pattern like the New Look 6665, which is a fit-and-flare dress with pleats. The pattern envelope suggests fabrics like chintz, cotton types, and linen. A midweight linen would be a fantastic choice here; it has the structure to make those pleats look sharp, but still enough drape for the skirt to move beautifully.
On the other hand, for a voluminous, tiered pattern like McCall's M8506, a lightweight rayon challis is the perfect partner. Its fluid drape lets all those gathers hang gracefully without adding a lot of bulk, giving you that effortless, breezy look the pattern was designed for. This kind of thoughtful pairing is really the secret to a successful project.
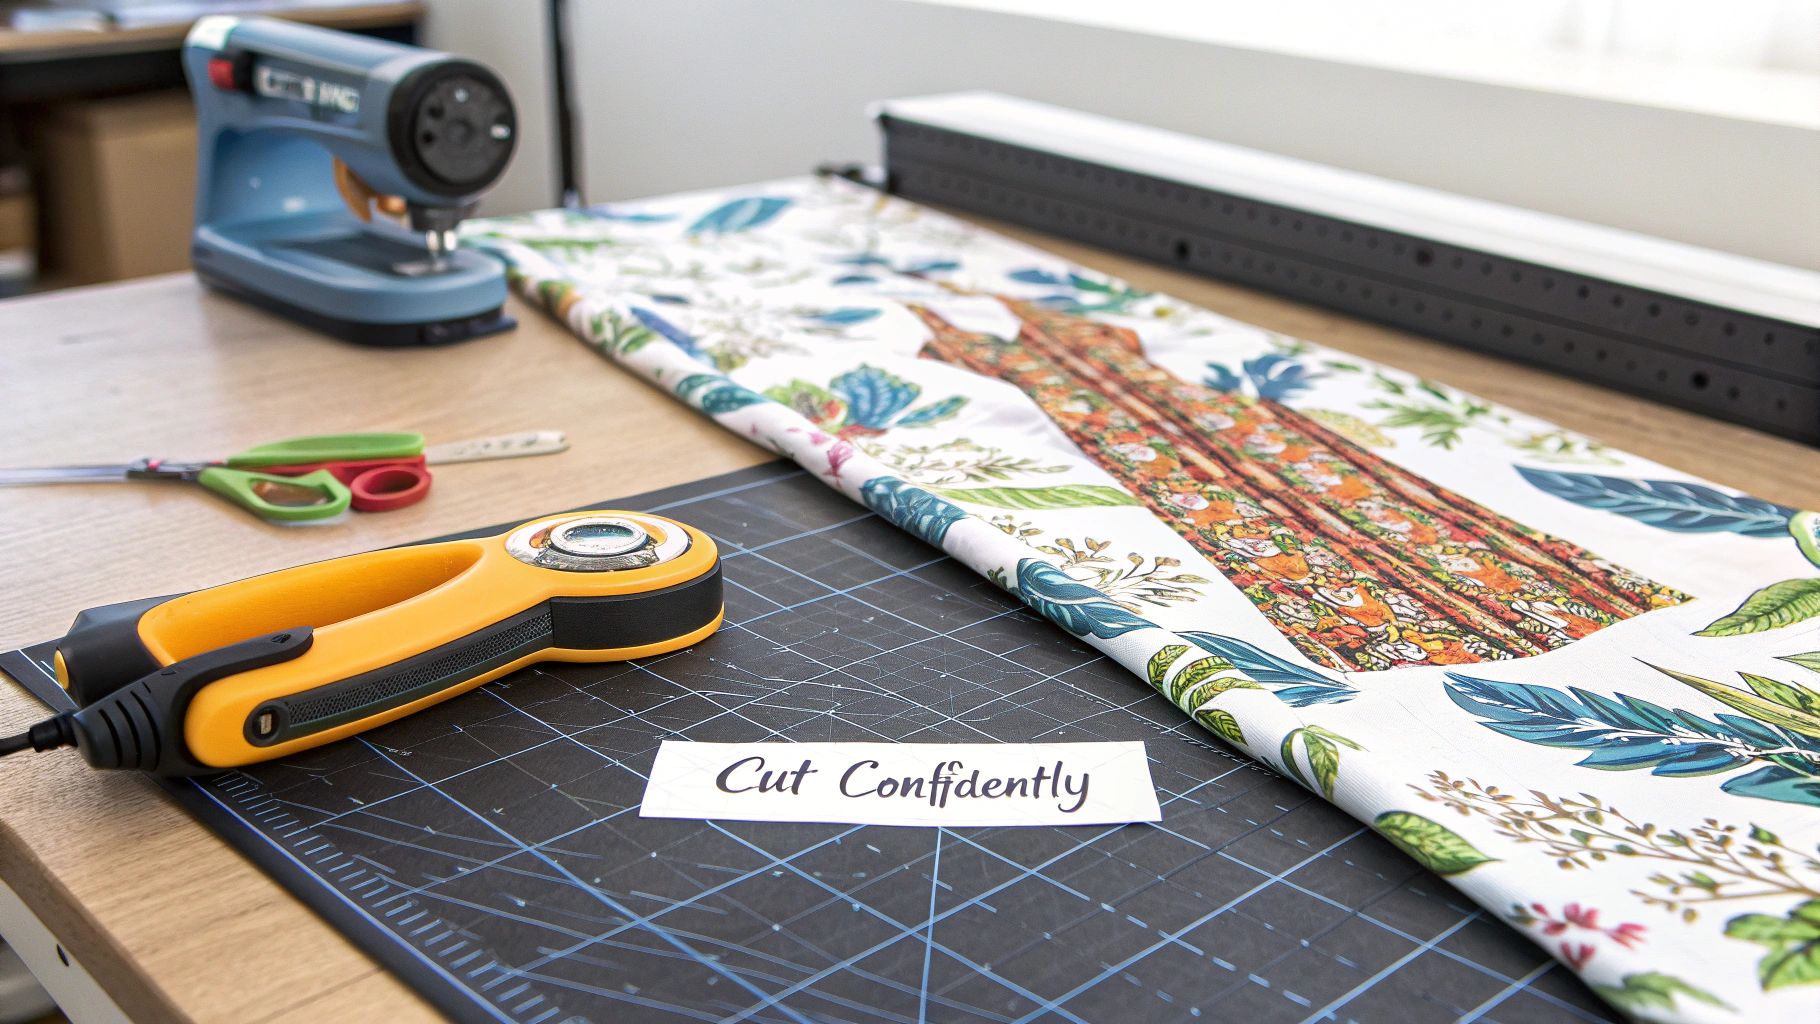
Getting Your Fabric Prepped and Cut
You've got your pattern altered and your dream fabric in hand. Now comes the part where your project really starts to take shape: the cutting table. This is one of those moments where a little extra care goes a long way. Taking your time here sets you up for a smooth sewing process, so let's get it right.
First things first, press your paper pattern pieces. They’re probably full of creases from being folded up, and those folds can seriously mess with the size and shape of your final garment. A quick pass with a dry iron on a low heat setting will make them perfectly flat and ready to go.
Why the Grainline Is Non-Negotiable
On every pattern piece, you'll see a long arrow printed somewhere in the middle. That's the grainline, and it’s your most important guide for layout. It’s not just a suggestion—it dictates how the finished dress will hang. Getting this wrong can lead to a garment that twists or pulls strangely after it’s sewn.
To nail it, you need to make sure this arrow is perfectly parallel to the selvedge (the finished, non-fraying edge of your fabric). I always grab a small ruler and measure from the selvedge to the top of the grainline arrow, then do the same for the bottom of the arrow. If those two measurements are identical, you know your piece is perfectly on-grain.
Taming Those Long Cuts of Fabric
Let’s be honest, a maxi dress uses a lot of fabric, and wrestling with metres of it on a small cutting table can feel like a workout. My go-to trick is to only have the section I'm currently cutting on the table. Let the rest of the fabric hang off the side, supported by a chair or a clean laundry basket. This stops the weight of the excess fabric from pulling and distorting the piece you're trying to cut accurately.
This is especially critical if you're working with slippery fabrics like rayon or viscose, which are amazing for maxi dresses but notorious for shifting around. Consider swapping pins for pattern weights to hold your pieces down. They keep everything in place without snagging the delicate material.
A Pro Tip From My Sewing Room: For slinky fabrics, I almost always cut in a single layer rather than on the fold. Yes, it takes a little more time and space, but it's the only way to guarantee that your left and right pieces are truly identical and not skewed by a tiny shift in the fabric.
Shears vs. Rotary Cutter: The Great Debate
Every sewist has their favourite cutting tool. The truth is, both traditional fabric shears and a rotary cutter have their place.
- Fabric Shears: A sharp pair of shears offers incredible control, particularly when navigating curves. The trick is to keep the bottom blade resting on the cutting mat as you cut, using long, smooth snips to avoid a jagged edge.
- Rotary Cutter: When you have a self-healing mat, nothing beats a rotary cutter for speed and precision, especially on those long, straight cuts for the skirt hem. It's also my weapon of choice for slippery fabrics because it cuts without lifting or disturbing the material.
Many of us, myself included, switch between both depending on the task at hand. The best tool is simply the one that gives you the most confidence.
Don't Forget to Transfer Your Markings!
Once you've cut out your pieces, resist the urge to immediately whip off the paper pattern. You still need to transfer all the crucial markings—like dots, notches, and dart placements. These little symbols are your construction roadmap.
Here are a few easy ways to do it:
- Chalk or a Washable Marker: These are great for marking things like dart points directly onto the wrong side of the fabric.
- Tailor's Tacks: This is an old-school method for a reason. Using a loop of thread is perfect for delicate fabrics where you don't want to leave any marks.
- Clip the Notches: Instead of cutting little triangles out of your seam allowance, just make a tiny snip—less than 1 cm deep—into the fabric right where the notch is marked. It’s so much faster.
Putting in this groundwork now ensures that when you finally sit down at your sewing machine, every piece of your maxi dress will come together just as it should.
Bringing Your Maxi Dress to Life
All that careful prep work—the pattern adjustments, fabric choices, and precise cutting—has brought you to this moment. It’s time to finally sit down at your sewing machine and bring your beautiful maxi dress to life. This is where flat pieces of fabric transform into a real, wearable garment.
The secret to a professional-looking dress isn't just about sewing straight. It’s about giving the inside of the garment just as much love as the outside. Taking the time to finish your seams properly will not only make your dress last longer but will also give it that high-quality, boutique feel.
Choosing the Right Seam Finish
Raw fabric edges love to fray, especially after a few washes. How you finish them really depends on your fabric and what tools you have on hand.
- For a Quick and Clean Finish: If you have a serger, this is its moment to shine. Serging the raw edges of your seam allowances is fast, effective, and gives a tidy, professional look. It's my personal go-to for most woven fabrics like cotton and linen.
- For Delicate, Sheer Fabrics: When you're working with lightweight materials like rayon challis or silk, a French seam is the gold standard. This technique neatly encases the raw edges within the seam itself, creating a gorgeous, clean finish that’s perfect for fabrics that might be a bit see-through.
- For a Simple, No-Fuss Option: No serger? No problem. Most sewing machines have an overcasting stitch that does a similar job. A simple zigzag stitch along the raw edge of the seam allowance also works perfectly well to stop fraying in its tracks.
The love for sewing maxi dresses is strong across Canada, with many sewists finding inspiration in talented local indie designers. Brands like BC's Helen's Closet Patterns offer designs like the Gilbert Top, which can be easily hacked into a maxi dress. Meanwhile, Ontario's Emerald Erin focuses on lingerie patterns that are perfect for wearing under your flowy creations, and Montréal's Les Perlines offers beautifully romantic slip dress patterns. This creative energy is part of a larger North American trend where the demand for versatile maxi dresses has soared. For those interested in the business side of fashion, you can explore more on the Canadian women's clothing market.
Tackling Tricky Construction Steps
Every pattern has a few steps that ask for a little extra focus. Slowing down here will make a huge difference in how your final dress turns out.
One of the most common hurdles is getting a zipper to look neat and tidy. Whether your pattern calls for a regular or invisible zipper, preparation is key. Always apply interfacing to the fabric where the zipper will go to give it some stability. And trust me, using a dedicated zipper foot is non-negotiable for getting your stitches perfectly close to the zipper teeth.
My Personal Tip: When I'm installing an invisible zipper, I always press the zipper coils flat with a warm iron before I start sewing. This simple trick lets me get my needle much closer to the teeth, and the result is a truly invisible finish once the seam is closed.
Another game-changing technique is understitching. After sewing a facing (like at a neckline or armhole), you press the seam allowance toward the facing and stitch it down. It’s a simple step, but it works like magic, forcing the facing to roll neatly to the inside of the dress so it never peeks out.
The Art of the Perfect Hem
The hem is the final flourish on your maxi dress, and its length can make or break the whole look. Nothing screams "homemade" faster than a wonky, uneven hem.
First things first: before you even think about hemming, let your dress hang on a dress form or a hanger for at least 24 hours. This is especially crucial for any panels cut on the bias, as the fabric will naturally stretch and drop. After it has hung, you can level out the hemline for a perfectly even finish.
Here are a couple of my favourite hemming methods for a long dress:
- Narrow Rolled Hem: This is my top choice for lightweight, drapey fabrics. It creates a tiny, delicate edge that moves beautifully with the fabric. You can achieve this with a special rolled hem foot or by carefully sewing it in two passes.
- Standard Double-Fold Hem: A classic for a reason. Simply press the raw edge up by about 1 cm, then press it up again by 2-3 cm to hide the raw edge, and topstitch it down. It's a sturdy finish that works well on medium-weight fabrics like linen or cotton poplin.
Finally, the most important habit you can get into is to press at every single step. Pressing your seams open as you go makes your dress look crisp and professional. It might not be the most glamorous part of sewing, but it is absolutely essential for a polished result.
Common Questions About Sewing Maxi Dresses
Even the most seasoned sewist runs into questions when tackling a big project like a maxi dress. Let’s walk through some of the things that often come up, so you can approach your beautiful new dress with complete confidence.
How Much Fabric Do I Really Need?
This is probably the number one question I hear, and for good reason! A maxi dress can be a real fabric hog. The answer really depends on the style of your pattern, your specific size, and how wide your chosen fabric is.
A simple, straight-cut maxi might only call for three metres of fabric. But if you’ve fallen for a design with a big, tiered skirt, you could be looking at five metres or even more. Your pattern envelope is your best friend here—the chart on the back will give you the exact yardage you need for your size and fabric width.
My personal rule of thumb? Always, always buy an extra half-metre. Think of it as cheap insurance. It’ll save you from a disaster if your fabric shrinks more than expected in the wash or if you make a cutting mistake. Worst case, you have a little extra for a matching scrunchie or headband!
What's the Best Way to Hem a Curved Skirt?
Those beautiful, sweeping curved hems can be a bit intimidating. They love to pucker and ripple if you’re not careful. My favourite method for a clean, professional finish is a narrow rolled hem. It follows the curve beautifully without creating any bulk or weird waves.
You can do this easily with a rolled hem presser foot. Or, you can do it by hand: sew a line of stitches 1.5 cm from the raw edge, press the hem up along that line, then fold it in on itself one more time to hide the raw edge before topstitching it down.
Here’s a crucial tip: before you even touch that hem, let the finished dress hang for at least 24 hours. Fabric, especially anything cut on the bias, will stretch and drop under its own weight. Letting it hang first means you can even out the hemline after it has settled, avoiding a wonky, uneven finish.
Can I Add Pockets to My Maxi Dress Pattern?
Of course! And you absolutely should. Adding in-seam pockets is one of the simplest and most satisfying adjustments you can make to a pattern. If your chosen pattern doesn't come with them, you can easily "borrow" the pocket piece from another pattern you own or just find a free template online.
It's a pretty straightforward process:
- Cut out four pocket pieces—that's two pairs that mirror each other.
- With right sides together, attach one pocket piece to the side seam of the front skirt panel and another to the matching side seam on the back skirt panel.
- When you sew your main side seams together, you'll just sew down the side, around the pocket bag, and then continue down the rest of the seam.
For a really professional touch, try using a lightweight cotton lawn for the pocket bags themselves. This cuts down on bulk right at the hips, helping your dress hang smoothly.
How Do I Fix a Dress That's Too Long?
This is an easy fix, so don't panic! The first step is to try on the dress with the shoes you think you'll wear with it most often. Grab a friend or partner to help you pin up the hem to the perfect length, ensuring it's nice and even all the way around.
Once it's pinned, take the dress off and lay it flat. Use a ruler to measure from the pinned edge and mark a new, straight cutting line. Remember to add your hem allowance—usually about 2.5-5 cm. Carefully trim off the extra fabric, then just press and sew your new hem. It’s a simple adjustment that makes all the difference.
At All About Sewing, we have all the tools and notions you need to tackle any maxi dress pattern with confidence. From high-quality threads to specialty presser feet for that perfect hem, we're here to support your creative journey.
Explore our collection of sewing essentials.


