Cat Cross Stitch Patterns: cat cross stitch patterns for beginners
Finding the perfect cat cross stitch pattern is all about capturing that unique feline charm while matching a design to your own stitching style. From sleek, modern silhouettes to incredibly detailed, photorealistic portraits, the right pattern makes for a rewarding project you’ll be proud to hang on your wall.
How to Find the Right Cat Cross Stitch Pattern
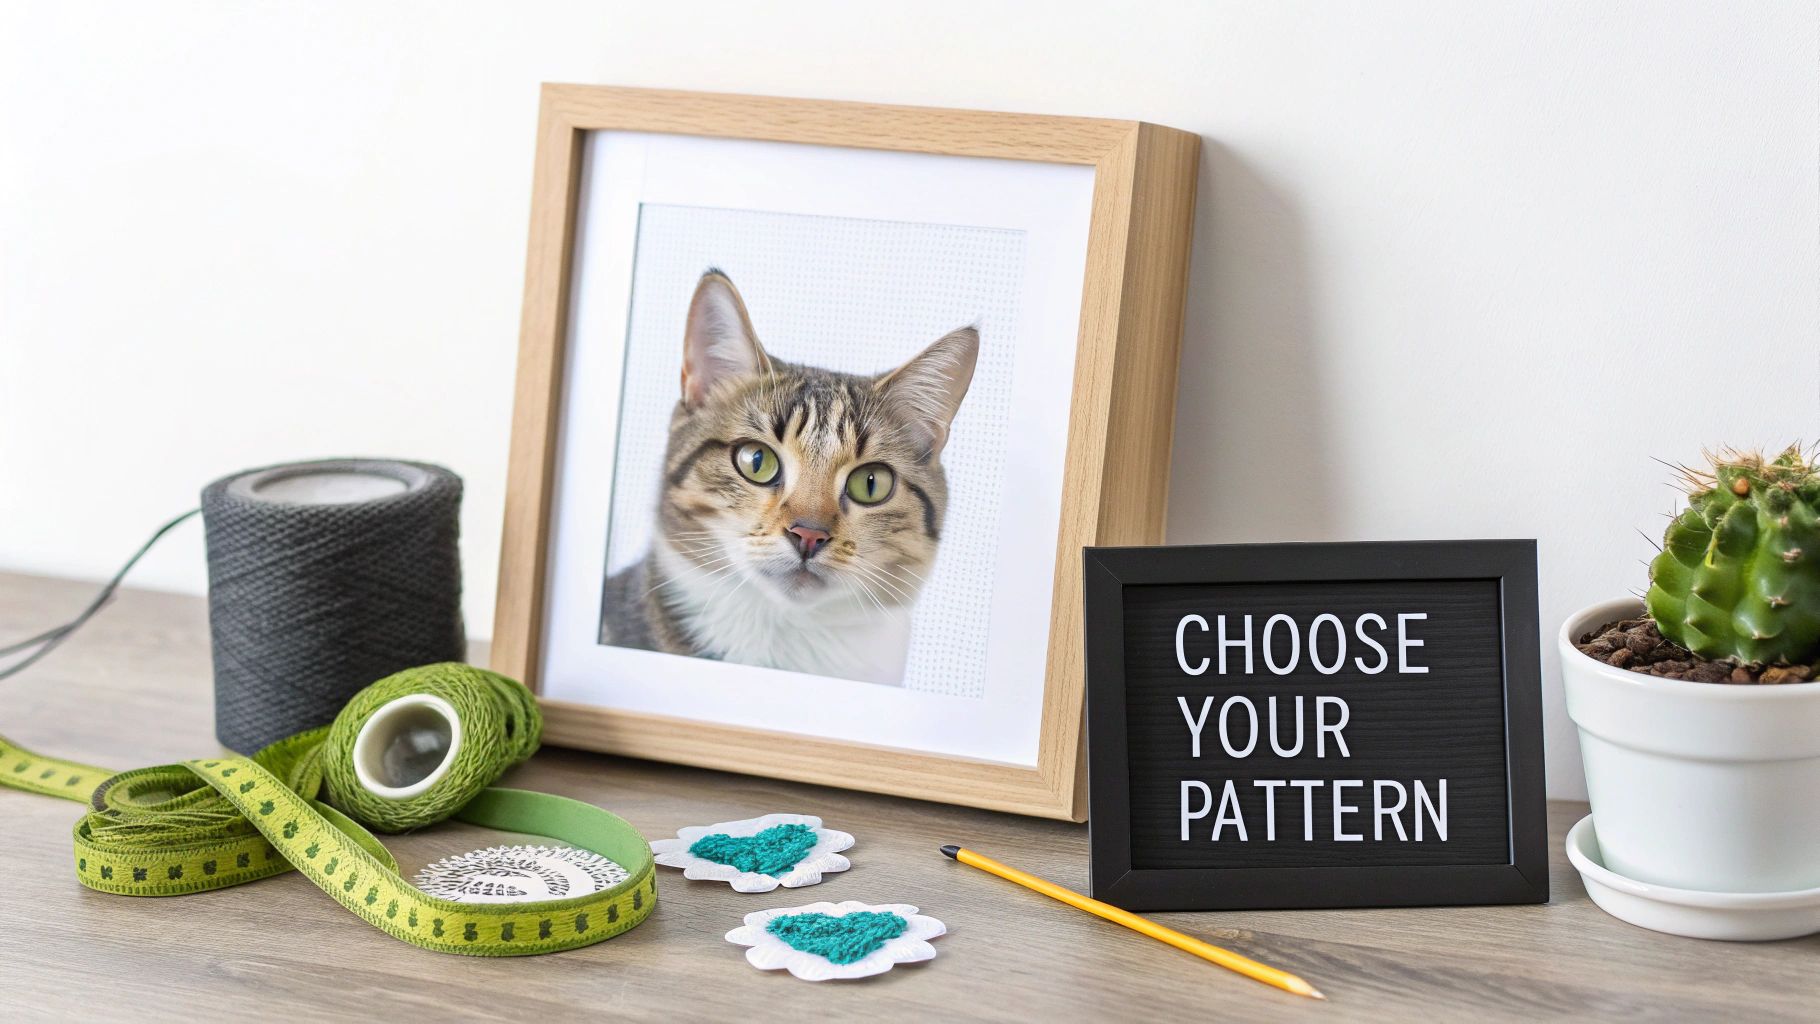
Jumping into a new cross stitch project is one of the best feelings, but let's be honest—the sheer number of cat patterns out there can be a little overwhelming. The first thing to do is think about the style that really speaks to you. Are you dreaming of a detailed portrait of a specific breed, or would a whimsical, cartoon kitten be a better fit for your space?
The world of cat cross stitch is huge, but most designs fall into a few key categories. Knowing what they are will help you narrow down the options and find a project you’ll love from the very first stitch.
Matching a Pattern to Your Skill Level
Before you fall head over heels for a gorgeous, intricate design, it’s a good idea to take a moment to gauge its difficulty. A pattern that's too far beyond your current skill level can quickly become frustrating, while one that’s too simple might not keep you engaged. A few key details will tell you everything you need to know.
First off, check the number of floss colours. A beginner-friendly pattern often uses fewer than 15 colours, which creates a crisp, graphic look. On the other end of the spectrum, an advanced piece might call for over 50 different shades to capture those subtle blends and create realistic fur textures.
Next, look for any special stitches. These are the little extras that add a ton of personality.
- Fractional Stitches: Think quarter and three-quarter stitches. These are your secret weapon for creating smooth curves and fine details, like the delicate flick of a cat’s ear.
- Backstitching: This is what you’ll use for outlining shapes and adding sharp details—think whiskers or that little glint in a cat’s eye. A lot of backstitching can be time-consuming, but the definition it adds is incredible.
- French Knots: These are tiny, textured knots perfect for adding dimension to eyes or other small features.
As a rule of thumb, if you're just starting out, I’d suggest picking a pattern with minimal backstitching and no fractional stitches. It lets you get really comfortable with the basic cross stitch before you tackle more advanced techniques.
Full Coverage vs. Modern Minimalist Designs
The style you choose also has a big impact on the time you’ll be investing. A full-coverage pattern, where every inch of the fabric is covered in stitches, creates a stunning, tapestry-like finish. These are fantastic for photorealistic cat portraits, but they are a serious time commitment.
On the other hand, modern and minimalist designs let the fabric shine through, leaving large areas unstitched. These patterns often feature simple outlines, fun geometric shapes, or cheeky cat-themed quotes. They’re perfect for a quick weekend project and use a lot less floss, which is always a bonus for your wallet.
At the end of the day, the best pattern for you is the one that gets you excited to start stitching. Whether it's a regal Persian lounging on a cushion or a simple black cat silhouette against the moon, your passion for the project is what will carry you through to a beautifully finished piece.
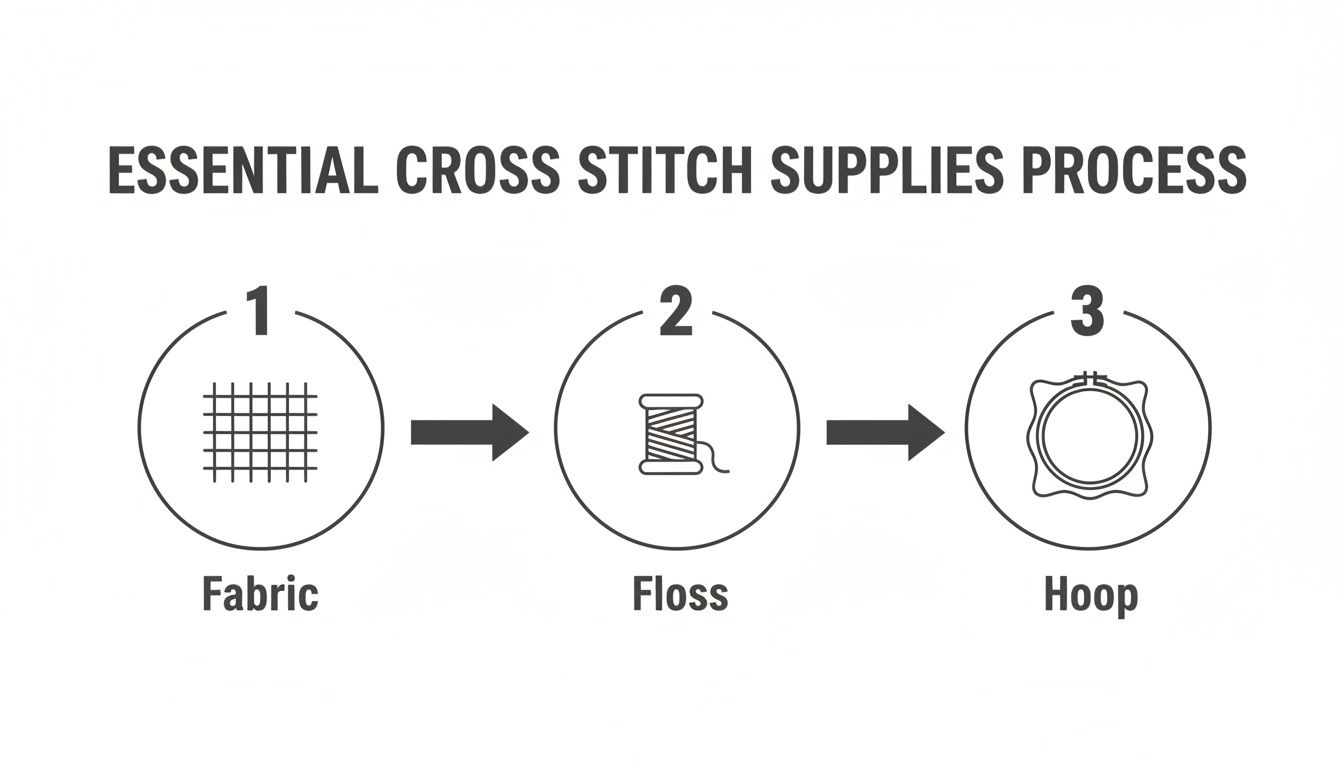
Gathering Your Essential Cross Stitch Supplies
Once you've found the perfect cat pattern, the fun really begins: gathering your supplies. Think of this as getting your artist's palette ready. The right fabric, floss, and tools don't just make the process easier—they completely shape the final look of your stitched feline.
Finding the Right Fabric
First things first, you need a canvas. For most cat cross-stitch projects, you'll be looking at Aida, evenweave, or linen. If you're just starting out, Aida cloth is a fantastic choice. It has a clear, easy-to-see grid of woven squares that makes counting your stitches a breeze. No guesswork involved.
For patterns with more intricate details—like the subtle curve of a cat's ear or delicate whiskers—evenweave and linen are wonderful. They have a smoother surface that's perfect for fractional stitches. With these fabrics, you typically stitch "over two," meaning your 'X' covers a tiny 2x2 square of threads. It's a slightly different feel from Aida but gives you a beautifully refined finish.
Picking Your Fabric Count
You'll hear the term "fabric count" a lot. It simply means the number of stitches you can fit into one inch. A lower number, like 14-count Aida, gives you larger stitches and a bigger final piece. A higher number, like 28-count evenweave, means smaller stitches and a more compact, detailed look. Your choice directly impacts the finished size, so always check what your pattern suggests.
A little pro tip: use an online cross stitch calculator. Just pop in your pattern's stitch count and the fabric count you want to use, and it'll tell you the exact finished dimensions. It’s a simple step that saves a lot of headaches later on!
To help you decide, here’s a quick breakdown of the most common fabrics you'll encounter.
Cross Stitch Fabric Comparison
Choosing your fabric is a big decision that affects both the stitching experience and how your finished cat portrait looks. Aida is a go-to for beginners, while evenweave and linen offer a more traditional, refined appearance for those with a bit more experience.
| Fabric Type | Best For | Stitching Experience |
|---|---|---|
| Aida | Beginners, projects with full stitches, blocky designs | The stiff, gridded weave makes it very easy to see the holes and count stitches. It's forgiving and structured. |
| Evenweave | Intermediate stitchers, patterns with fractional stitches | A softer fabric with a uniform weave. You stitch "over two" threads, creating a smooth background. |
| Linen | Experienced stitchers, heirloom-quality pieces | Has natural variations (slubs) in the thread, giving it a unique, rustic charm. Requires a bit more focus to stitch on. |
Ultimately, the best fabric is the one you feel most comfortable working with. Don't be afraid to try a small scrap of each to see what you prefer!
Needles, Floss, and Hoops
With your fabric sorted, let's talk tools. You’ll need tapestry needles, which have a blunt tip and a big eye. They're designed to glide through the fabric holes without splitting the threads. For 14-count Aida, a size 24 or 26 needle is a good all-rounder.
For floss, you can't go wrong with high-quality, six-strand cotton embroidery floss from a trusted brand like DMC. The colour selection is massive, so you'll have no trouble finding the perfect shades for every bit of fur, from tortoiseshell to tabby.
Keeping Your Project Taut and Tidy
To get those perfectly neat, even stitches, you need to keep your fabric tension just right. An embroidery hoop or frame is your best friend here.
- Embroidery Hoops: The classic choice. They’re inexpensive, portable, and perfect for smaller projects. You can easily move them around your fabric as you stitch different sections.
- Q-Snaps or Scroll Frames: These are lifesavers for bigger projects. They hold the entire piece taut without squashing your finished stitches and help you avoid those pesky hoop marks you sometimes have to wash out.
A little prep work before you start makes all the difference. To prevent the edges of your fabric from unravelling, you can run a line of masking tape along the sides or do a quick whip stitch. It's also a great idea to wind your floss onto bobbins and pop them in an organizer. This will save you from the dreaded "floss nest" and make grabbing your next colour quick and easy. At All About Sewing, we carry a bunch of organizers that can help you get everything sorted before you make that first stitch.
Understanding and Adapting Your Pattern Chart
Think of your cross-stitch chart as the treasure map for your project. It's a grid packed with symbols that guide every single stitch, showing you exactly which colour goes where. It might seem like a secret code at first, but once you crack the key, you'll be reading charts like an old pro.
Each chart is basically a grid that mirrors the weave of your fabric, and every little square on that grid stands for one full cross-stitch. Inside those squares, you’ll find different symbols—maybe a star, a triangle, or a letter—each one representing a specific shade of floss.
Somewhere on the page, you'll find the legend or colour key. This is your decoder ring! It matches every symbol on the grid to a specific floss number, usually from a well-known brand like DMC. This little key is crucial for making sure your stitched cat has the exact shades the designer intended.
This just shows how the journey from pattern to finished piece really begins with getting your core supplies in order: the fabric, the floss, and a good hoop to keep it all nice and tight.
Finding Your Starting Point
To make sure your finished design sits perfectly in the centre, you’ll want to find the middle of both your fabric and your chart. It's easier than it sounds. Most patterns have little arrows along the top and side edges that point to the centre lines. The spot where those imaginary lines cross is your starting point.
Finding your fabric's centre is just as simple. Fold it in half one way, then fold it in half the other way. The corner where the two folds meet is your sweet spot. You can give it a little pinch to make a temporary crease or pop a pin in to mark it. Starting your very first stitch right here is the best way to guarantee your cat won't end up lopsided in the frame.
Making a Pattern Your Own
Here’s where the real fun begins. One of the greatest things about stitching is that you're not just following instructions—you can be the artist. Adapting a pattern doesn't mean you have to be a designer; sometimes, the smallest tweaks can make the biggest difference.
Don't be afraid to experiment with your pattern. Swapping a few colours or simplifying a busy section can transform a standard design into a piece that's uniquely yours and perfectly suited to your style.
Let’s look at a few straightforward ways you can put your personal stamp on any cat cross-stitch chart.
Easy Ways to Adapt Your Chart
Customizing a pattern is all about letting your creativity shine. You can switch things up to match your home decor, simplify a design to make it a quicker project, or even resize it without redrawing a single thing.
Here are a few of my favourite techniques:
- Swap Floss Colours: Does the pattern call for a grey tabby, but your beloved cat is a ginger? Go for it! Just find a similar range of light, medium, and dark tones in the orange family and substitute them for the suggested greys.
- Change the Size: The absolute easiest way to make a design bigger or smaller is to change your fabric count. Stitching the exact same pattern on 18-count Aida will give you a much smaller, more detailed piece than stitching it on 11-count Aida. No chart changes needed.
- Simplify Complex Details: Feeling a bit overwhelmed by a pattern with a lot of "confetti"—those single, scattered stitches in different colours? You can easily clean it up. Just stitch those tiny, isolated spots with one of the main surrounding colours. It dramatically reduces the colour-changing headache without really affecting the final look.
Stitching Techniques for Realistic Feline Features
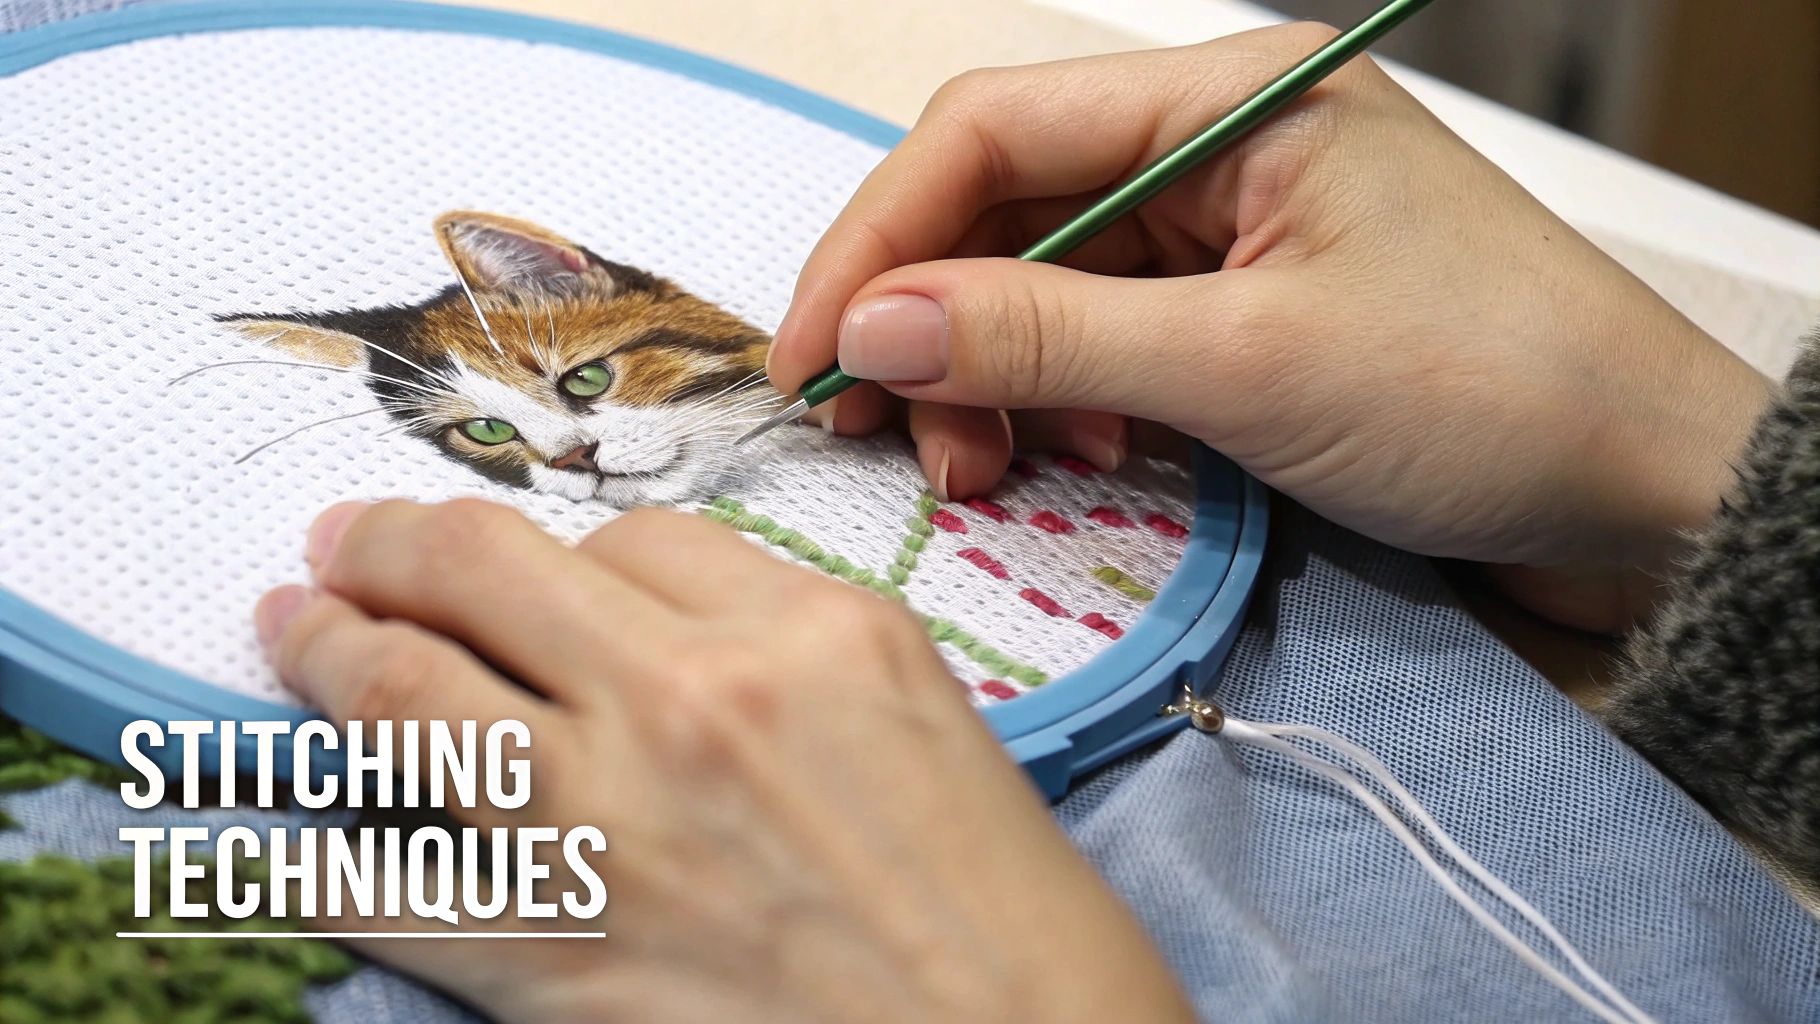
The real magic in bringing a cat cross-stitch pattern to life is all in the details. Your basic cross stitch forms the foundation, of course, but it’s the specialized techniques that turn a simple grid of colour into a piece with depth, texture, and that unmistakable feline personality.
Mastering these stitches is how you’ll capture the soft curve of a cat's ear or the delicate wisps of its fur.
Before we get into the fancy stuff, let’s talk about consistency. To get that smooth, even finish every stitcher wants, it’s vital to make sure every single "X" is uniform. Get into the habit of making all your bottom stitches go in the same direction (like ///) and all your top stitches go the other way (like \). This simple discipline makes a world of difference, ensuring the light reflects evenly off the floss for a truly polished look.
With that foundation locked in, you can start adding the artistic touches that really capture a cat’s spirit.
Creating Curves with Fractional Stitches
Cats are all soft lines and graceful curves, but a standard cross stitch is, well, square. This is where fractional stitches save the day. These smaller stitches, like quarter (¼) and three-quarter (¾) stitches, let you break free from the grid to create much smoother, more organic lines. They are absolutely essential for rounding out features like eyes, ears, and the gentle slope of a cat’s back.
- Quarter Stitches: Think of these as a single diagonal line going from a corner to the very centre of an Aida square. They're perfect for the absolute finest details—the sharp point of a whisker or the tiny corner of an eye.
- Three-Quarter Stitches: This stitch is just a quarter stitch plus a half stitch. It’s the real workhorse for creating curves and softening the blocky edges that full cross stitches can sometimes leave behind.
You’ll find fractional stitches are a bit easier on evenweave or linen fabric since a sharp needle is needed to pierce the centre of the fabric square. But with a little patience, they are totally doable on Aida cloth, too.
Adding Definition with Backstitching
After you’ve finished all your cross stitches, your project might look a bit like a pixelated image. Backstitching is what brings everything into sharp focus. It’s basically a simple outline stitch used to define shapes and make certain features pop.
Think of it as drawing with your thread. Backstitching is what transforms a cluster of coloured squares into a cat you can recognize. It defines the whiskers, outlines the paws, and adds that crucial, lively glint to the eyes. Most cat patterns will show you where to backstitch using solid lines on the chart, often in a bold, contrasting colour.
A great tip for backstitching is to vary your strand count. I often use a single strand of floss for delicate details like whiskers, but switch to two strands for bolder outlines around the body. This small change adds a surprising amount of visual interest.
Achieving Realistic Fur with Blending
For me, the most impactful technique for stitching realistic cat fur is blending floss. This just means threading your needle with two strands of floss, but using two different colours at the same time. For example, you could combine one strand of light grey with one strand of dark grey.
This simple trick creates a subtle, heathered effect that perfectly mimics the multi-tonal nature of a cat’s coat. It’s fantastic for creating soft shadows, transitioning smoothly between colours, and adding depth to tabby stripes or tortoiseshell patches. Blending gets rid of the harsh lines you sometimes see with solid colour blocks, giving you a much softer and more photorealistic finish.
By combining these techniques, you can elevate any cat cross-stitch pattern from a simple design into a true work of art.
How to Give Your Cat Cross-Stitch a Professional Finish
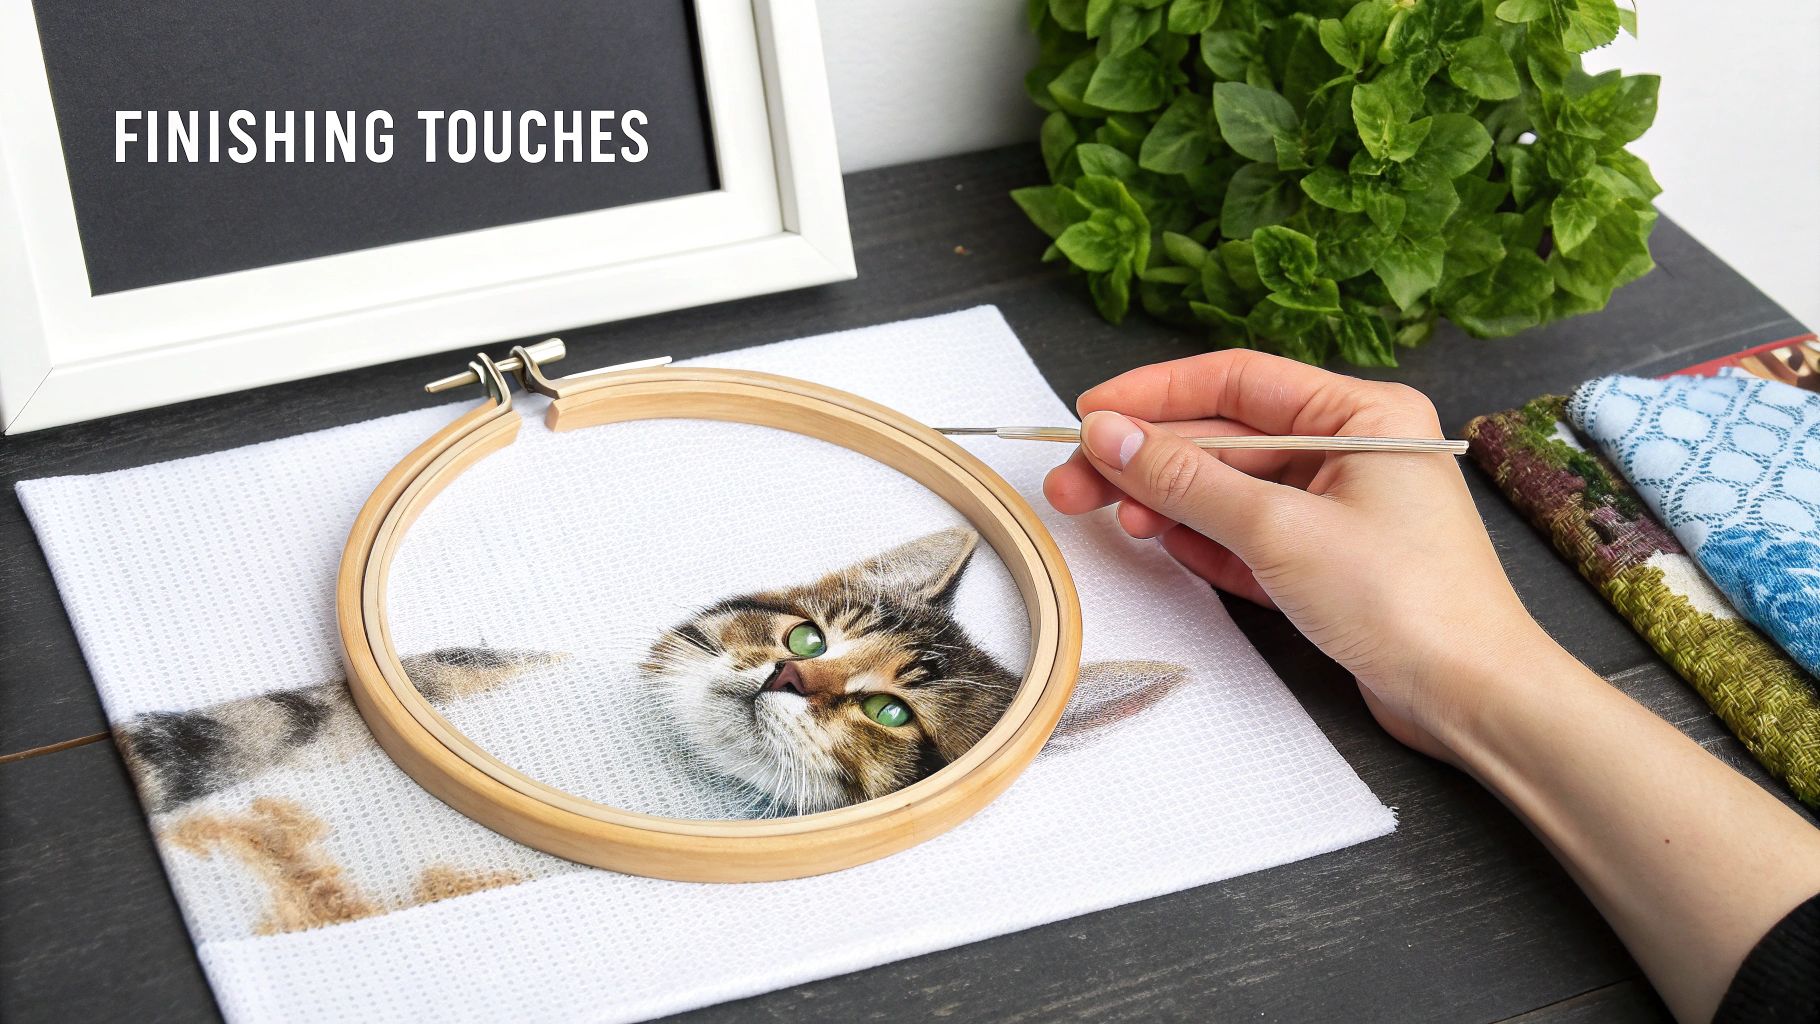
You’ve placed the last stitch and tied off the final thread. Congratulations! You've officially brought your cat cross-stitch pattern to life. Now comes the really satisfying part: transforming it from a finished project into a piece of art that’s ready to hang on the wall.
This final bit of prep work is what makes your piece look truly polished. It protects all those hours of stitching and ensures your creation looks its absolute best for years to come.
Washing Your Stitched Piece
Even if you’ve been super careful, your fabric has likely picked up some natural oils from your hands, a bit of dust, or maybe some stubborn hoop marks. A gentle bath is the first step to getting a truly professional finish. Don't worry, it's a delicate process, but it isn't difficult.
First, fill a clean sink or basin with lukewarm water and add just a few drops of a mild, clear dish soap. A specialized textile wash works great, too. Gently place your cross-stitch into the water and let it soak for about 15–20 minutes. You can swish it around a little, but whatever you do, don't scrub or wring it out! That’s a surefire way to distort your beautiful stitches.
Next, rinse the piece carefully under cool, running water until you're sure all the soap is gone. To get the excess water out, lay it flat on a thick, clean towel. Place another towel over the top and gently roll the whole thing up like a Swiss roll, pressing down firmly to blot out the moisture.
Pressing for a Flawless Finish
The secret to getting a perfectly flat, crisp result is to iron your project while it's still slightly damp.
Lay your piece face down on a clean, fluffy towel. This is the most important part of the process—the towel’s soft pile gives your stitches a cushion, preventing them from being squashed flat and losing all their lovely texture.
Set your iron to a medium heat setting (no steam!) and gently press the back of the fabric. Keep the iron moving constantly so you don't scorch anything. Keep going until the piece is completely dry and free of wrinkles.
Pro Tip: Never, ever iron directly on the front of your project. The heat can easily damage the floss, flatten your stitches, and completely ruin the dimensional quality you worked so hard to achieve.
Creative Ways to Frame and Display Your Work
Once your piece is clean, dry, and perfectly pressed, it’s time for the fun part—showing it off! You’ve got so many more options than just a standard picture frame.
Here are a few ideas to get you started:
- Classic Framing: For that timeless, gallery-wall look, mount your piece onto an acid-free foam core board. You can secure the fabric by stretching it taut and using stainless steel pins along the edges or by lacing the back with a strong thread for perfectly even tension.
- Finishing in a Hoop: A nice wooden embroidery hoop can double as a charming, modern frame. Just make sure your design is perfectly centred, tighten the screw, and trim the excess fabric around the back. A little bit of craft glue can secure the raw edge to the inside of the inner hoop for a super neat finish.
- Pillows and Banners: Why not turn your art into something functional? Your stitched cat would make a fantastic centrepiece for a small decorative pillow or a cute wall banner. This is where having a sewing machine from All About Sewing comes in handy for creating those clean, professional seams.
A Few Common Cat Cross Stitch Questions Answered
Even experienced stitchers hit a snag every now and then. This is your go-to spot for tackling some of the usual challenges that pop up when you're deep into a cat cross stitch pattern. The goal is to get you back to your happy place—stitching—as quickly as possible.
We'll cover everything from battling tangled floss to deciding the best way to handle those big blocks of colour.
How Do I Stop My Floss from Twisting and Knotting?
Ah, the age-old question! This is easily the most common headache in the world of cross stitch. The simplest fix? Just let your needle and thread dangle every few stitches. Gravity will do the work for you, allowing the floss to unwind itself before it has a chance to form a dreaded knot.
A thread conditioner can also be a game-changer. Another brilliant little trick is to separate each strand from the six-strand floss before you group them back together for stitching. We call this stripping the floss, and it helps the threads lie much flatter, which dramatically cuts down on tangles.
Honestly, a bit of prep work at the start saves so much frustration later. Taking a moment to strip your floss not only stops knots but also makes your finished stitches look incredibly neat and even.
Can I Use an Embroidery Machine for a Cross Stitch Pattern?
You certainly can! Many modern embroidery machines are fantastic for creating cross stitch designs. The key thing to remember is you'll need a specific digital pattern file made for machine embroidery—you can't just pop a standard paper or PDF chart into the machine.
This is a great route to take for bigger projects where you want speed and flawless consistency. Think about adding a crisp cat design to a quilt block or a sturdy tote bag. If you're curious about this, our team at All About Sewing can guide you to the right machine and software to get started.
What's the Best Way to Stitch Large Blocks of a Single Colour?
When you’re facing a big, solid area—like the silhouette of a black cat—it's best to work in neat rows using the Danish method. This just means you stitch a row of half stitches (like this: ///) across the section first. Then, you work your way back along the row, completing the 'X's with the top stitch (like this: \\).
This approach gives you a much tidier look on the back and beautifully uniform stitches on the front. Just be careful not to carry your thread across too many squares on the back of your project. Dark floss can sometimes peek through lighter-coloured fabrics.
Ready to elevate your stitching game? Check out the amazing range of embroidery machines and supplies over at All About Sewing. Find the perfect tools to bring your next creative idea to life today!


