Counted Cross Stitch Bookmark Patterns: A Quick Guide to Gorgeous Bookmarks
Cross-stitch bookmarks are one of my favourite projects. They're quick, satisfying, and a brilliant way to create a little piece of art that you can actually use. Whether you're just starting out or you've been stitching for years, these small-scale designs are perfect for trying out new techniques or using up those leftover threads to make a lovely, personal gift for a book lover.
Your First Stitch: Creating a Cross-Stitch Bookmark
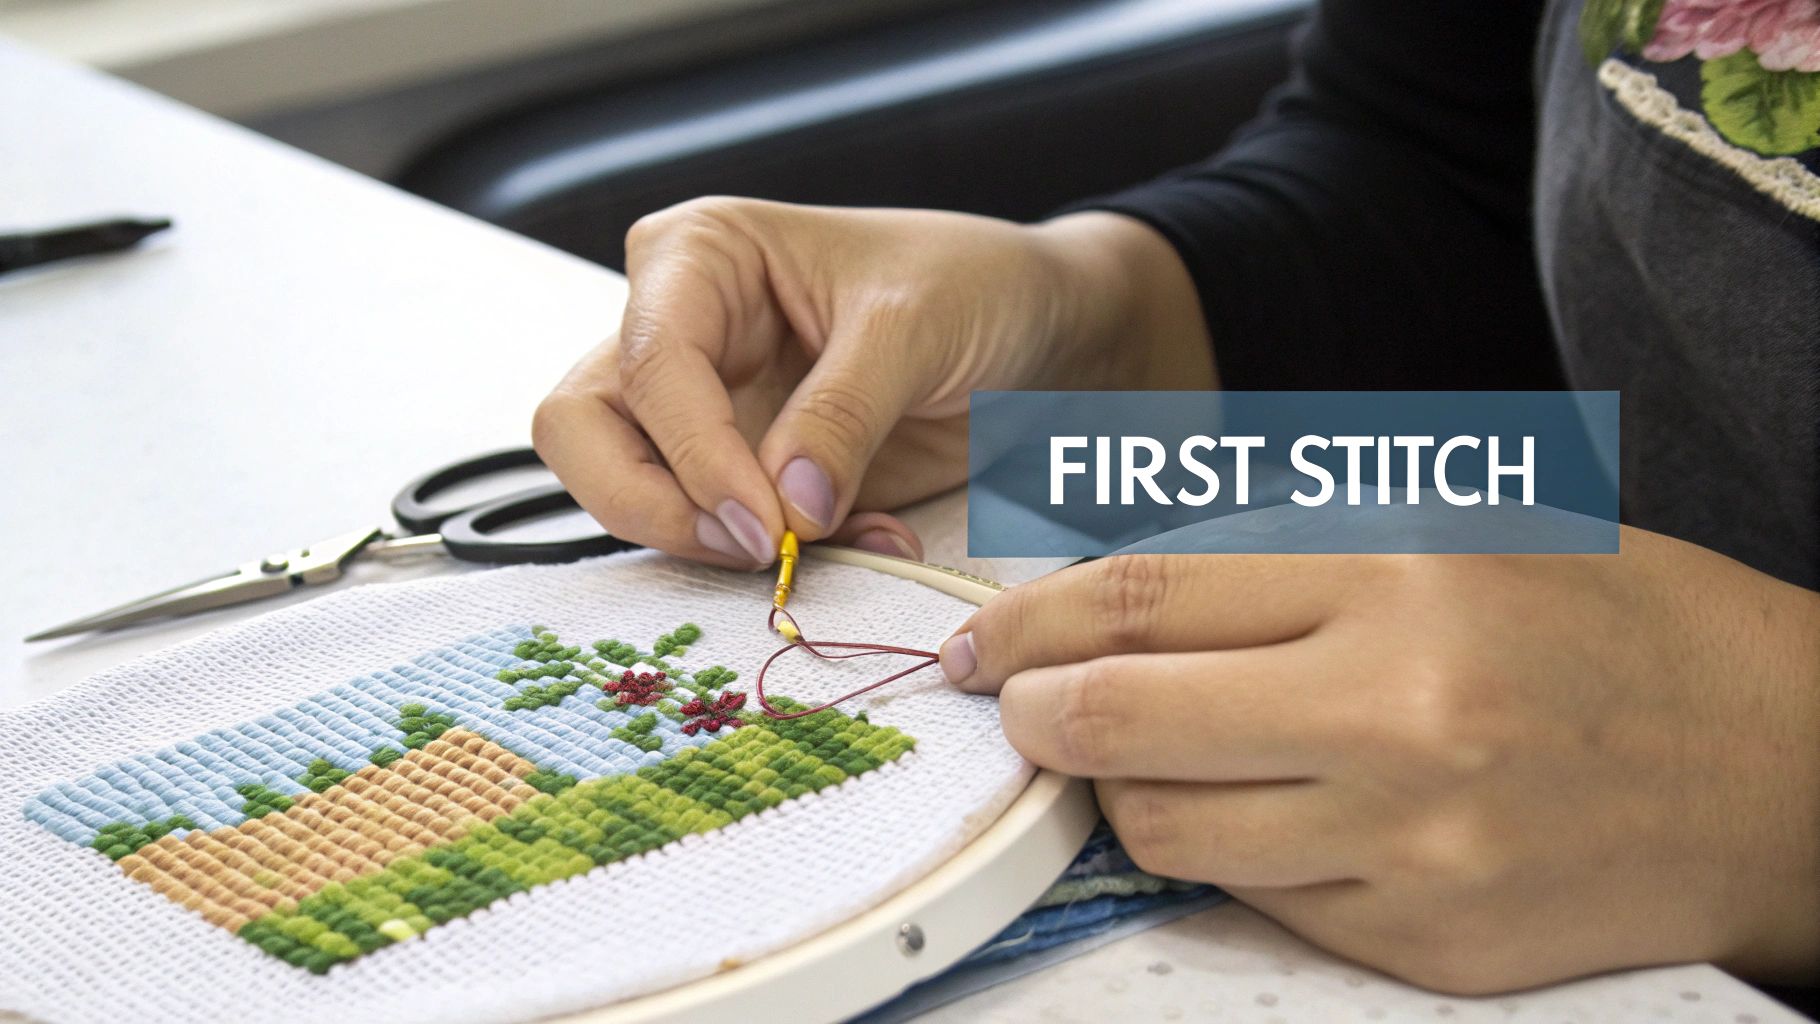
Ready to turn a bit of fabric and thread into a gorgeous bookmark? You're in the right place. Making a counted cross-stitch bookmark is such a rewarding process. It has that wonderful, relaxing rhythm of stitching, but at the end, you have something both beautiful and genuinely useful.
One of the best things about bookmarks is how portable they are. I love having a small project on the go. Unlike a massive piece that can be a hassle to carry around, a little strip of Aida and a few bobbins of floss tuck neatly into a small bag. It’s perfect for a quiet moment at a coffee shop or while waiting for an appointment.
Why Bookmarks Make the Perfect Project
The real magic of these little projects is their versatility and how quickly you can finish one. You can easily complete a bookmark in a weekend, which gives you that great feeling of accomplishment. It's so motivating! This makes them especially good for testing out a new colour palette or a tricky stitch without having to commit to a huge project.
I find they're fantastic for a few key reasons:
- Building Your Skills: They’re the perfect size for practising the basics. You can really focus on getting your tension just right, starting and stopping your threads neatly, and making your backstitching look crisp and clean.
- A Fun Creative Challenge: The long, narrow shape of a bookmark pushes you to think differently about design. It's fun to adapt a small motif from a larger pattern or search for charts created specifically for that unique format.
- Making Thoughtful Gifts: Nothing says you care like a hand-stitched gift. You can find counted cross-stitch bookmark patterns to match anyone’s personality, from their favourite flowers to a classic literary quote.
A handmade bookmark isn't just a placeholder; it's a small reminder of care and creativity tucked inside the pages of a beloved story. It connects two crafts—stitching and reading—in a truly special way.
In this guide, I'll walk you through everything you need to know. We'll cover picking a pattern, getting your supplies together, and all the finishing touches that make your bookmark durable and beautiful. By the end, you’ll have all the confidence and skills you need to create a piece that you or a friend can enjoy for years to come.
Gathering Your Stitching Supplies
Before you can even think about that first stitch, you need to get your materials in order. Trust me, having everything you need on hand from the get-go makes the whole process so much more relaxing and fun. Let's walk through the essentials for bringing those fantastic counted cross stitch bookmark patterns to life.
Fabric, Threads, and Needles
First things first: the fabric. For bookmarks, you really can’t go wrong with Aida cloth. Its perfectly even grid is a lifesaver for counting stitches. Aida is sold by "count," which just means how many squares (and therefore stitches) you can fit into one inch.
- 14-count Aida: If you're new to cross stitch, start here. The squares are a bit larger, which makes them much easier on the eyes.
- 18-count Aida: This is my personal favourite for bookmarks. The smaller squares give you a more detailed, refined look, making your finished piece feel extra special.
Now for the best part—choosing your colours! Most patterns you'll find use DMC embroidery floss, and they'll list the specific number for each colour you need. This takes all the guesswork out of it. For a typical bookmark, one skein of each colour is almost always plenty, unless the design is overwhelmingly one shade.
You’ll also need a couple of key tools. A tapestry needle is a must-have; its blunt tip slips easily through the holes in the Aida without catching or splitting the fabric threads. I recommend a size 24 or 26. A small, sharp pair of embroidery scissors for clean thread snips and an embroidery hoop to hold your fabric taut will also make your life a whole lot easier.
A little tip from my own experience: for narrow projects like bookmarks, I often stitch "in hand" without a hoop. It can be a bit awkward to get that small strip of fabric tight in a frame, and going without gives you a bit more freedom once you get comfortable controlling your stitch tension.
Essential Supplies for Your Bookmark Project
Getting your toolkit ready is half the fun. Here’s a quick breakdown of what you'll need, with a few suggestions based on how comfortable you are with cross stitching.
| Item | Beginner Recommendation | Intermediate Recommendation | Why It's Important |
|---|---|---|---|
| Fabric | 14-count Aida | 18-count Aida or 28-count Evenweave | The foundation of your project; the count determines the final size and detail. |
| Floss | DMC Cotton Embroidery Floss | DMC Cotton or specialty threads (e.g., silk, metallic) | Brings your pattern to life with colour and texture. |
| Needle | Tapestry Needle (Size 24) | Tapestry Needle (Size 26 or 28) | A blunt tip prevents splitting fabric threads, making stitching smoother. |
| Scissors | Small embroidery scissors or snips | A high-quality, sharp pair of embroidery scissors | Essential for clean cuts and trimming threads close to the fabric. |
| Pattern Holder | A simple printout or your phone | Magnetic board or a pattern-keeper app | Keeps your place on the chart, reducing mistakes and frustration. |
Ultimately, the goal is to have tools that make you feel comfortable and in control, so you can just enjoy the rhythm of stitching.
Kits vs. Buying Separately
So, should you buy a pre-packaged kit or gather all the supplies yourself? Both have their perks. Kits are fantastic because everything is bundled together for you—no hunting for the right fabric or floss colours. On the other hand, buying individually gives you complete freedom to use your favourite brands or even swap out colours to make the design your own.
It's interesting to see how popular kits have become, especially here in Canada. In Ontario alone, counted cross stitch bookmark patterns account for a surprising 18% of all kit sales. Many experienced sewists and quilters I know prefer the 18-count Aida often found in these kits because it yields such a neat, professional-looking finish—perfect for gifts. This fits right in with a broader trend, as national spending on hobbies has grown by 15%. More and more of us are discovering the simple joy of making something beautiful with our own hands.
If you want to see what's out there, you can explore a huge variety of patterns and kits on Etsy Canada to get inspired.
How to Read and Prepare Your Bookmark Pattern
Think of your pattern as the roadmap for your entire project. Getting comfortable with it before you even thread your needle is the best thing you can do. At first glance, a counted cross stitch bookmark pattern chart can look a bit like a secret code, but I promise it's simple once you know what you're looking at.
The chart is just a grid. Each little square on that grid represents one single cross stitch you'll make on your fabric. Inside those squares, you'll see different symbols. These are your colour key—all you have to do is match the symbol on the chart to the corresponding floss number in the pattern’s legend. It's really that straightforward. You're basically painting by number, but with thread.
Here's a tip I swear by: make a working copy of your chart. Either print a spare or use a digital version you can mark up. As you finish a section, just highlight the symbols you’ve stitched. This simple habit makes it so much easier to keep your place and drastically cuts down on mistakes, especially when you're working with colours that are really similar.
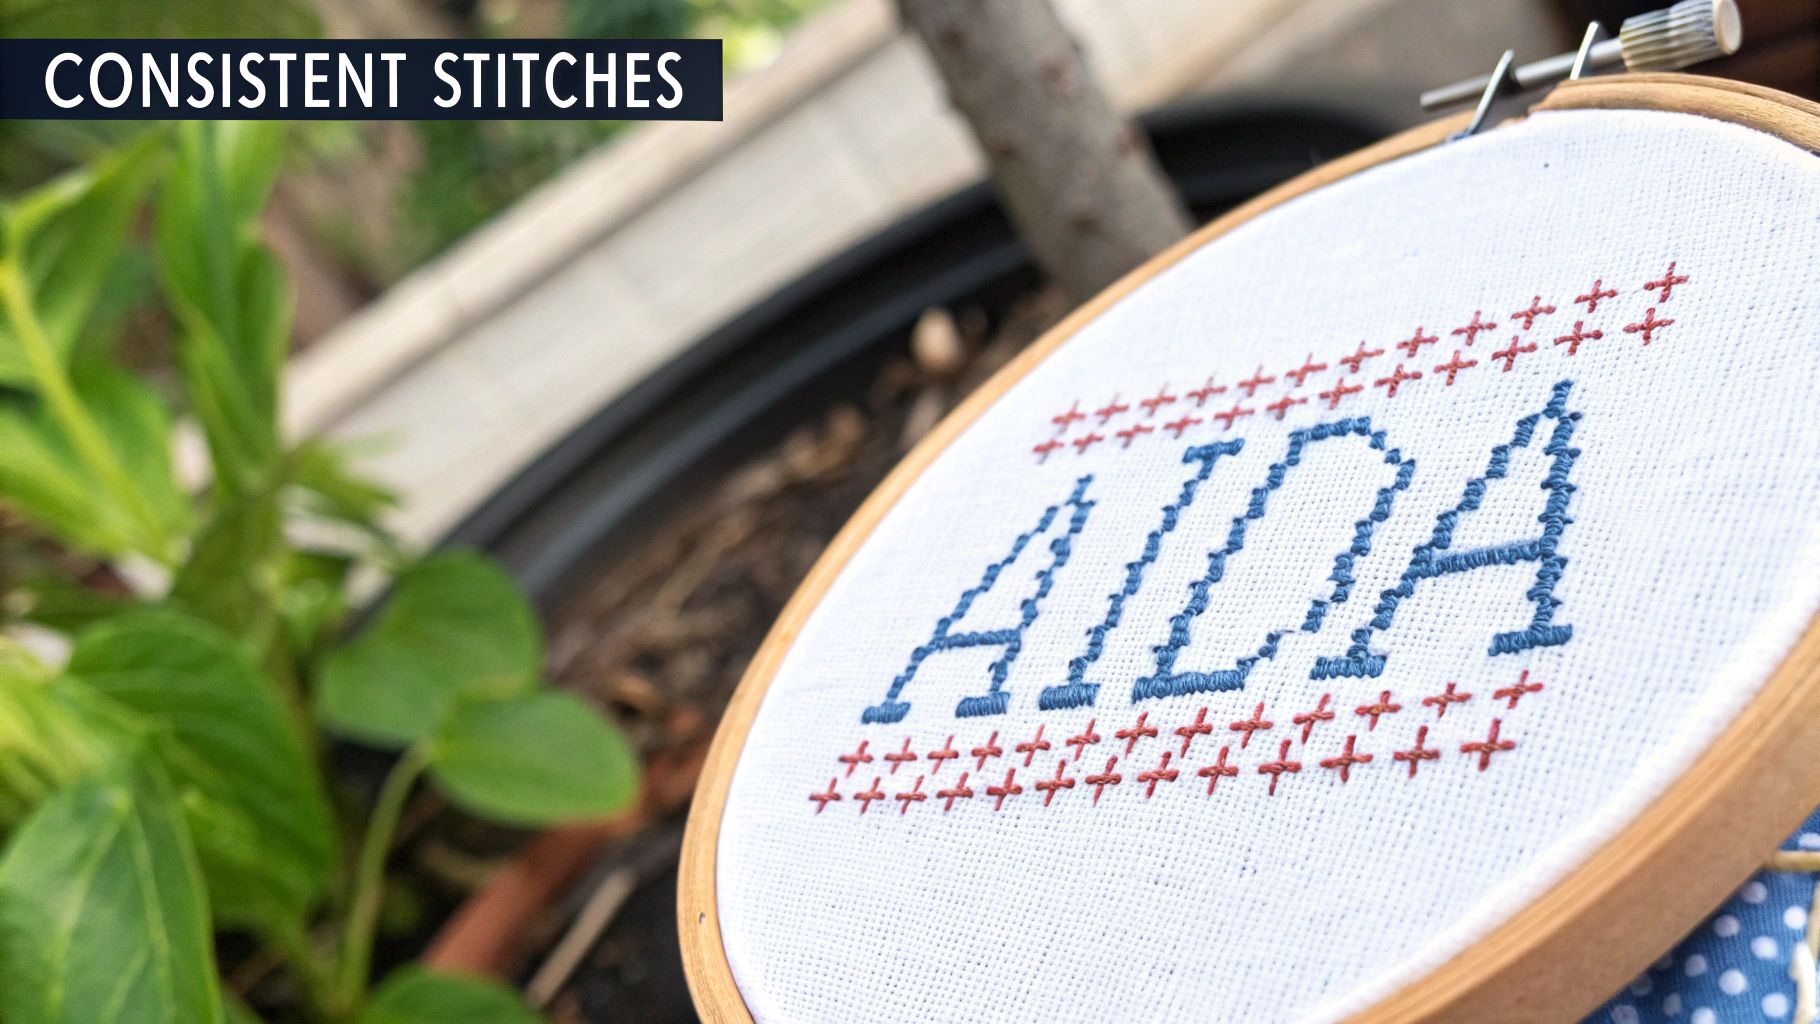
Finding the Centre Point
The secret to a beautifully placed design is starting right in the middle. Because a bookmark is so long and narrow, any design that's even slightly off-centre will stick out like a sore thumb. Thankfully, finding the dead centre of your fabric and your pattern is a breeze.
First, let's find the centre of your fabric. Just fold it in half lengthwise and give it a gentle crease. Then, fold it in half again, this time widthwise. The exact spot where those two creases cross is the middle. I like to either make a small pinch or stick a pin right there to mark it.
Next, do the same with your pattern chart. Look along the top and side margins for little arrows or markers. Follow those lines inward with your fingers until they meet, and that's the centre square of your design. This is where you'll make your very first stitch—right on the spot you marked on your fabric.
Starting from the centre and working your way out is a total game-changer. It guarantees your design will be perfectly balanced and ensures you'll have an even border of fabric all around, which is crucial for a clean finish later on.
Calculating Your Fabric Size
Trust me, there is nothing more frustrating than getting halfway through a project only to discover you've cut your fabric too small. To avoid that headache, all it takes is a tiny bit of math upfront. Your pattern should tell you the stitch count—for example, 35 stitches wide by 120 stitches high.
To figure out how big your finished design will be, you just divide the stitch count by your fabric count (the number of stitches per inch).
- Example Calculation: Let's say your pattern is 35 stitches wide and you're using 14-count Aida. The math is 35 ÷ 14 = 2.5 inches. Your stitched design will be 2.5 inches wide.
Once you know the dimensions of the stitched area, you absolutely have to add a border. My personal rule of thumb is to add at least three extra inches on each side. This gives you plenty of room to hold the fabric while you work and is essential for any finishing technique, whether you're adding a felt backing or folding a hem.
Bringing Your Bookmark to Life, Stitch by Stitch
Alright, your pattern is ready, and your materials are all laid out. This is where the magic happens—the part where you actually start stitching and watch your design take shape. The real charm of any counted cross stitch bookmark pattern isn't just the design, but the care you put into each stitch. It's these little details that turn a simple craft project into a little work of art.
The heart of it all is the classic cross stitch: two simple diagonal stitches that cross over to form an 'X'. Now, if you take away only one piece of advice, let it be this: consistency is everything. Always, and I mean always, cross your stitches in the same direction. For instance, if you make your bottom stitch from bottom-left to top-right, make sure the top stitch always goes from bottom-right to top-left. Every single time.
You might not think this small habit matters, but it has a huge impact on the final look. When all those top stitches lie in the same direction, they catch the light in the same way, giving your bookmark a wonderfully smooth and professional sheen.
Adding Those Finishing Touches
While full cross stitches fill in the colours and shapes, a couple of other stitches are used to add definition and polish. Think of them as the fine-liner pens of the embroidery world.
- Backstitching: This is your secret weapon for crisp, clean outlines. It’s essentially a simple running stitch that you'll see as a solid line on your chart, perfect for defining the edges of a flower petal or making lettering pop.
- Fractional Stitches: When a full square 'X' is too blocky for a delicate curve or a tiny detail, fractional stitches save the day. You’ll run into quarter stitches (one diagonal leg ending in the fabric's centre hole) and three-quarter stitches (a quarter stitch combined with a half stitch). They can feel a bit fiddly at first, but they are absolutely essential for creating those smooth lines in more detailed designs.
These more advanced stitches are often the key to making a pattern work in a long, narrow space like a bookmark. They allow designers to pack a surprising amount of detail into a small area.
Tips for a Tidy Finish
A beautiful bookmark looks great from every angle, and that means paying a little attention to the technical side of things. First up is tension. If you pull your thread too tight, the fabric will pucker and warp. Too loose, and the stitches will look floppy and can easily get snagged.
The sweet spot is a stitch that lies flat and smooth against the fabric without distorting the Aida cloth. It takes a little practice to get the feel for it, but soon you'll develop a natural, even rhythm.
Another pro tip is to ditch the knots. Tying knots on the back of your work can create little bumps that show through on the front, especially after you iron your finished piece. Instead, try securing your thread by tucking the tail under a few stitches on the back as you start and finish. This keeps the reverse side smooth and flat—a must for a bookmark that will be slid in and out of books for years to come.
Bringing It All Together: Finishing Your Bookmark
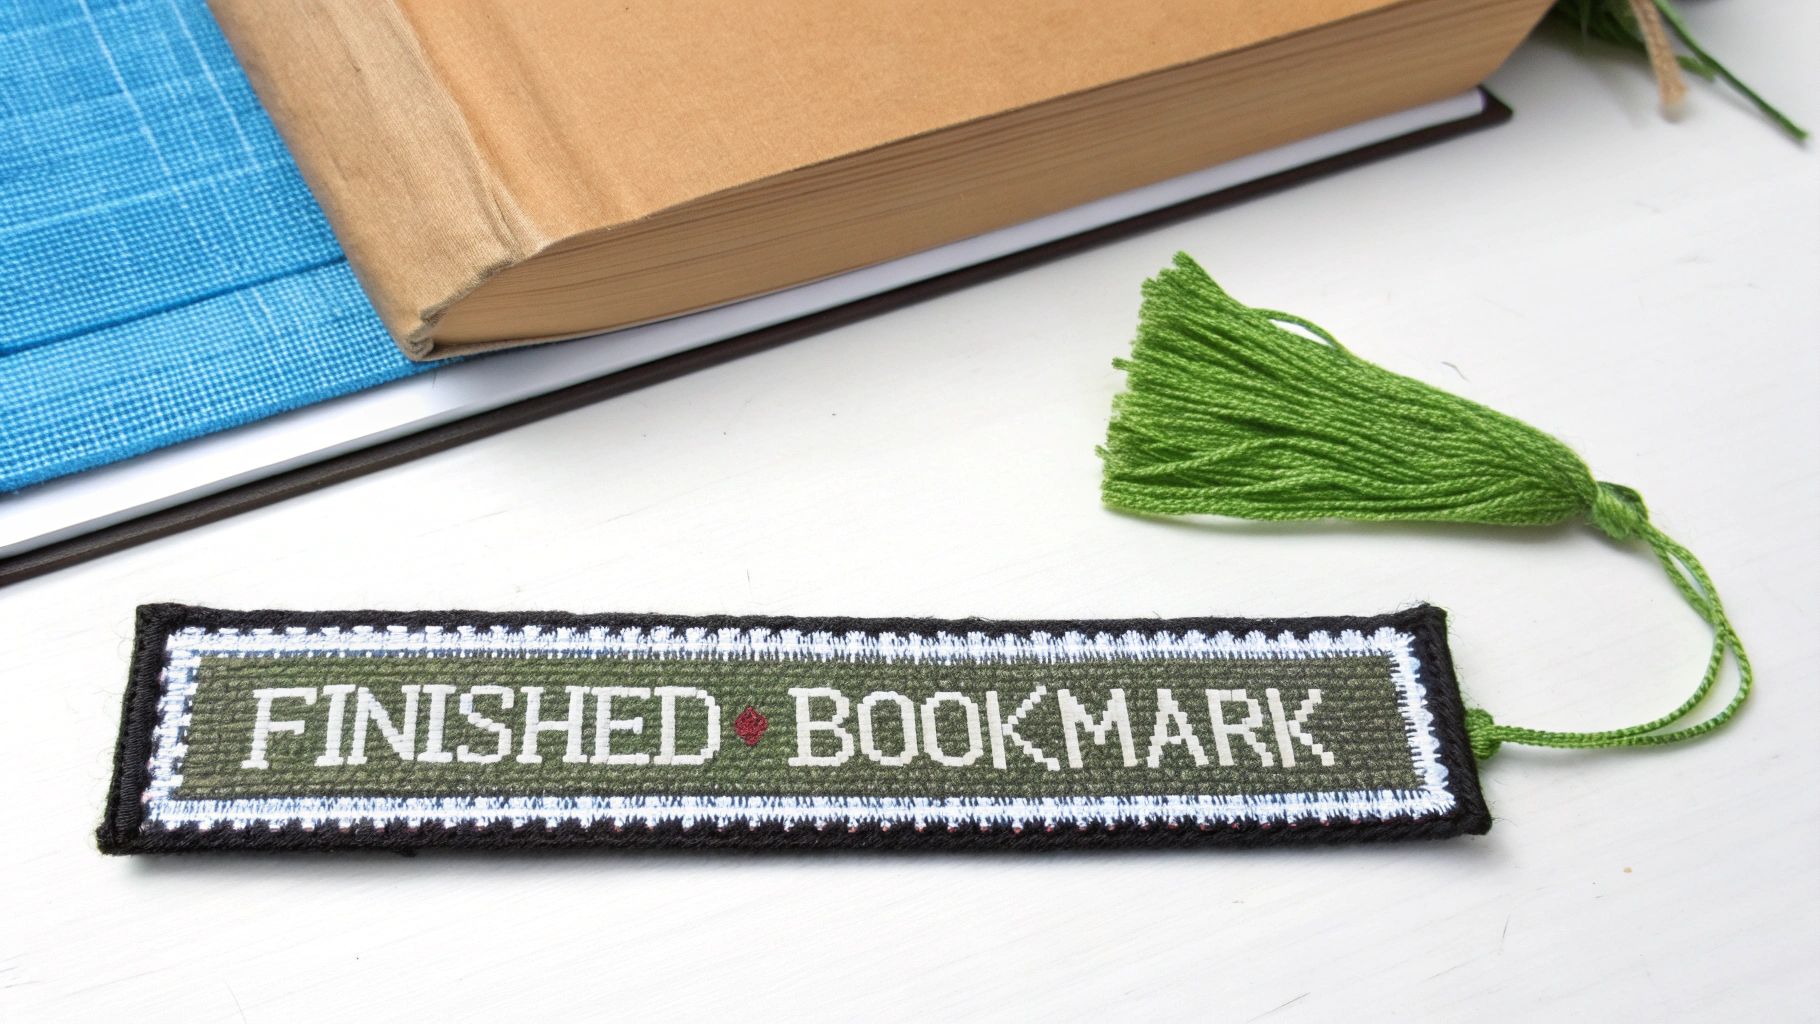
You’ve made the very last stitch, and your design looks absolutely fantastic. Now for the really satisfying part: transforming that piece of fabric into a sturdy, beautiful bookmark that will last for years. These final touches are what protect all your hard work and give your project that polished, professional look.
Before you start assembling anything, give your piece a gentle wash. No matter how careful you are, oils from your hands and a bit of dust can find their way onto the fabric. A quick bath in lukewarm water with a mild soap, followed by a good rinse in cold water, makes a world of difference.
To dry it, lay your damp bookmark on a clean, fluffy towel. Roll the towel up and press gently to soak up the excess water. Then, unroll it, place the bookmark face down on a fresh part of the towel, and press with a medium-hot iron until it’s perfectly dry. Doing it this way protects your stitches, keeping them plump and defined instead of flattened.
Putting Your Bookmark Together
With your masterpiece all clean and pressed, it’s time to assemble it. The goal here is twofold: hide the messy back of your stitching and give the bookmark enough body to slide easily between pages without getting bent or frayed.
One of the easiest ways to do this is by adding a backing. Felt is a classic choice; it’s soft, it doesn't fray, and it adds a nice bit of weight. A coordinating piece of fabric from your stash also works beautifully, especially if it complements your floss colours.
For a really sturdy finish, fusible interfacing is a game-changer. Just iron a piece onto the back of your stitched work before you add the final backing. This gives it the perfect amount of stiffness so your bookmark holds its shape over time.
My Go-To Tip: When you cut your backing material, whether it's felt or fabric, trim it just a little smaller than your Aida cloth. This way, when you fold the Aida edges over to the back, you get crisp, clean corners without any extra bulk.
It seems like this final assembly stage is where creativity is really taking off in the Canadian crafting community. There's been a huge surge in interest for counted cross stitch bookmark patterns, and here in Ontario, we've seen a 35% jump in sales for these supplies at shops like ours. It lines up with broader trends showing that 28% of Canadian women aged 25-54 enjoy needlework weekly, and bookmarks are one of their favourite starter projects. Their small size makes them perfect for mastering these crucial finishing techniques. If you're looking for inspiration, you can see what fellow Canadian stitchers are making and find an amazing variety of patterns over at 123stitch.com.
The Finishing Flourish: A Decorative Tassel
A tassel is that perfect final touch. It adds a pop of charm and, practically speaking, makes it much easier to spot your bookmark in a book. The best part? They are incredibly simple to make and a brilliant way to use up leftover floss from your project.
Here’s how I whip one up in a few minutes:
- Wrap It Up: Cut a piece of cardboard a bit longer than you want your final tassel. Wrap your embroidery floss around it over and over—the more wraps, the fuller your tassel will be.
- Tie the Top: Take a separate piece of thread, slide it under all the loops at the top of the cardboard, and tie a tight double knot. This creates the loop you'll use to attach the tassel.
- Snip the Bottom: Gently slide the floss bundle off the cardboard. With a sharp pair of scissors, cut straight through all the loops at the bottom.
- Create the Neck: Grab another piece of floss and wrap it tightly around the bundle, about a centimetre down from the top knot. Secure it with a hidden knot to form the tassel’s "neck."
Finally, give the ends a little trim to make sure they're all even. Now all that's left is to securely stitch your new tassel to the top or bottom of your beautifully finished bookmark
Troubleshooting Your Cross Stitch Bookmark
Even the most detailed guide can't cover every little hiccup you might run into. When you're creating something small and precise like a bookmark, tiny issues can feel like big roadblocks. Let’s walk through some of the common snags I've seen over the years and how to smooth them out so you can get back to stitching.
One of the first things that trips people up is thread management. Is your floss constantly twisting into a bird's nest of knots? I have a simple, almost meditative trick for this: every ten stitches or so, just let your needle and thread dangle. The needle's weight will naturally untwist the floss, saving you a world of frustration.
Another pro tip is to resist the urge to use a super long piece of thread. It seems efficient, but it's not. Stick to a length of about 18 inches—roughly from your fingertips to your elbow. This shorter length is far more manageable, less likely to knot, and won't get frayed and fuzzy from being pulled through the fabric so many times.
Oops! How to Fix Stitching Mistakes
Sooner or later, it happens. You're admiring your work and spot a rogue stitch glaring back at you from three rows down. Take a deep breath! For a single misplaced stitch, you can often just use the tip of your needle to carefully back it out, reversing the motion you used to make it. No cutting required.
But what if it's a bigger blunder, like an entire patch of flowers stitched in the wrong colour? That calls for a little gentle surgery.
- Grab Your Tools: You'll need a seam ripper or a small, sharp pair of embroidery scissors.
- Work from the Front: Carefully slide the point of your tool under the stitches you need to remove and snip them.
- Tweeze It Out: Use a pair of tweezers to pull out all the little colourful bits from the front and back of your fabric.
- Reset the Fabric: Once the thread is gone, gently fluff up the Aida cloth with your fingernail. This helps the holes close up a bit before you stitch over the area again.
Remember, every single person who has ever held a needle has made mistakes. I still do! Fixing them is just another skill you pick up along the way, and it makes you a much more confident and resilient stitcher in the long run.
Making Your Bookmark Last
You've put all this effort in, so how do you make sure your bookmark stands up to daily use? Beyond that initial wash before assembly, the best approach for future care is spot-cleaning. If a smudge appears, just a damp cloth with a tiny dab of gentle soap will usually lift it right off.
My number one rule for durability, though, is fusible interfacing. Honestly, I consider it essential. It gives the bookmark just the right amount of stiffness so it won't get dog-eared or floppy inside a book. This simple step is the secret to making sure the beautiful counted cross stitch bookmark patterns you create become treasured keepsakes that last for years.
At All About Sewing, we have all the high-quality Aida, DMC floss, and essential tools you need to create your next beautiful bookmark. Explore our collection and get everything for your project delivered right to your door. Start your next stitching adventure today


