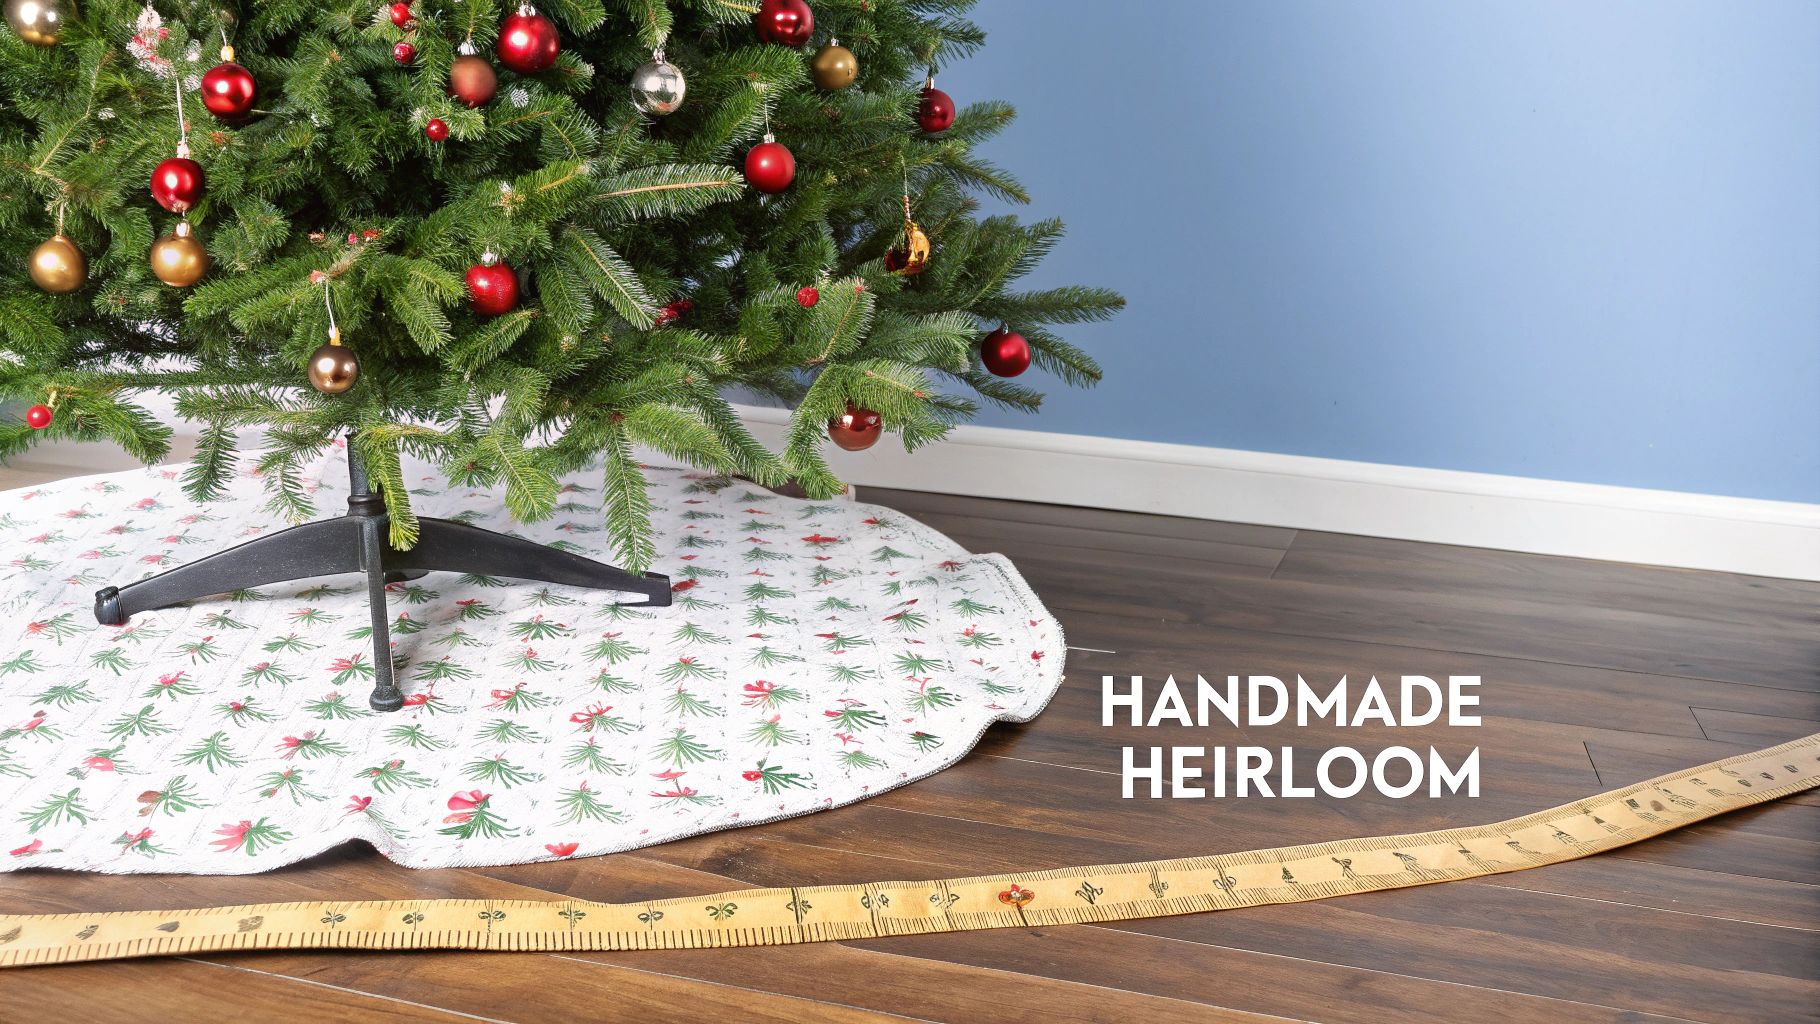
Your Ultimate Christmas Tree Skirt Pattern and Sewing Guide
Ready to add that perfect, personal touch to your holiday decorations with a beautiful Christmas tree skirt? There's something so special about a handmade skirt. It's more than just a sewing project; it's the start of a new family heirloom, one that will see many happy holidays for years to come.
Crafting Your Perfect Christmas Tree Skirt
Making your own tree skirt is one of the most satisfying holiday projects I can think of. You get to match your decor perfectly, whether you're dreaming of a classic quilted look, a simple rustic style, or something bright and modern. With our downloadable Christmas tree skirt pattern and straightforward instructions, you'll have everything you need to sew a piece that truly reflects your taste.
This guide will take you through every single step, from picking out the right fabrics to putting in that final stitch. I've packed it with all the little tips and tricks I've learned over 25 years of sewing to help you get it right, no matter how long you've been at the machine. Think of me as your sewing buddy, here to make sure the process is fun and your finished skirt is something you'll be excited to show off.
What You Will Learn in This Guide
We're going to cover all the bases to make sure your project is a huge success. You're getting more than just a pattern here—you're getting the know-how to really make it your own.
- Fabric Selection: We'll talk about the best materials to use, from festive 100% cotton prints that are a dream for quilting to luxurious velvets for a richer feel.
- Pattern and Cutting: I'll show you how to use our free pattern, pick the right size for your tree, and lay out your fabric to cut accurately and with minimal waste. It makes a difference!
- Sewing and Quilting: We'll break down how to piece the top, assemble the 'quilt sandwich' (it's not as intimidating as it sounds!), and stitch it all together.
- Finishing Touches: This is the fun part! You'll learn professional-looking techniques for binding the edges and adding closures. Plus, we'll explore creative ideas like appliqué or embroidery to make your skirt completely unique.
When you follow this tutorial, you’re doing more than just making a decoration. You’re stitching memories and starting a tradition. And honestly, you’ll end up with a high-quality piece for a fraction of what you’d pay in a store. Let’s get started
Gathering Your Materials and Tools
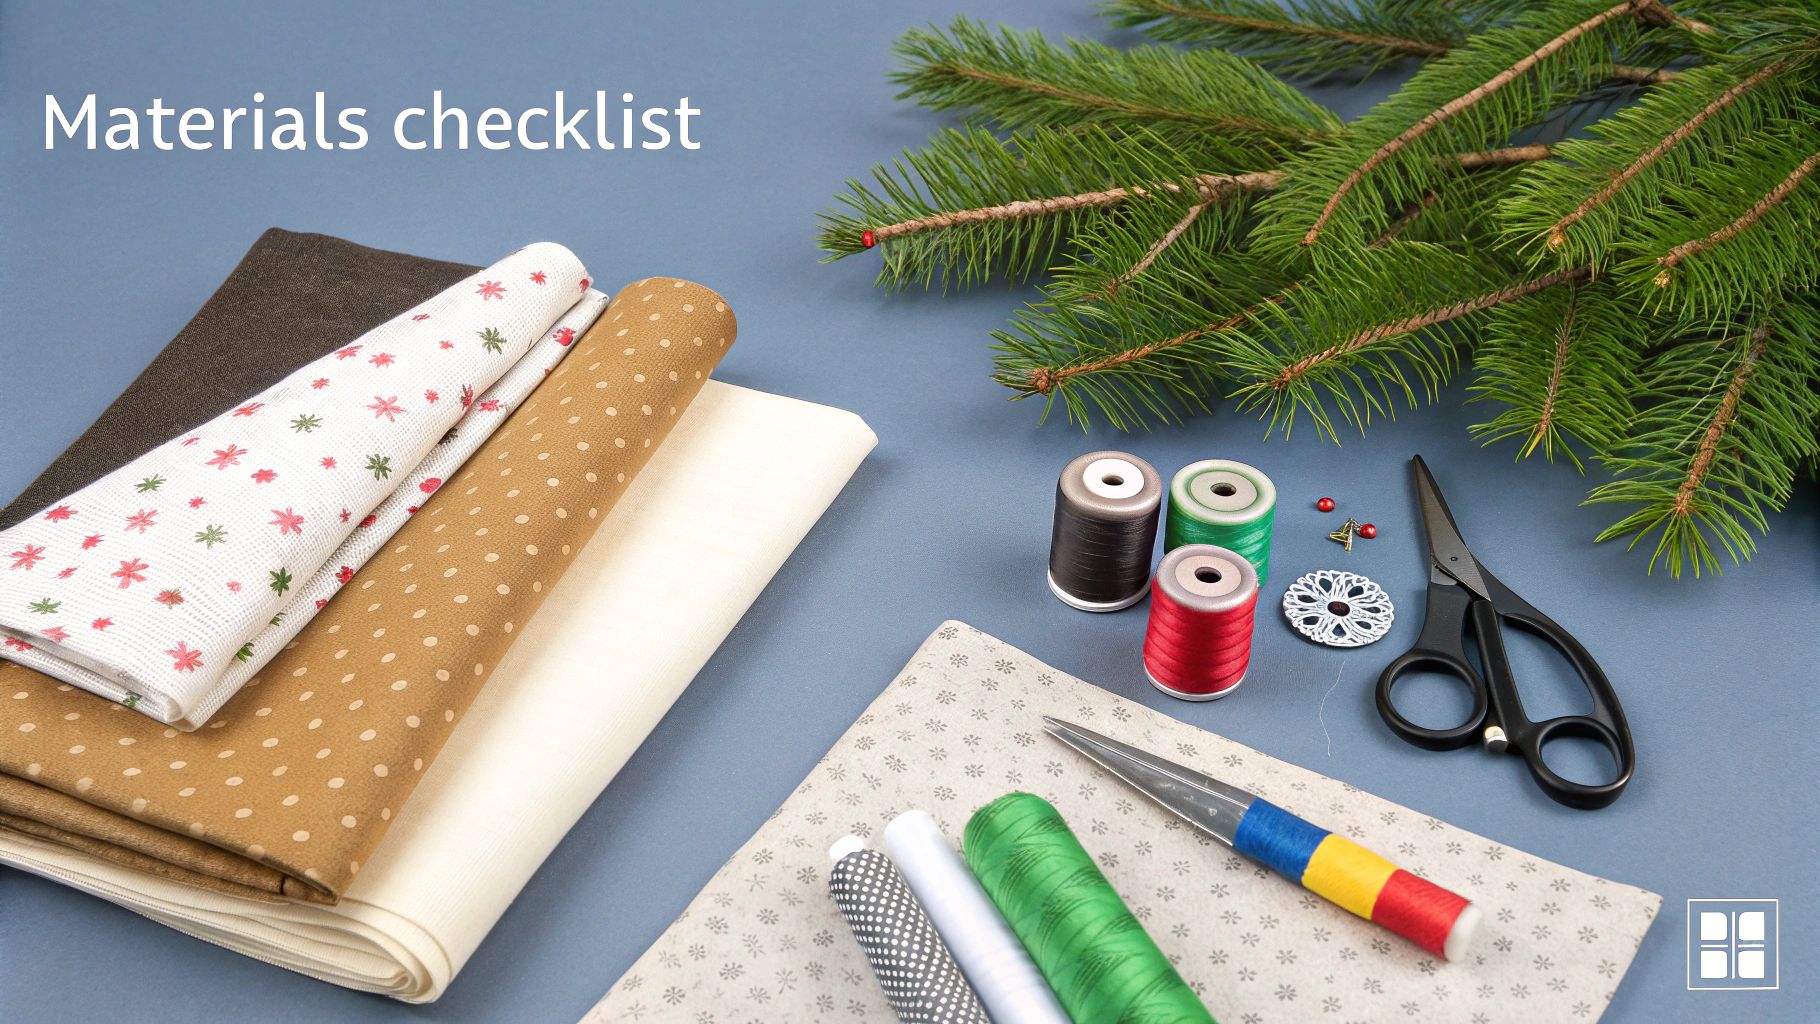
Before you even sit down at your sewing machine, the secret to a smooth and enjoyable project is getting all your supplies ready. Think of it as your mise en place for sewing. This is the fun part where you make the key decisions that will define the whole look and feel of your finished Christmas tree skirt pattern.
Let’s dive into the most exciting part first—the fabric! This is your chance to set the whole mood for your holiday decor. Are you going for a classic, cozy vibe, or something more modern and chic?
Choosing Your Core Fabrics
Your fabric choices for the top, backing, and batting are the main event. They don’t just determine how the skirt looks, but also how it drapes around the tree and holds up year after year.
-
Top Fabric: This is the star of the show. Festive 100% cotton prints are a fantastic choice, especially if you plan on quilting. They're a dream to work with, press beautifully, and come in every holiday theme imaginable. If you want something a bit more luxurious, materials like velvet, corduroy, or even a soft flannel can be stunning.
-
Backing Fabric: Think of this as the trusty workhorse. A simple, coordinating cotton solid is usually your best bet. It’s budget-friendly and won’t steal the spotlight from your beautiful top. Just make sure it’s a similar weight to your top fabric to avoid any weird pulling or distortion.
-
Batting (Optional): If you're making a quilted skirt, the batting is what gives it that lovely bit of puff and structure. I almost always reach for a low-loft cotton or a cotton-blend batting. It adds warmth and definition without being so bulky that the skirt can’t lie flat.
Here in Canada, making a custom tree skirt has become a really special holiday tradition. At our little shop in Barrie, Ontario, we see home sewists grab metres and metres of 100% cotton for these exact projects. Just last December, we sold over 2,500 metres of fabric destined for custom skirts, many of them stitched on BERNINA machines for intricate appliqué work.
The most common patterns create skirts around 48-52 inches in diameter, which is a perfect size for the 7-foot trees found in about 68% of Canadian homes. The best part? By making it themselves, crafters often save 60-70% compared to buying one from a big-box store, all while adding their own unique, personal flair. You can get a good feel for popular tree skirt styles and sizes over at The Home Depot.
To help you decide, here's a quick look at how different material combinations can bring your vision to life.
Fabric and Batting Combinations for Your Tree Skirt
| Style Goal | Top Fabric Suggestion | Batting Type | Backing Fabric | Recommended Needle |
|---|---|---|---|---|
| Classic & Quilted | Holiday Print Cotton | Low-Loft Cotton Blend | Solid Quilting Cotton | Quilting 90/14 |
| Modern & Minimalist | Linen or Canvas | Fusible Fleece | Coordinating Linen | Universal 80/12 |
| Luxe & Glamorous | Velvet or Faux Silk | No Batting (or very thin) | Satin or Cotton Sateen | Microtex 70/10 |
| Rustic Farmhouse | Flannel or Burlap | 100% Cotton Batting | Muslin or Homespun | Jeans/Denim 90/14 |
Choosing the right combination up front really sets you up for success and ensures your final piece hangs just the way you imagined.
Essential Tools of the Trade
With your fabrics picked out, it's time to gather the tools that will make this whole process a breeze. Trust me, having the right equipment makes all the difference between a project you love and one that makes you want to pull your hair out.
Pro Tip: Before you start sewing, take a moment to clean your machine and pop in a new needle. A fresh needle is your best defence against skipped stitches and fabric snags, especially when you're working with multiple layers.
You don't need a lot, but a few key items will help you get that professional-looking finish.
- Sewing Machine: Your trusty standard machine is perfect for this. If you plan on quilting, a walking foot is an absolute game-changer. It helps feed all the layers through evenly, so you don't get any puckering.
- Needles: A universal 80/12 needle is great for most cottons. If you’re quilting through a few layers, bump up to a quilting 90/14 needle to handle the extra thickness.
- Thread: Go for a high-quality, all-purpose thread that matches your main fabric. I suggest using 100% cotton thread for cotton fabrics since they'll shrink at a similar rate if you ever wash it.
- Cutting Tools: A rotary cutter, a self-healing mat, and a long acrylic ruler are your best friends for cutting super straight lines and perfect angles. If you're a scissors person, just make sure they're sharp fabric shears that you only use for fabric.
- Marking Tools: A water-soluble pen or a chalk pencil is perfect for marking quilting lines or figuring out placement for any embellishments.
- Pins or Clips: You can never have too many! Grab a big handful of pins or sewing clips to hold everything together and stop it from shifting while you sew.
Finally, give a little thought to your closures. Simple fabric ties made from leftover backing or binding fabric are a classic, charming option. If you want something a bit quicker, buttons and loops or even hook-and-loop tape work great. Having these little things ready from the start means you won’t have to interrupt your creative flow later on.
Okay, with all your supplies organized, you’re ready for the really fun part—cutting your fabric
Getting Your Fabric Ready to Cut
This is where the magic really starts. A beautiful Christmas tree skirt is all about the prep work. Taking your time now means everything will fit together like a dream later, making the actual sewing part a breeze. It’s a bit like baking: you can’t rush the early steps and expect a perfect result.
First, you'll need to piece together the downloadable Christmas tree skirt pattern. After printing, I find it easiest to lay all the pages out on the floor to get a sense of how they fit before reaching for the tape. Just line up the marked edges, tape them up, and you’ll have your full-sized pattern. Remember, the pattern comes in a few different sizes, so make sure you cut along the correct lines for the diameter you've chosen.
Why You Can’t Skip Pre-Washing
Before you even think about laying your pattern on that gorgeous fabric, we need to talk about pre-washing. I know, I know, it feels like an extra step, but trust me on this one. It's a non-negotiable in my sewing room. Fabrics like cotton can shrink by as much as 5% the first time they're washed.
Just imagine spending all that time making a beautiful skirt, only to have it pucker and warp the first time you wash it. Heartbreaking! Pre-washing gets all that potential shrinkage out of the way first. It also washes out any factory finishes, leaving the fabric softer and easier to handle. A quick, gentle cycle with cool water and a low tumble dry is all it takes.
A little tip from my own experience: give your fabric a good press with a hot iron after it comes out of the dryer. Starting with crisp, smooth fabric isn't just a luxury; it's the secret to getting super accurate cuts. Wrinkles are the enemy of precision!
Laying Out and Cutting Your Pieces
Okay, your fabric is washed and pressed, and your pattern is ready. It's time to cut! A smart layout can save you a surprising amount of fabric, leaving you with decent-sized scraps for other festive projects.
Pay close attention to the grainline arrow on your pattern pieces. This little arrow needs to run parallel to the selvage (the finished edge of the fabric). This ensures your tree skirt will hang properly and not twist oddly. For the main skirt wedges, you can often "nest" them by flipping every other piece upside down. They fit together like a puzzle, which is a great way to minimize waste.
How to Cut with Confidence
Whether you’re a rotary cutter enthusiast or loyal to your trusty fabric shears, the goal here is precision. A sharp blade and a steady hand are what you need.
- Top and Backing Fabric: Spread your fabric out on a large, flat surface. If you're using a rotary cutter, place your pattern piece down, anchor it with a quilting ruler, and cut. If you're using scissors, pin the pattern down every few inches so it doesn’t shift, and use long, confident snips.
- The Batting: You’ll want to cut your batting a bit bigger than the fabric pieces—an extra inch or two on all sides is perfect. This gives you a little margin for error when quilting, and we’ll trim off the excess later. Don’t stress about making the batting edges perfect at this stage.
Cutting the centre circle can feel a bit intimidating. The key is to take it slow. If you’re using a rotary cutter, a smaller 28mm blade gives you much better control around that tight curve. With scissors, I find it helps to make a series of small, careful snips instead of trying to cut the whole curve at once. You'll get a much smoother edge, which makes the next step—sewing—so much easier.
Sewing Your Christmas Tree Skirt Together
Alright, with all your fabric cut and ready to go, we can get to the fun part—actually sewing your Christmas tree skirt pattern! This is the stage where you'll see all that careful prep work pay off as your project finally starts to take shape. We’re going to piece the top, quilt the layers, and bring it all together.
I like to think of this step as building a festive, cozy fabric sandwich. The beautiful top you’ve cut is your first slice of bread, the fluffy batting is the filling, and the backing fabric is the final slice. Our job is to stitch them together so everything stays perfectly in place.
First things first, let's make sure our foundation is solid. The initial process is simple: prepare your fabric, lay out the pattern, and cut your pieces. This little graphic breaks down the workflow for getting your materials prepped and ready for the machine.
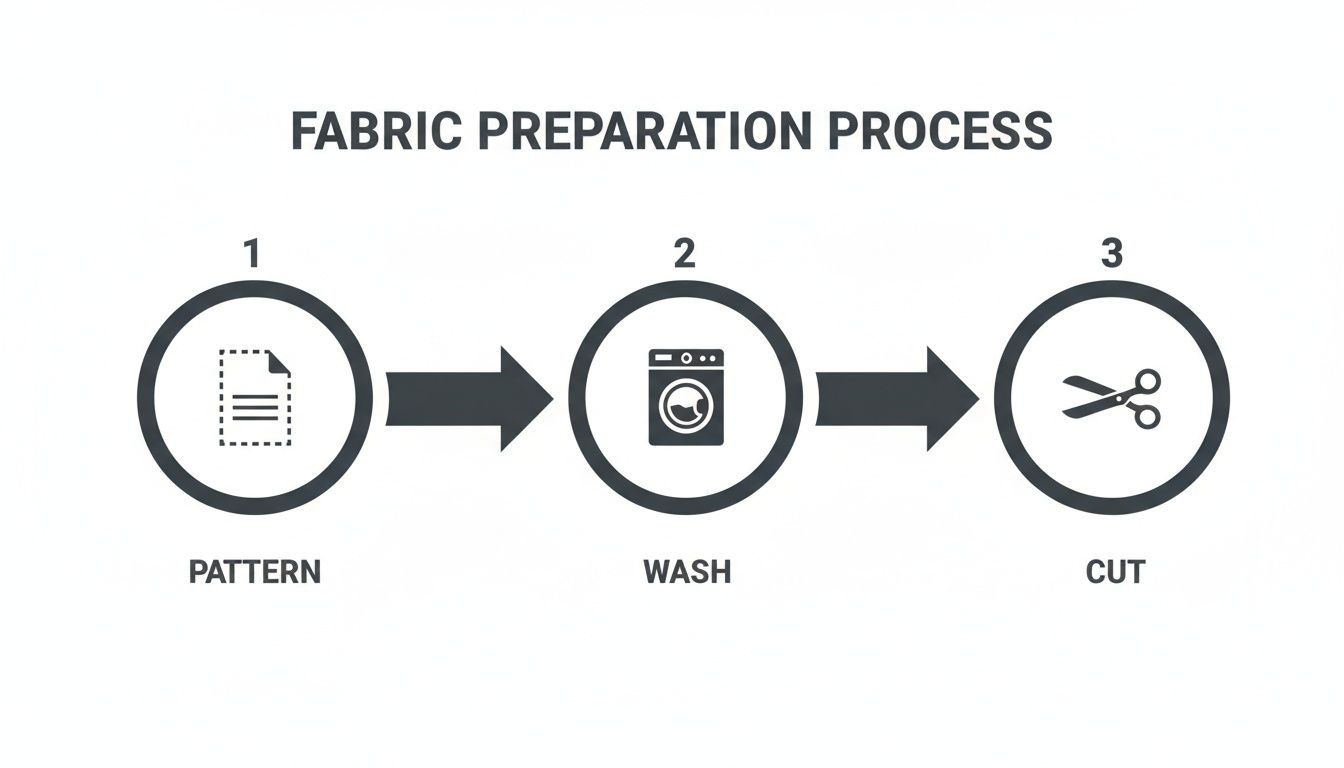
As you can see, tackling these three essential steps before you even sit down to sew is the key to a great start. It's the best way to make sure your finished skirt will be stable, accurately sized, and have a truly professional finish.
Assembling the Top Layer
If your pattern is made up of wedge-shaped panels, your first task is to join them all together to form a full circle. This is just straightforward piecing, but a little precision goes a long way.
Take two of your wedge pieces and place them with their right sides facing each other. Line up one of the long, straight edges perfectly. I recommend pinning or using clips to keep them secure and prevent any shifting while you sew. Now, head to your sewing machine and stitch along that edge using a consistent ¼-inch seam allowance.
Keep adding wedges one by one until you’ve formed a complete circle. After you sew each seam, take a moment to press it open with a hot iron. Trust me, this simple step makes a massive difference—it helps the top lay perfectly flat and gets rid of any bulk where the seams meet.
Creating the Quilt Sandwich
It's time to build your layers! In the quilting world, we call this making a "quilt sandwich," and it's a crucial step for getting that classic, plush look. You'll want to find a large, clean floor space where you can spread everything out without feeling cramped.
- Lay Down the Backing: Start by placing your backing fabric on the floor with the wrong side facing up. Smooth out every single wrinkle and pull it taut. A pro tip: you can use painter's tape on the corners to hold it securely to the floor.
- Add the Batting: Next, lay your batting on top of the backing. You'll notice it’s a bit larger than your top and backing, which is exactly what we want here. Gently smooth it out.
- Position the Top: Finally, carefully place your pieced skirt top onto the batting with the right side facing up. Make sure to centre it so you have an even overhang of batting and backing all the way around.
The secret to a pucker-free finish is to "baste" these three layers together before quilting. You can use large safety pins placed every 4-5 inches or a temporary spray adhesive designed for fabric. This stops the layers from shifting under the needle.
Quilting Your Tree Skirt
With your sandwich basted and secure, you can finally start quilting. This is your chance to add some real personality and texture. You don’t need to do anything complex like free-motion quilting; simple, straight lines can look incredibly elegant and modern.
A walking foot attachment for your sewing machine is your absolute best friend for this part. It grips all three layers at once, feeding them through the machine evenly and preventing any annoying bunching. I also suggest setting your stitch length a little longer than usual—a 3.0 or 3.5 mm length works really well for quilting.
You could stitch straight lines radiating out from the centre, follow the seam lines of your wedges, or even create a simple grid pattern. Just take your time and let the machine guide the fabric.
Sewing the Final Seams
Once the quilting is done, it's time to trim the excess batting and backing. Use your acrylic ruler and rotary cutter to trim them flush with the edge of your skirt top. You'll be left with a clean, perfect circle.
Next, place your quilted top and the remaining backing piece with their right sides together. Pin them securely all around the outer and inner circles, and don't forget the straight opening edge.
Stitch all the way around the perimeter, but be sure to leave a 6-8 inch gap along one of the straight edges. This is the opening you’ll use to turn the entire skirt right-side out. Remember to backstitch at the beginning and end of your seam to lock it in.
Before you turn it, you’ll want to clip the curves. Snip small V-shaped notches into the outer curve and small straight slits into the inner curve, being careful not to snip through your stitching. This little trick helps the seams lay flat and smooth once turned.
Making Christmas tree skirts has really taken off in Canada, especially among quilters here in Ontario. Recent data shows 55% of surveyed craft council members have made at least one, often relying on machines like a Husqvarna Viking for their precision. It’s no wonder, since a homemade skirt usually costs only $25-$45 in materials—a huge 55% savings over store-bought ones. In our workshops, we've seen how finishing edges with a serger from a brand like JUKI can cut down on fraying by 90%. It’s a great example of blending timeless tradition with modern sewing techniques. You can dig into more fascinating Canadian holiday crafting trends in the full report from Statistics Canada.
Now, carefully turn the skirt right-side out through the opening you left. I like to use a dull, pointed tool like a chopstick to gently push out the corners and smooth the seams. Give the entire skirt a final, thorough press with your iron, paying extra attention to the edges.
To finish it all off, simply topstitch ⅛ inch from the edge all the way around the skirt. This not only gives it a crisp, professional look but also neatly sews that turning gap closed. And just like that, your beautiful, quilted Christmas tree skirt is fully assembled and ready for its finishing touches
Adding the Final Flourish and Creative Details
With the main construction of your Christmas tree skirt all done, we get to the really exciting part—where your personal style comes out to play. The finishing touches, like how you finish the edge, the type of closures you add, and any extra embellishments, are what will turn this from a simple sewing project into a cherished family heirloom.
This is your chance to give it some real character and a professional polish. Whether you’re leaning towards a classic, crisp binding or a simpler, more modern edge, the way you finish your skirt has a huge impact on the final look. Let's walk through some beautiful and practical techniques to bring it all together.
How Will You Finish the Edge?
Finishing the outer edge of your skirt is a big design decision. There are two go-to methods, and each gives a completely different feel and requires a different amount of effort.
-
Classic Quilted Binding: For a traditional, super-durable finish, you just can't beat a proper binding. This means creating long strips of fabric, folding them, and sewing them all the way around the raw edges of the skirt. It frames your work beautifully and is the gold standard for any quilted project.
-
The 'Pillowcase' Method: If you're after a quicker, more modern finish, this is a brilliant option. Since you've already sewn the layers right-sides together and turned it, the edges are neatly enclosed. All it needs is a clean topstitch around the entire perimeter to create a tidy, streamlined look.
Making your own binding might sound a bit intimidating, but it’s such a satisfying skill to learn. You'll cut your fabric strips, join them on a diagonal to keep them from getting bulky, and then press them in half. Sewing this binding to the curved edge of your Christmas tree skirt pattern does take a bit of patience, but using plenty of clips and a walking foot makes the whole process surprisingly smooth.
Adding Closures That Are Both Functional and Stylish
Next up, you need a way to fasten the skirt around the tree. You'll want to choose a closure that's both practical and works with the overall design you've created.
You've got a few great options here:
- Fabric Ties: Simple, charming, and they don't cost a thing if you use leftover fabric. Just sew some long, thin tubes from your backing or binding fabric, turn them right-side out, and stitch them securely to the opening of the skirt.
- Buttons and Loops: For a more decorative touch, buttons add a lovely, handcrafted feel. You can either make little fabric loops or even sew a simple elastic hair tie into the seam for a loop with a bit of stretch.
- Hook-and-Loop Tape: This is by far the quickest and easiest way to get it done. Just cut a few small pieces of hook-and-loop tape and stitch them along the opening for a secure closure that stays hidden.
My personal favourite is using fabric ties. They add a soft, traditional touch that just feels right for a holiday project. Plus, it’s a fantastic way to use up every last scrap of that beautiful fabric you picked out.
Let Your Creativity Shine with Embellishments
Okay, now for the really fun stuff! Embellishments are where you can let your imagination run wild. Even the smallest additions can make your tree skirt a true one-of-a-kind piece. Think about adding some appliqué shapes like snowflakes or stars, using scraps of contrasting fabric.
Personalized embroidery is another wonderful idea. You could add your family's name, the year, or some simple festive motifs. In fact, recent data from the Canadian Quilters' Association shows a 28% jump in members making tree skirts, often using embroidery machines like a PFAFF for those intricate festive designs. These patterns often saved sewers an average of $60 per project, and a whopping 75% of creators chose high-speed Ricoma machines to stitch 20% faster. In communities like Barrie, sewers in our rewards program reported 92% satisfaction with their handmade skirts' durability, noting they outlasted store-bought versions by at least two holiday seasons. With free shipping on bulk buys of Handi Quilter threads and financing options available, getting the right tools for these creative touches is easier than you think. You can dive deeper into how Canadians are embracing holiday crafting in this article from Statistics Canada.
Even simple decorative stitching with a contrasting thread colour can add incredible texture and visual interest. Most modern sewing machines have a whole library of decorative stitches built right in, which are perfect for adding an elegant little border around the edge of your skirt. This is your moment to turn that Christmas tree skirt pattern into a true work of art.
Answering Your Top Tree Skirt Sewing Questions
Even with the best pattern in hand, sometimes you just hit a snag or have a question pop up. I've been sewing these for years and have heard it all, so I've put together answers to the questions I get asked most often. Think of it as having an experienced sewing friend right there with you.
We'll tackle everything from getting the size just right for your specific tree to keeping your finished creation looking beautiful for years to come. Let's get these common questions sorted so you can get back to sewing with confidence.
What’s the Perfect Size for a Christmas Tree Skirt?
This is, without a doubt, the number one question I get asked. The honest answer? It really depends on your tree. A good rule of thumb is to make sure the skirt's diameter is at least 10 to 15 centimetres wider than the tree's widest branches. This little bit of extra fabric ensures it looks balanced and is big enough to catch those pesky stray needles.
If you need a starting point, here are some general guidelines that usually work well:
- For a standard 7-foot tree: A diameter of 48 to 54 inches (122 to 137 cm) typically looks fantastic. It’s got enough presence without taking over the whole room.
- For a small tabletop tree: Something smaller, between 20 and 30 inches (51 to 76 cm), will feel much more in proportion.
- For a grand 9-foot tree: Go big! A more dramatic skirt with a diameter of 60 inches (152 cm) or more will make a real statement.
My best piece of advice is to put your tree up before you cut your fabric. Take a quick measurement of the tree stand and the widest point of the branches. Our pattern has guides for common sizes, but nothing beats a custom fit that looks like it was made just for your home.
Can I Skip the Quilting Layer?
You absolutely can! A classic quilted tree skirt is wonderfully cozy, but a simple two-layer version without batting can be just as stunning. This is a great shortcut if you're tight on time or aiming for a cleaner, more modern look.
All you need to do is place your top and backing fabrics right sides together, stitch all the way around the perimeter, and leave a small gap to turn it right-side out. It’s often called the "pillowcase" method. This works beautifully with fabrics that have a bit of body on their own, like flannel, canvas, or even a nice corduroy. It's a quick and elegant alternative.
How Do I Care for My Handmade Tree Skirt?
The fabric you choose is the key here. If you took my advice and used a 100% pre-washed cotton, you're in for an easy time. It can likely be machine washed on a gentle cycle with cold water. To keep it looking its best, I always recommend laying it flat or hanging it to dry.
For skirts with more delicate fabrics or detailed embellishments, you'll want to be a bit more careful.
- Velvet or Faux Silk: These really should be professionally dry-cleaned. A machine wash can easily damage their beautiful texture.
- Appliqué or Embroidery: If you've added special touches, spot cleaning is your safest option. A mild detergent and a soft cloth should be all you need to gently handle any stains.
When it's time to pack everything away after the holidays, gently fold your skirt and store it in a breathable cotton bag or a cardboard box. This will protect it from dust, moisture, and sunlight, making sure it looks just as gorgeous next year.
What's the Easiest Way to Bind a Curved Edge?
Binding a big circle can feel intimidating, but the secret weapon is bias binding. Because it's cut on a 45-degree angle to the fabric's grain, it has a natural stretch. This is what allows it to hug the curve and lie perfectly flat, without any of those frustrating puckers or folds.
You can buy pre-made bias tape or make your own for a perfect fabric match. When you go to attach it, just remember to take your time. Slow and steady wins the race here! Use lots of sewing clips to hold the binding securely in place as you sew. A walking foot on your machine is also a game-changer, as it helps feed all the layers through evenly and prevents any shifting.
Ready to create your next holiday masterpiece? At All About Sewing, we have everything you need, from festive fabrics and premium threads to the best machines from BERNINA, PFAFF, and JUKI. Explore our full collection and get inspired.


