


A Beginner's Binding a Quilt Tutorial for Perfect Edges
Binding a quilt is one of the most satisfying parts of the whole process. It's that final frame that brings all your hard work together. But to get that flawless finish, it all starts with getting your tools and materials ready before you even think about making that first cut.
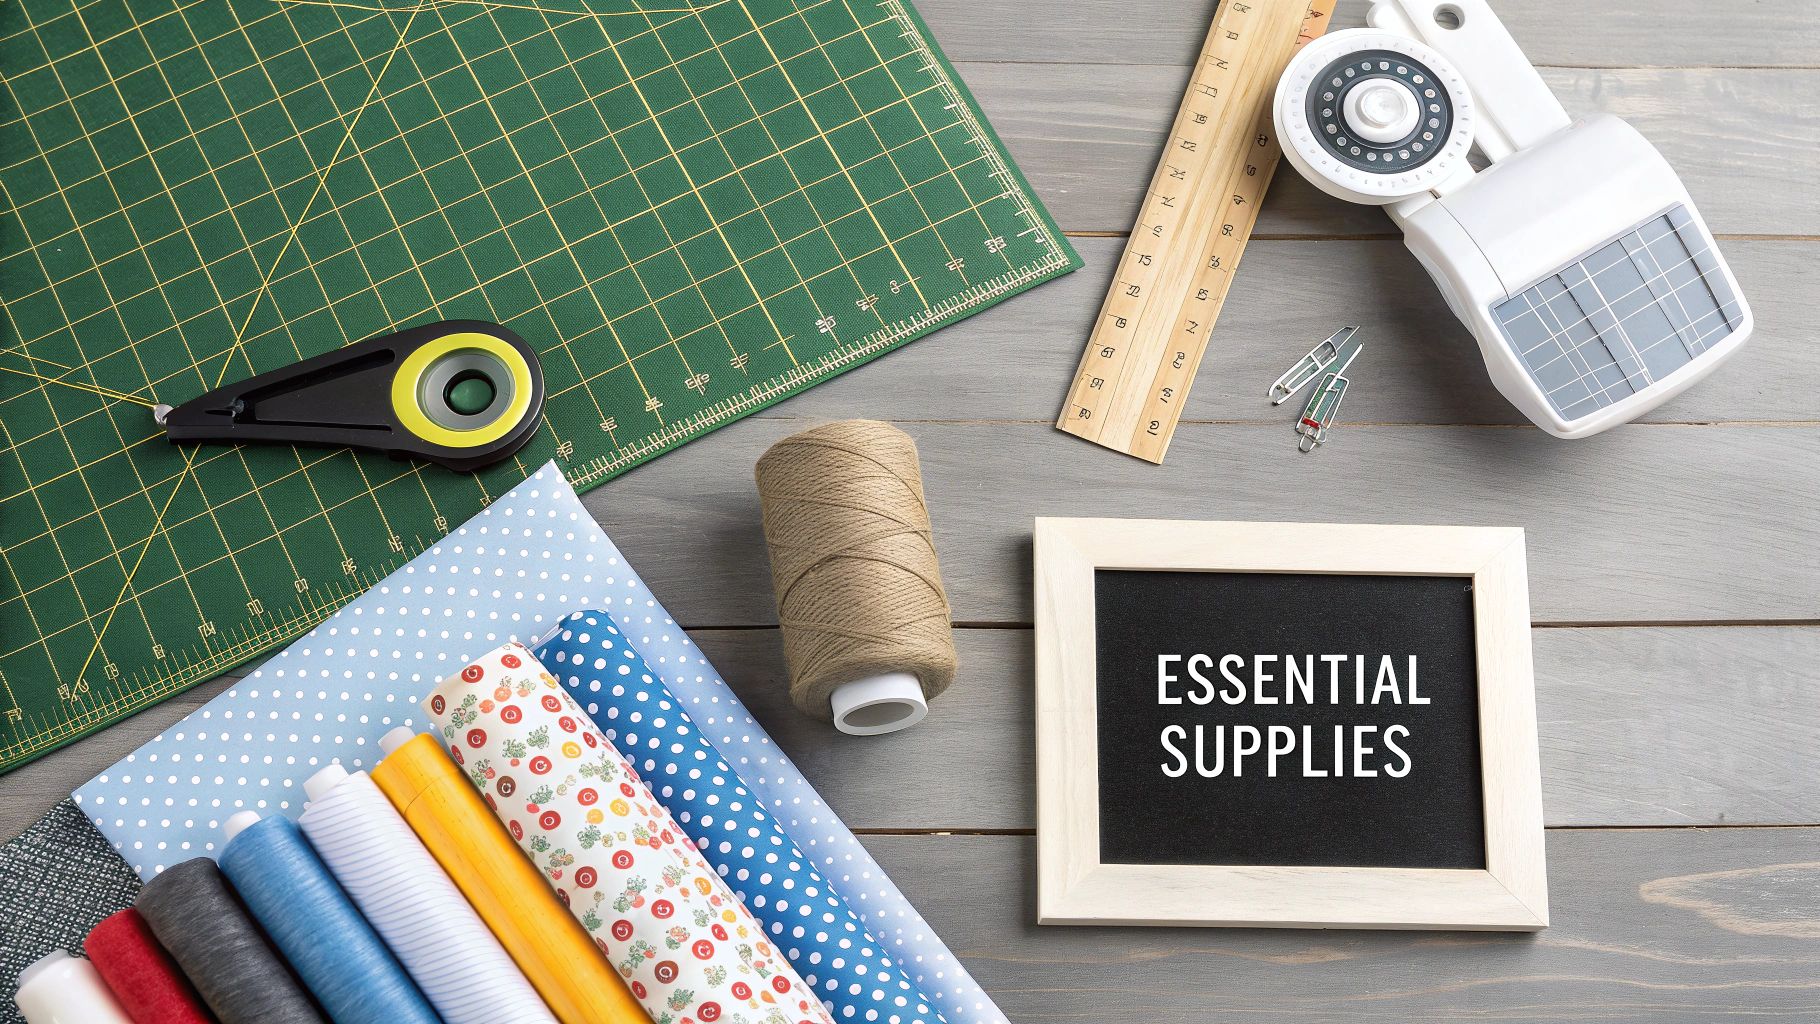
Gathering Your Supplies for a Flawless Finish
Let's get organised. Taking a few minutes to gather everything you need isn't just about being tidy; it’s about setting yourself up for success and avoiding frustrating interruptions later. Think of it as mise en place for sewing—everything in its place, ready to go.
Fabric and Thread: The Foundation
The heart of a great binding is quality material. I always recommend using 100% quilting cotton for your binding fabric. It’s got the perfect combination of weight and stability to handle wear and tear, protecting your quilt's edges for years.
Your thread choice matters just as much. A high-quality, coordinating cotton thread will sink into the fabric and blend beautifully. This is especially important if your stitches aren't perfectly straight (we've all been there!). It's the ideal finishing touch for those intricate projects, like the beautiful designs you can create with our layer cake quilt patterns.
Tools of the Trade
Here’s a quick look at the tools you'll need, separating the absolute must-haves from the nice-to-haves that just make life a little easier.
| Tool | Why It's Important | Category |
|---|---|---|
| Rotary Cutter | Delivers crisp, perfectly straight cuts that scissors can't replicate. | Essential |
| Quilting Ruler (24-inch) | Essential for guiding your rotary cutter to create long, even strips. | Essential |
| Self-Healing Mat | Protects your table and keeps your rotary blade from dulling quickly. | Essential |
| Walking Foot | Feeds all layers (top, batting, backing) through the machine evenly. | Recommended |
| Binding Clips | Holds binding securely without poking holes or getting in the way. | Recommended |
Having the right gear not only improves your results but also makes the entire process more enjoyable.
Getting Perfectly Straight Cuts
Precision is everything when you're preparing binding strips. Your rotary cutter, quilting ruler, and self-healing mat are a trio that works together to guarantee accuracy. A long, clear ruler (at least 24 inches) is your best friend here.
A sharp rotary blade makes a world of difference. If you notice it’s skipping threads or leaving a slightly jagged edge, it's time for a new one. A fresh blade will glide through the fabric, giving you that perfect, clean edge you’re looking for.
Sewing Machine Essentials
While you can technically attach binding with a standard presser foot, some accessories make the job so much smoother.
A walking foot is a game-changer. Seriously. It has feed dogs on the bottom that grip the top and bottom layers of your quilt sandwich at the same time, feeding everything through evenly. This prevents the fabric from shifting, puckering, or stretching out of shape.
And don't overlook binding clips! These little gadgets are fantastic. They hold your folded binding in place much more securely than pins, and you don't have to worry about pricking your fingers or distorting the fabric.
For Canadian quilters, especially in communities like those around our Ontario shop, these techniques are more relevant than ever. Quilting is seeing a huge surge in popularity, with recent surveys showing that 18% of quilters in 2025 were new to the craft. If you're curious about quilting market trends, you can find more insights over at the Craft Industry Alliance.
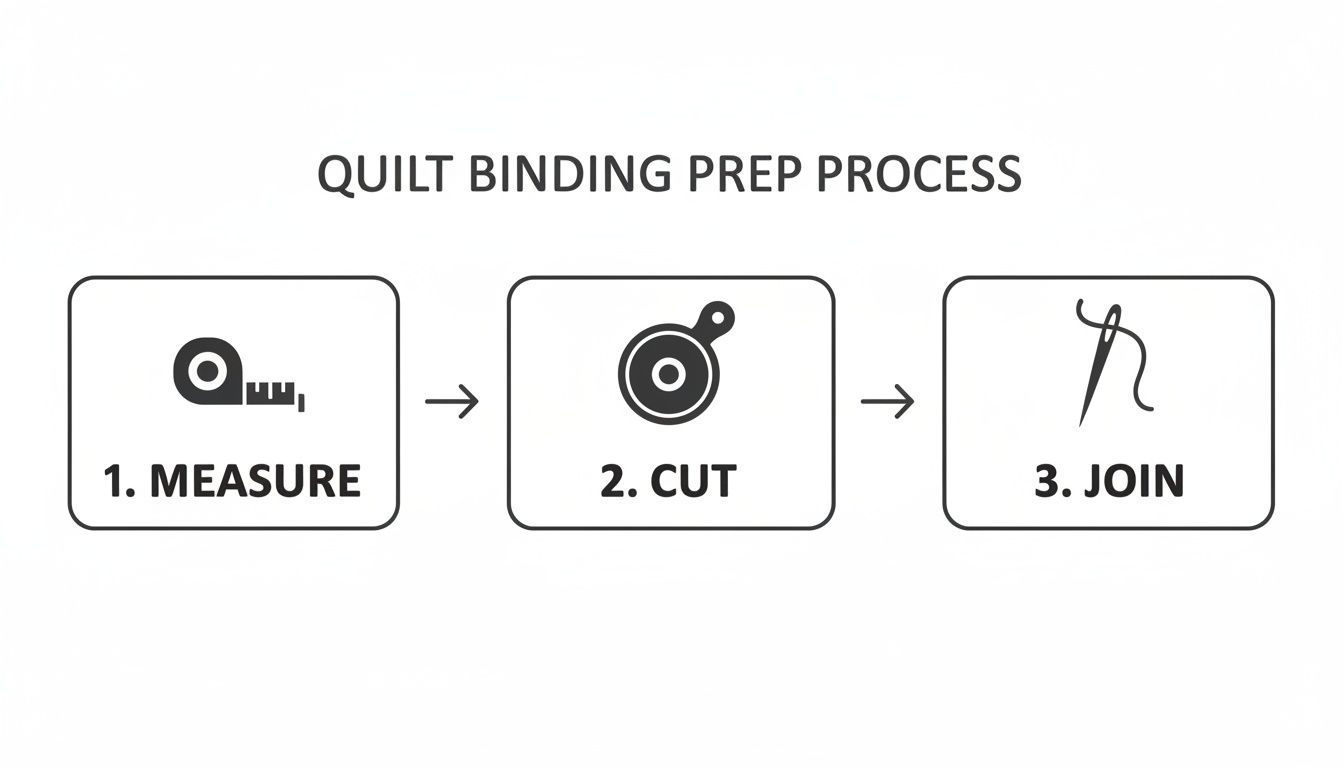
Getting Your Binding Fabric Ready to Go
Nailing your measurements is the secret to a great-looking binding. It's what separates a smooth, professional edge from one that looks puckered or stretched out of shape. The good news is, the math is straightforward and will save you from the headache of running out of fabric mid-project.
First up, you need the perimeter of your quilt. Just measure all four sides and add them together. Let's say you have a quilt that's 60 inches long and 50 inches wide. Your math would look like this: 60 + 60 + 50 + 50 = 220 inches.
Now, here’s a crucial step: always add an extra 10 to 12 inches to that total. This little bit of insurance gives you enough fabric to comfortably join the ends and fold those crisp mitred corners without a struggle. For our example quilt, we'd want a total binding length of 230 inches (220 + 10).
Cross-Grain vs. Bias Binding: What's the Right Choice?
Next, you need to decide how you'll cut your fabric strips. This isn't just a matter of preference; it really depends on the shape of your quilt's edges. Your two main options have very different properties.
- Cross-Grain Binding: For any quilt with straight edges, this is your go-to. You simply cut the strips from one selvage edge to the other. This gives you a tiny bit of stretch—just enough to ease around the corners perfectly—but it’s stable enough to keep those long straight sides from waving.
- Bias Binding: If your quilt has any curves, from a gentle scallop to a full circle, you absolutely need bias binding. These strips are cut at a 45-degree angle to the fabric's grain. That diagonal cut unlocks a ton of stretch, letting the fabric hug those curves beautifully without any puckers or awkward folds.
A Little Tip From Me: Don't think bias binding is only for curves! Many experienced quilters (myself included) use it for everything. The diagonal seams are much less bulky and seem to disappear, and the extra give in the fabric can be really forgiving when you're attaching it.
Cutting and Joining Your Strips
For almost every quilt I make, I cut my binding strips 2.5 inches wide. This is the industry standard for a reason. It creates a durable, double-fold binding (often called a French binding) that looks fantastic and holds up beautifully to years of love and washing.
To figure out how many strips to cut, just divide your total binding length by the usable width of your fabric (which is typically 40-42 inches after you trim the selvages). Using our 230-inch example, we'd need six strips (230 ÷ 40 = 5.75, so we round up to 6 to be safe).
Once your 2.5-inch strips are cut, it's time to join them into one long piece. Here's how:
- Place two strips right sides together, forming a 90-degree angle.
- Sew a diagonal line from the top-left corner to the bottom-right where they overlap.
- This 45-degree seam is the real magic here. It distributes the fabric bulk along a diagonal so you don't end up with a clunky lump in your finished binding.
After sewing, trim the excess fabric about a quarter-inch away from the seam and press it open with your iron. Keep doing this until all your strips are connected. For the final step, fold the entire binding strip in half lengthwise with the wrong sides touching, and give it a good press. Just like that, your binding is prepped and ready for the main event
Attaching the Binding to Your Quilt by Machine
Alright, you’ve done the prep work—your binding is measured, cut, joined, and nicely pressed. Now for the fun part! This is where that quilt sandwich finally becomes a beautifully finished quilt. We're going to walk through attaching it by machine, focusing on how to get started smoothly and, of course, how to tackle those notorious mitred corners.
First things first, line up the raw edge of your folded binding strip with the raw edge of your quilt top. You'll always want to sew the binding to the front of the quilt first. Here's a pro tip I learned the hard way: never start sewing right at a corner. Find a spot about halfway down one of the sides to begin.
Make sure to leave a tail of about 8-10 inches of binding unsewn at the start. You'll thank yourself for this later, as it’s the key to getting a seamless join. Use clips to hold the binding in place as you work your way around.
Starting Your Stitch
With your binding clipped down, you're ready to start sewing. A walking foot is an absolute game-changer here. It grabs all the layers of your quilt sandwich and feeds them through evenly, which means no annoying stretching or puckering. If you don't have one, your standard foot will do the job, but just take it slow and steady.
For most quilting cottons, I find a stitch length between 2.5 mm and 3.0 mm works perfectly. It’s long enough to keep things moving but short enough for a strong seam.
The gold standard for the seam allowance is a crisp 1/4 inch. This gives you just the right amount of fabric to fold over for a neat finish. Many machines have a dedicated foot for this, like a 1/4 inch binding foot, that makes staying accurate practically foolproof.
This is the stage where all that careful prep work really pays off.
Having your binding measured, cut, and joined properly before you even sit down at the machine is the secret to a stress-free attachment process.
Mastering the Mitred Corner
Ah, the mitred corner. This is what gives your quilt that sharp, professional look that we all strive for. It might seem a bit intimidating, but I promise it's just a simple sequence of stopping, folding, and turning.
As you get close to a corner, slow down. You'll want to sew until your needle is exactly 1/4 inch away from the quilt's edge—the same as your seam allowance. Stop with the needle down in the fabric, do a little backstitch to lock it in, and then cut your threads. Pull the quilt out from under the needle.
Now, for the magic folding trick:
- Take the binding strip and fold it straight up, away from the quilt. This should create a neat 45-degree angle at the corner. The raw edge of your binding should now line up with the raw edge of the next side you're about to sew.
- While holding that first fold in place with your thumb, bring the binding strip straight back down over itself.
- Line up the raw edge of the binding with the raw edge of the new side. You should have a perfect, sharp fold at the corner, sitting flush with the quilt's edge.
Pop a clip on that folded corner to hold it secure. Now, take the quilt back to your machine. Start sewing again right from the very top edge of this new side, keeping that consistent 1/4 inch seam allowance. Just repeat this process for the other three corners!
Don't forget to stop stitching and leave another 8-10 inch tail when you get back near your starting point. These two unsewn tails are what you’ll use to create that final, invisible join we'll cover in the next section.
For home sewists, using 2.5-inch wide strips is a common practice echoed in quilting workshops all across the country. It’s a skill worth mastering, especially since Canada holds a significant 19.70% share of a North American quilting market projected to reach $1,871.79 million. Here at All About Sewing, our 25 years of service means we know how to get your machine perfectly tuned for these precise stitches, whether you're a hobbyist or a seasoned pro.
Creating a Seamless Join for a Continuous Look
That final join is what really separates a good binding from a great one. A bulky, awkward connection can be a real eyesore on an otherwise beautiful quilt, but trust me, getting a perfectly flat join is easier than you might think. This is where those unsewn tails you left at the beginning and end finally get their moment to shine.
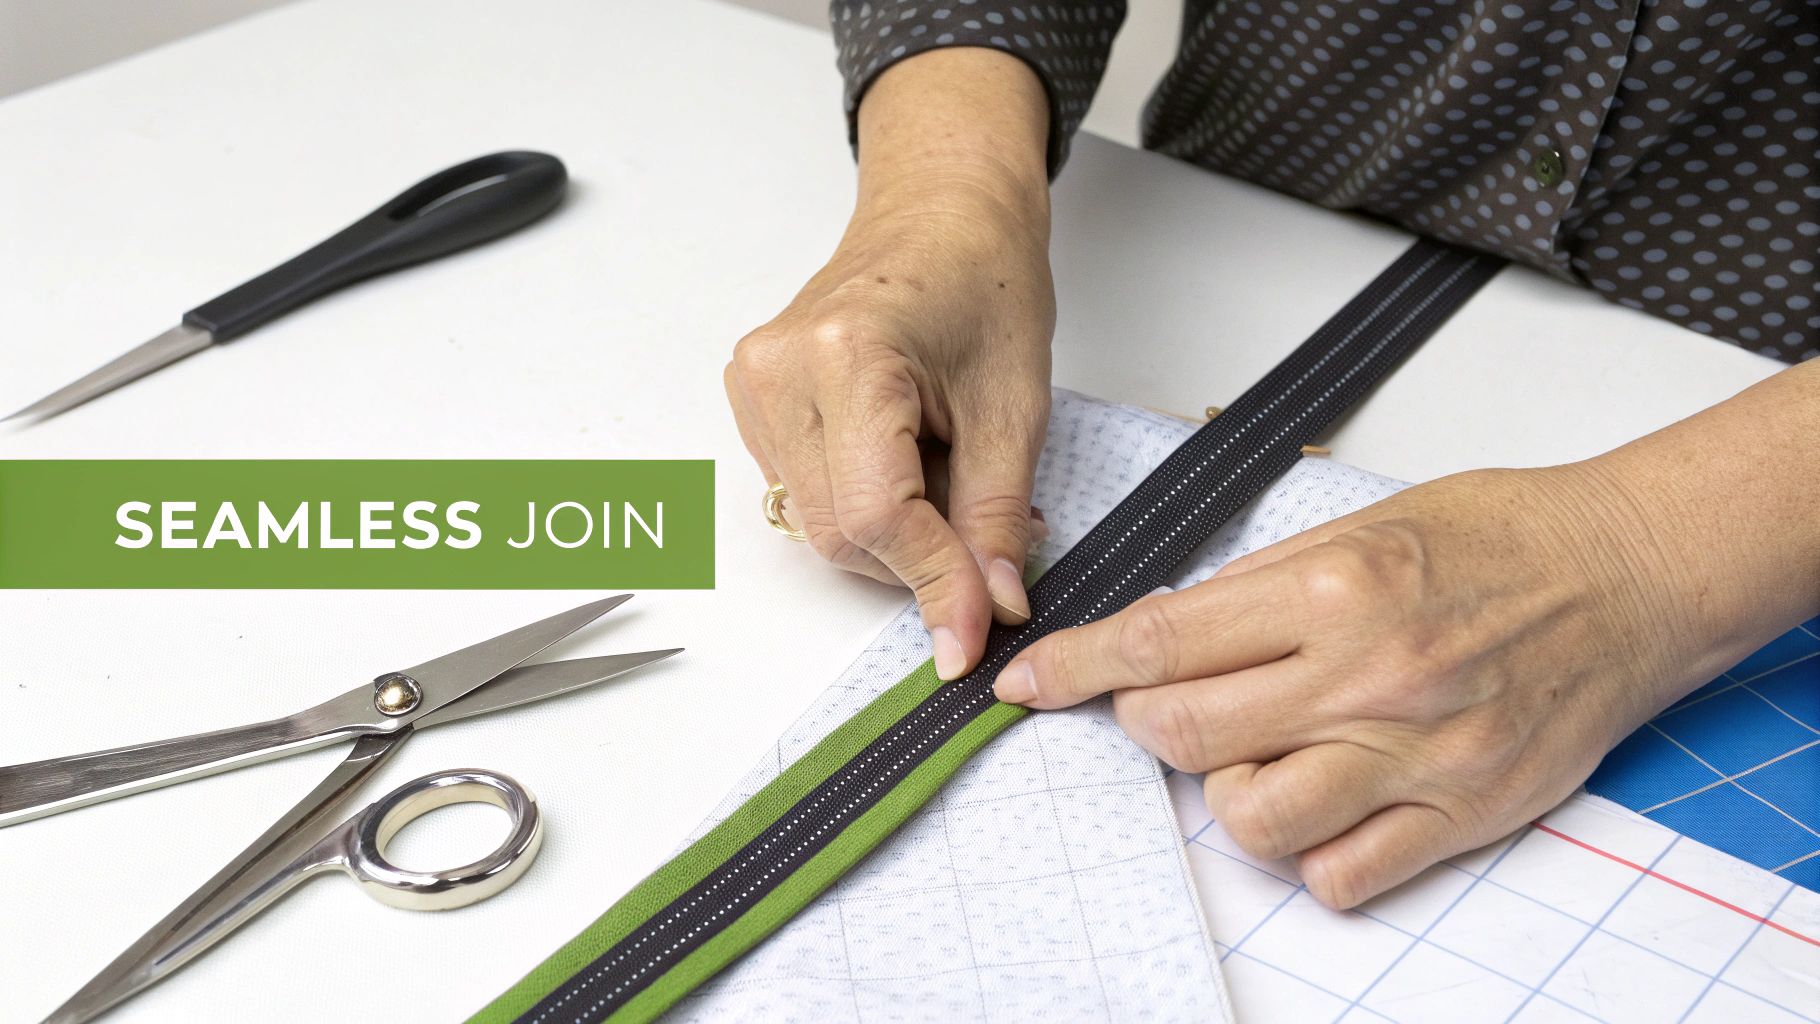
Let's start by laying the two binding tails flat in the gap where they meet. The goal here is to trim them so they overlap by the exact width of your binding strip. Since we cut our strips 2.5 inches wide, that's the magic number we'll use for the overlap.
Smooth out the beginning tail—the one you started with—flat against the quilt's edge. Now, lay the ending tail directly on top of it. Make sure both are completely straight and haven't twisted. This overlap is where you're going to make your cut.
Marking and Cutting for the Perfect Fit
Take the ending tail and carefully trim it so it overlaps the beginning tail by precisely 2.5 inches. I always recommend using a clear quilting ruler and a rotary cutter for this; accuracy is everything. Get this cut right, and you'll avoid a join that's either too tight (causing puckers) or too loose (leaving a saggy gap).
Once it's trimmed, you’ll join these two ends together with a diagonal seam, just like you did when you first pieced your binding strips together. Open up the folds of both tails and place them right sides together, forming a 90-degree angle.
Next, draw a diagonal line from the top left corner to the bottom right where the fabrics cross. You'll stitch directly on this line.
Before you even think about trimming the excess fabric, do a quick "test fit." Gently fold the joined binding back into place along the quilt's edge. It should lie perfectly flat with no pulling or bunching. If it looks good, you're ready to commit.
With the fit confirmed, go ahead and trim the excess fabric about a quarter-inch away from your diagonal seam. I like to gently press the seam open with my fingertips right after trimming, as it really helps reduce the bulk.
Finally, refold your binding strip and align its raw edge with the raw edge of the quilt one last time. Stitch this final section down, using the same 1/4-inch seam allowance as before. And just like that, your binding is a continuous, seamless loop, all ready for the final finishing touches.
Finishing Your Quilt Binding by Hand or Machine
With your binding securely attached to the front, you’re on the home stretch! The final, and arguably most satisfying, step is to bring that folded edge around to the back of the quilt and stitch it down for good.
You’ve got two main paths to choose from: hand-finishing for a traditional, invisible look, or machine-finishing for a speedy and durable result. Your choice really just boils down to what the quilt is for and what you prefer.
A quilt destined to become a family heirloom often calls for the quiet, meditative process of hand-stitching. On the other hand, a modern baby quilt that’s going to see the inside of a washing machine more times than you can count might be better off with the robust strength of a machine stitch. There’s no right or wrong answer—just what feels right for your creation.
The Heirloom Touch of Hand Finishing
For a truly invisible finish, the blind stitch (also known as a ladder stitch) is your best friend. This technique cleverly hides the thread within the fold of the binding, making your stitches practically disappear. The result is a beautiful, soft edge that has long been the hallmark of a high-quality, traditional quilt.
Before you get started, grab a few essentials:
- A fine needle, like a quilting "between" or a sharp appliqué needle.
- Coordinating thread; a quality 100% cotton that matches your binding is perfect.
- A thimble. Trust me on this one—it’s a must-have for protecting your finger during a long stitching session!
Once your thread is knotted, bring your needle up from behind the quilt backing so the knot is hidden right under the binding’s folded edge. Next, take a tiny stitch into the quilt backing, travel about 1/4 inch inside the binding’s fold, and bring the needle out. Just keep repeating this motion, creating a little "ladder" of hidden stitches that gently but securely pulls the binding into place.
My Personal Tip: Resist the urge to pull your stitches too tight. The goal is to have the binding just kiss the backing fabric. If you tug too hard, you’ll end up with puckers on the front of your quilt. A relaxed, even tension is the secret to a flawless finish.
The Practicality of Machine Finishing
When speed and strength are at the top of your list, finishing your binding by machine is an excellent choice. This method is perfect for quilts that will be loved hard and washed often. A popular technique is "stitching in the ditch" from the front of the quilt.
This involves stitching directly in the seam—the "ditch"—where the binding meets the quilt top. The idea is that this line of stitching will catch the folded edge of the binding on the back. It definitely requires some precision and a walking foot is highly recommended to make sure all the layers feed through your machine evenly. If you're weighing your options, our guide on the differences between a serger and a sewing machine can offer some valuable insights for this kind of work.
Another machine-friendly approach is to topstitch the binding from the back. After folding the binding over and securing it with clips, you simply sew very close to the folded edge all the way around. This leaves a visible line of stitching on the back and a nearly invisible one on the front, giving you a clean and very durable finish.
Choosing Your Finishing Method: Hand vs. Machine
Deciding between hand and machine finishing often comes down to balancing aesthetics, time, and the quilt's intended use. Here’s a quick breakdown to help you choose the best route for your project.
| Feature | Hand Finishing (Ladder Stitch) | Machine Finishing (Stitch-in-the-Ditch) |
|---|---|---|
| Final Look | Stitches are invisible on both sides; traditional heirloom quality. | A visible, clean stitch line on the back; nearly invisible in the seam on the front. |
| Speed | Slow and meditative; can take several hours depending on quilt size. | Fast and efficient; can be completed in under an hour. |
| Durability | Very secure, but may be less robust for frequent, heavy washing. | Extremely durable and strong, ideal for items used and washed often. |
| Skill Level | Requires patience and practice for even stitches, but is very forgiving. | Requires good machine control and a walking foot for best results. |
| Best For | Wall hangings, heirloom quilts, art quilts, and projects where aesthetics are key. | Baby quilts, utility quilts, placemats, and items needing maximum durability. |
Ultimately, both methods create a beautiful and secure finish. Don't be afraid to try both to see which one you enjoy more!
With a growing number of new quilters joining the craft, durable techniques are more important than ever. Tutorials emphasizing double-fold binding are especially popular, as this method has been proven to withstand over 500 machine washes. This focus on durability is part of a larger trend in Canada's craft economy, which saw sewing machine sales rise 15% in 2024-2025. You can read more about these market trends in the quilting industry.
Answering Your Top Quilt Binding Questions
Even with a great tutorial, some questions always seem to come up when you're binding a quilt. It happens to all of us! Let's walk through some of the most common snags so you can fix them like a pro and get that flawless finish you're after.
Why Is My Quilt Binding Wavy or Puckered?
A wavy binding is a classic sign that the fabric was stretched while being sewn on. It's so easy to do, especially on those long, straight sides where you might unconsciously pull the binding strip tight as it goes through the machine.
The key is to let your sewing machine do all the work. Just guide the fabric gently and let the feed dogs pull the quilt through. A walking foot is your best friend here—it ensures the quilt top, batting, backing, and binding all feed through at the exact same rate, which pretty much eliminates stretching.
Here's a tip that can save you a lot of grief: make sure your quilt is trimmed and perfectly square before you even think about attaching the binding. If your quilt's edge is uneven to start with, you’re almost guaranteed a wavy result, no matter how carefully you sew.
What's the Difference Between Single and Double Fold Binding?
It really boils down to durability. A single-fold binding is just one layer of fabric folded over the quilt's raw edge. It’s a bit less bulky, which can be nice for things that won't get a lot of handling, like a decorative wall hanging.
For any quilt that's going to be used and loved, though, double-fold binding is the way to go. This technique, also known as French binding, uses a wider strip of fabric that’s folded in half lengthwise before you attach it. This means you get two layers of fabric wrapping the edge, creating a super sturdy finish that will hold up to years of cuddles and washes. For almost every project, this is the method I recommend.
Can I Use a Different Fabric for My Binding?
Absolutely! While 100% quilting cotton is the standard for a reason—it’s stable and gives a nice, crisp edge—you can definitely play around with other fabrics. You just need to know what you're getting into.
- Flannel: This creates such a soft, cozy border, but be warned, it has a lot of stretch. You'll need a very light touch to keep it from waving.
- Linen-Cotton Blends: I love the rich texture these add, but they do tend to fray more. You might want to use a slightly wider seam allowance to be safe.
- Satin or Silk: These can look incredibly luxurious on a special quilt, but they are very slippery and can be a real challenge. Definitely do a test run on a scrap first!
A good rule of thumb is to match the weight of your binding fabric to your quilt top. It just creates a more balanced feel. If mastering details like this sparks a love for textile arts, you might want to explore other creative arts courses to see where your creativity takes you next.
At All About Sewing, we have all the high-quality fabrics, threads, and expert advice you need to create a beautiful, durable finish on every quilt. https://all-about-sewing-canada.myshopify.com