

A Simple Guide to Layer Cake Quilt Patterns
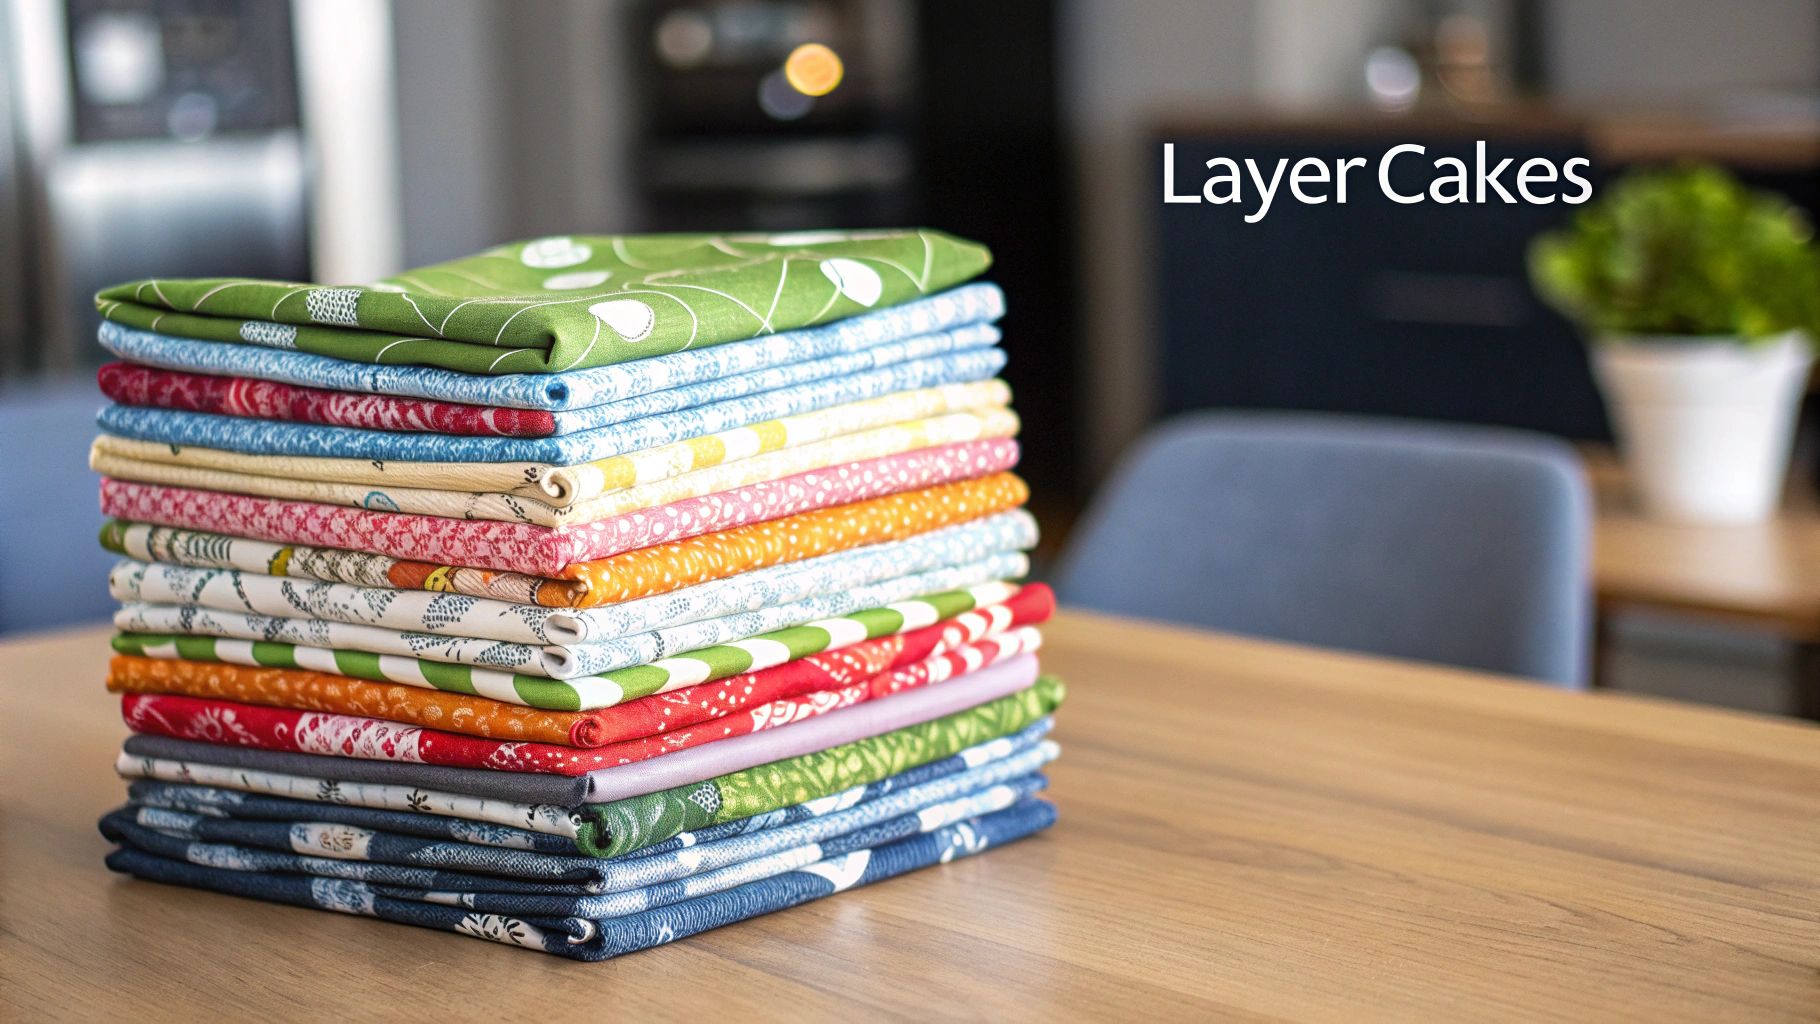
If you've ever admired a quilt with perfectly coordinated fabrics and wondered how the maker pulled it off so effortlessly, the secret might just be a Layer Cake. These bundles of pre-cut 10-inch fabric squares are a quilter's best friend, especially when you want to create something beautiful without spending hours at the cutting mat.
A typical Layer Cake contains 42 unique squares, all pulled from a single designer's collection. This means the time-consuming task of matching fabrics is already done for you, letting you jump right into the fun part: sewing.
Why Quilters Love Layer Cakes
So, how do some quilters seem to whip up gorgeous, intricate quilts so quickly? Often, it starts with a simple stack of fabric. A Layer Cake is more than just pre-cut fabric; it’s a fast track to a stunning quilt top.
This clever format allows you to bypass one of the most tedious parts of quilting—cutting endless strips and squares from yardage. For popular patterns like the Churn Dash or the Disappearing Nine-Patch, which we'll get into later in this guide, this is a massive time-saver.
The Rise of Precut Popularity
The love for Layer Cakes isn't just a fleeting trend; it's a practical shift for today's busy crafters. Here in the Canadian quilting scene, especially in communities like Barrie, Ontario, we've seen a huge surge in their use. In fact, local shops reported a staggering 35% increase in precut fabric sales between 2015 and 2020.
Quilting guilds in the region tell a similar story, with most members saying they reach for Layer Cake patterns because they can get a project done in a weekend instead of a month. For a fantastic look at the sheer variety of Layer Cakes out there, I always recommend browsing the selection at the Missouri Star Quilt Company.
This efficiency makes the whole quilting process more approachable and, frankly, more enjoyable.
Layer Cakes take the guesswork out of fabric selection. Since every square is from a single, coordinated collection, your finished quilt is guaranteed to look cohesive and professionally curated—without any of the stress.
More Than Just Squares
While these 10-inch squares are perfect on their own, their true magic lies in their versatility. You can easily pair them with other precuts, like Jelly Rolls, which opens up a whole new world of design possibilities. If that idea piques your interest, you should check out our guide on creative jelly roll quilt ideas.
Ultimately, working with a Layer Cake gives you a few key advantages:
- Time Savings: You can practically eliminate all that initial cutting time.
- Perfect Coordination: All your fabrics are guaranteed to harmonize beautifully.
- Reduced Fabric Waste: You get just what you need for many common quilt sizes.
- Beginner-Friendly: They simplify the process, making complex-looking patterns feel totally achievable.
Your Quilting Toolkit and Getting Prepped
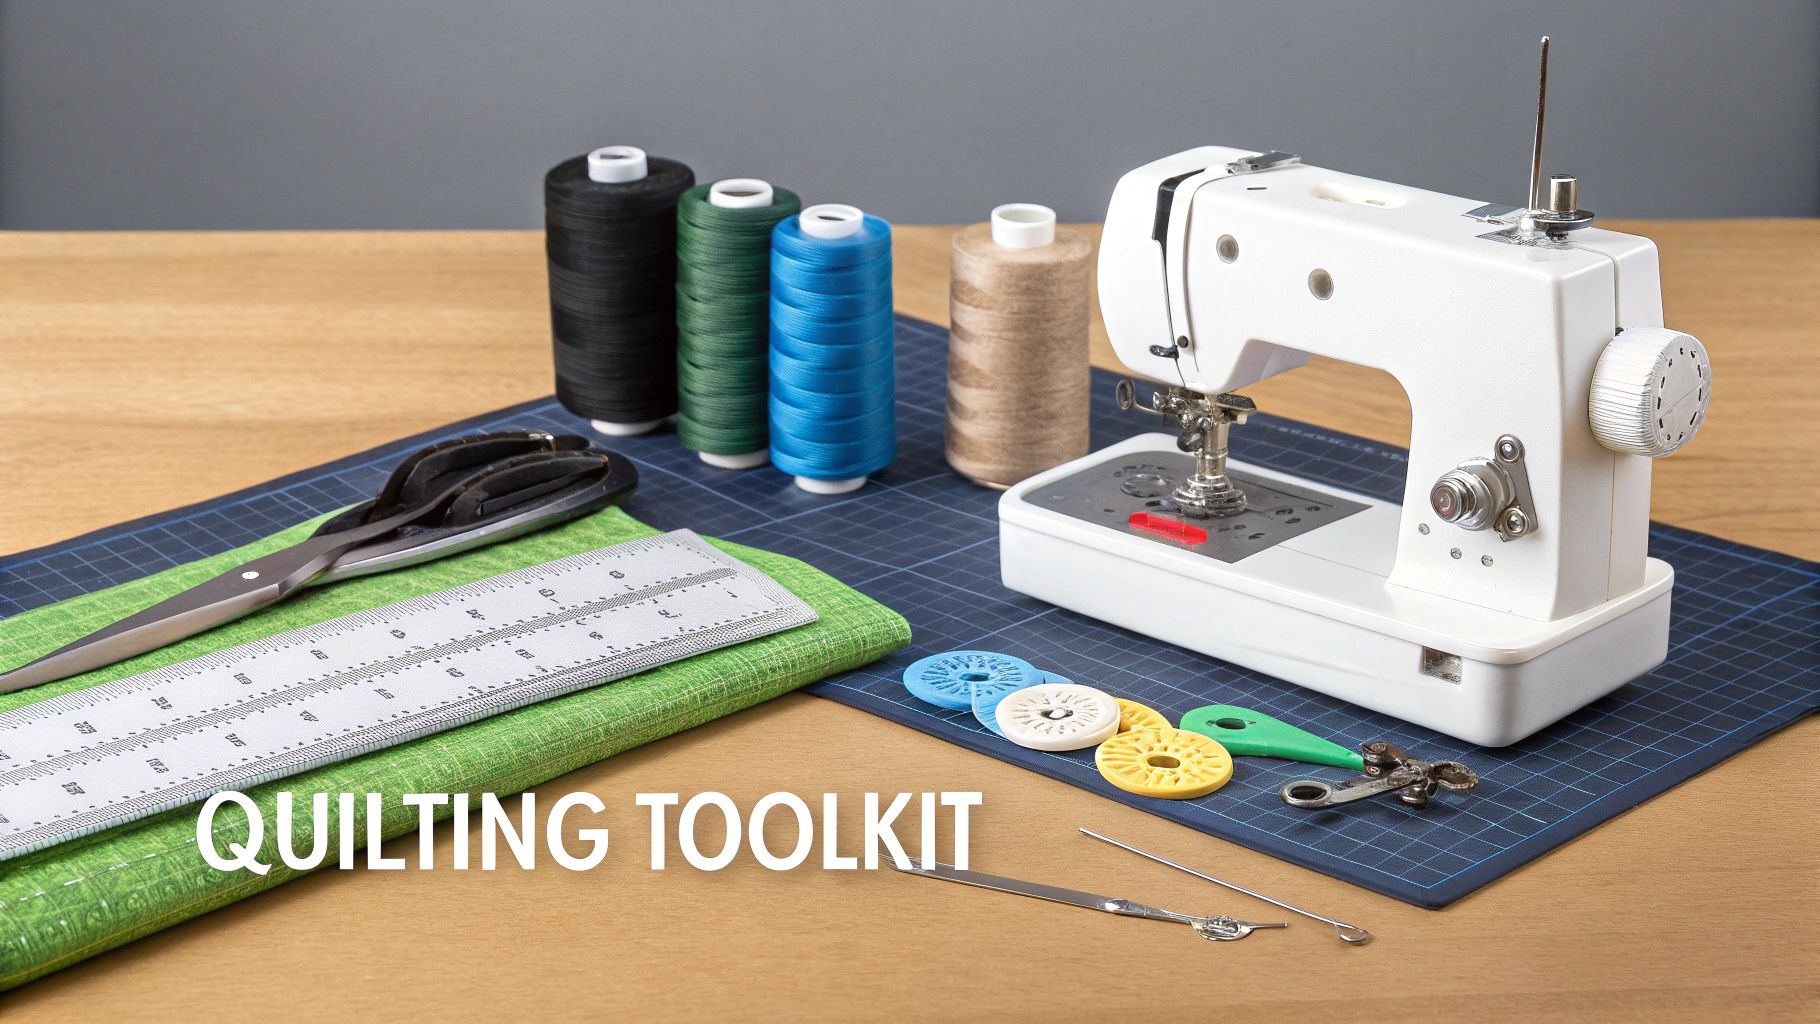
A beautiful quilt is about more than just gorgeous fabric—it all starts with good prep and the right tools. Before you even think about stitching your first seam, gathering the right gear will make every step smoother, more precise, and frankly, a lot more fun. You're setting yourself up for success from the get-go.
I like to think of it like baking. You wouldn't try to make a delicate pastry without the proper measuring cups and a good oven. Quilting is exactly the same. The right tools don't just make things easier; they make a real difference in the quality of your finished quilt.
Must-Have Tools for Piecing Like a Pro
Your sewing machine is the star of the show, but a few key accessories are non-negotiable if you want those crisp, professional-looking quilt blocks. These are the things that ensure every cut, seam, and press is spot on.
- Rotary Cutter and Mat: This is the heart of any modern quilter's toolkit. A sharp 45mm rotary cutter and a self-healing mat give you incredibly clean, straight cuts that you just can't get with scissors. It's a game-changer.
- Quilting Rulers: You’ll need a couple of good rulers. I always have a long one (like a 6" x 24") on hand for cutting yardage and a smaller square one for trimming blocks down to size. Look for ones with clear, easy-to-read markings.
- Quarter-Inch Seam Foot: If you only buy one specialty foot, make it this one. It has a little metal guide that helps you sew a perfect quarter-inch seam every single time. This is absolutely critical for making sure your quilt blocks fit together perfectly.
- Walking Foot: Sometimes called an even-feed foot, this is your best friend when it comes time to do the actual quilting. It pulls the top and bottom layers of your quilt sandwich through the machine at the same speed, which stops all that annoying puckering and shifting.
If you're just starting to build your collection, you can find some great all-in-one sets. Something like the Omnigrid Small Quilting Kit is a fantastic way to get several of these essentials at once.
Getting Your Layer Cake Squares Ready
With your tools laid out, it's time to prep the fabric. I know, this part can feel like a chore, but trust me, skipping it is a rookie mistake that leads to headaches down the road. The two big things to consider are pre-washing and starching.
The great pre-washing debate is alive and well in the quilting world! On one hand, washing your precuts can stop colours from running later and deals with any shrinkage upfront. The downside? It can make your squares fray and lose that crisp, perfect shape. For that reason, many quilters (myself included) often skip washing layer cakes and just toss a colour catcher sheet in with the finished quilt's first wash.
My two cents? I skip pre-washing layer cakes, but I never, ever skip starching. A quick spritz of spray starch and a pass with a hot iron gives those 10-inch squares some much-needed stability. It keeps them from stretching out of shape as you cut and sew.
Starching makes the cotton feel more like paper, which leads to incredibly accurate cutting and piecing. It’s this simple step that helps you get those perfect points and flat seams, giving your blocks a truly professional finish.
A Classic Quilt for the Modern Maker: The Churn Dash
Ready to get sewing? We’re going to tackle one of the most recognized and well-loved blocks out there: the Churn Dash. It's a pattern that has graced quilts for more than a century, and it’s easy to see why. The design is bold, the process is satisfying, and it works with just about any fabric style.
Using a layer cake is my favourite way to make this classic pattern. It streamlines the whole process, letting you turn those perfectly coordinated 10-inch squares into crisp, beautiful blocks in no time at all. Let's jump in.
The Churn Dash Cutting Plan
First things first, we need to break down a few of our layer cake squares into the basic shapes that form the Churn Dash block. The whole block is built from just two simple units: Half-Square Triangles (HSTs) and a few basic rectangles. I find it works best to pair up contrasting squares—one light and one dark—to get that classic Churn Dash pop.
For every pair of 10-inch layer cake squares (one light print, one dark print), you’ll get all the pieces you need for two complete Churn Dash blocks.
Here's my go-to method for cutting them:
- Start by placing your light and dark 10-inch squares right sides together. Make sure the edges are perfectly aligned.
- Cut this two-layer stack into four smaller 5-inch squares. You should now have four pairs of stacked 5-inch squares.
- Set aside two of those 5-inch pairs to make your HSTs. On the back of the lighter fabric, draw a diagonal line from corner to corner. Stitch a scant quarter-inch seam on both sides of that line. When you cut on the line, you’ll get two perfect HST units from each pair, giving you a total of four HSTs.
- The remaining two 5-inch pairs will become your rectangles. Just cut each 5-inch stack in half, and you’ll have four 2.5 x 5-inch rectangles of each colour (that’s eight rectangles total).
Once you’ve done that, you have all the components for two blocks! Just keep repeating the process with more layer cake pairs until you have enough pieces for your quilt.
Assembling the Churn Dash Block
With all your pieces cut, now comes the really fun part—watching your blocks come together. The Churn Dash is just a simple nine-patch, which means it’s built on a three-by-three grid. I always find it easiest to work row by row to keep everything organized and make sure my points line up nicely.
But before you start sewing the rows, take a moment to trim your HSTs down to a precise 4.5 inches square. This step, often called "squaring up," is my non-negotiable secret for a perfect block. It fixes any little wobbles or stretching that can happen during sewing and pressing, ensuring everything fits together just right.
Now, lay out your nine components in their grid:
- Top Row: An HST, a rectangle, and another HST.
- Middle Row: A rectangle, your centre 4.5-inch square, and another rectangle.
- Bottom Row: An HST, a rectangle, and another HST.
Stitch the pieces in each row together first, pressing your seams as you go. Here’s a little tip I swear by: press the seams in the top and bottom rows in one direction (say, outwards toward the HSTs), and then press the seams in the middle row in the opposite direction (inwards toward the centre square). This allows the seams to "nest" together when you join the rows, which drastically reduces bulk and helps you get a perfectly flat block.
A well-pressed block is the foundation of a beautiful quilt. Don't rush this step! While some quilters press seams open, nesting them like this often creates a stronger seam intersection, which is great for classic blocks like the Churn Dash.
Planning Your Layer Cake Quilt Size
One of the best things about using layer cake quilt patterns is how straightforward it is to plan your project. A standard layer cake usually has 42 squares, which is more than enough to create a good-sized quilt. For this pattern, a single pack will give you enough fabric to make 20 Churn Dash blocks, and you’ll even have a couple of squares left over for another project.
Here’s a look at what a single layer cake can become. The finished block size for this pattern is 12.5 inches before it's sewn into the quilt top, where it will finish at 12 inches.
Layer Cake Quilt Size And Yield Chart
This chart gives you a quick idea of the final quilt size you can expect from a standard 42-piece layer cake, depending on your layout. I've also included estimates for adding sashing, which can really change the final look and size.
| Pattern Type | Block Size | Layout (Blocks) | Finished Size (No Sashing) | Finished Size (2-inch Sashing) |
|---|---|---|---|---|
| Churn Dash | 12" finished | 4 x 5 (20 blocks) | 48" x 60" | 56" x 70" |
| Churn Dash | 12" finished | 4 x 4 (16 blocks) | 48" x 48" | 54" x 54" |
| Churn Dash | 12" finished | 3 x 4 (12 blocks) | 36" x 48" | 41" x 54" |
Adding sashing—those fabric strips between the blocks—is a brilliant trick to make your quilt larger while giving your beautiful blocks some breathing room. It’s also the perfect opportunity to introduce a solid colour that makes your prints sing.
With these steps, you’re all set to create your own timeless Churn Dash quilt. It’s such a rewarding block to make, and using a layer cake truly makes the whole experience a joy from the first cut to the final stitch.
Mastering the Disappearing Nine-Patch
If you're looking for a pattern that delivers a serious "wow" factor without a ton of complicated piecing, the Disappearing Nine-Patch is your new best friend. It has a magical way of looking incredibly intricate, almost like a woven fabric. But the secret is that it all starts from one simple, humble nine-patch block.
This pattern is an absolute dream to make with layer cake quilt patterns. The 10-inch squares are the perfect size, and because the fabrics in a layer cake are already coordinated, they do all the colour-matching work for you. You get that gorgeous, scrappy look that seems like it took hours of careful planning, but really, you just opened a pack and started sewing.
Building Your Foundation: The Nine-Patch Block
First things first, you need to make a standard nine-patch block. Grab nine of your layer cake squares and lay them out in a 3x3 grid. For the most dynamic look, I like to create a strong contrast between my squares.
A classic and effective arrangement is to use:
- Five squares of your darker or more vibrant prints.
- Four squares of a lighter, contrasting print.
Lay them out, alternating between the two, and sew them into three rows. Here's a pro tip: press the seams for the top and bottom rows in one direction, and press the seams for the middle row in the opposite direction. When you go to sew the rows together, those seams will "nest" or lock into place perfectly, giving you sharp, crisp points without a fight.
The Magic Cut: Where the Transformation Happens
Once you have your big nine-patch block sewn and pressed, it's time for the trick that gives this pattern its name. This is where the "disappearing" act happens. You're going to take that perfectly nice block and cut it into four equal pieces. Don't be nervous! Accuracy is your friend here.
Grab your rotary cutter and a long ruler. You need to find the exact centre of your block, both horizontally and vertically, and make two clean cuts. After sewing, your 10-inch squares probably finished at 9.5 inches, making your nine-patch block about 28.5 inches square. That means your cutting lines will be at the 14.25-inch mark.
This one move—slicing a simple block into four new ones—is the entire secret behind the Disappearing Nine-Patch. It’s not complicated. Just focus on making those two cuts straight, accurate, and right through the centre seams.
Suddenly, you no longer have one nine-patch. You have four smaller, much more interesting blocks. This is where the quilt really starts to develop its personality.
Creative Layouts and Arrangements
Now for the fun part—playing with your new blocks! The real magic comes from how you decide to rotate and arrange these four quadrants. Take a look at your new blocks; each one has a small corner square that came from the very centre of your original nine-patch. The way you position these little cornerstone squares will create all sorts of fascinating secondary patterns.
Here are a few popular layouts to get you started:
- Pinwheel Effect: Turn all four blocks so that the small cornerstone squares meet in the middle. This creates a fantastic spinning pinwheel right where your blocks join.
- Chevron or Zig-Zag: Orient the blocks to create a continuous diagonal line that flows across the quilt top, forming a modern zig-zag pattern.
- Woven Look: Try alternating the rotation of each block—one turned inward, the next turned outward. This creates a sophisticated, interlocking design that looks incredibly detailed and complex.
Before you sew anything, lay your blocks out on a design wall or even a clean patch of floor. Step back and have a look. You’ll be amazed at how a simple 90-degree turn can completely change the entire quilt. It’s a puzzle with no wrong answers, so just have fun with it!
The simple workflow for this and many other quilting projects is all about cut, sew, and press.
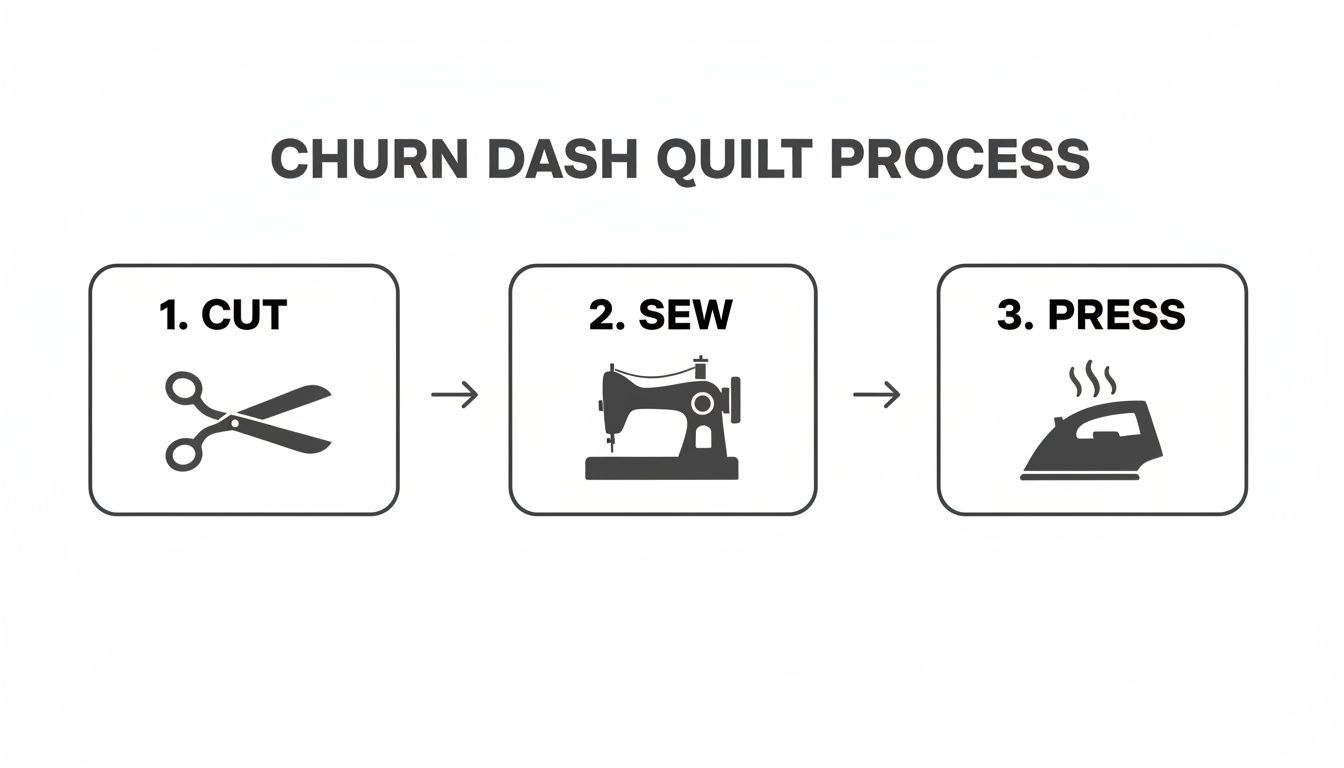
This visual reminds us that each stage is just as important as the last for getting a beautiful, polished quilt.
Tips for Perfect Points and Flat Seams
Because of all the cutting and rearranging, the Disappearing Nine-Patch creates a lot of seam intersections. If you're not careful, these can get pretty bulky. The secret to a lovely, flat quilt top is a consistent seam allowance and smart pressing. Using a quarter-inch seam foot on your machine isn't just a suggestion; for this pattern, it's essential.
As you begin sewing your four smaller blocks together, pay close attention to where the seams meet up. A great trick for dealing with bulky intersections is to press these particular seams open. This lets the fabric spread out instead of piling up on one side, which helps your quilt top lie beautifully flat and makes the final quilting process a whole lot easier.
Making a Modern Rail Fence Quilt
Looking for a layer cake pattern that’s fast, fresh, and guaranteed to look amazing? The Rail Fence is your answer. Honestly, it's one of my go-to secret weapons for turning a stack of 10-inch squares into a quilt top with almost zero fuss. It’s the perfect project for a relaxing weekend at the machine.
What I love most about the Rail Fence is its straightforwardness. You can forget about tricky templates or weird angles. The whole quilt comes together by cutting strips and sewing them back together. Simple as that.
It All Starts with the Cut
First things first, let's turn those lovely 10-inch squares into the "rails" that give this pattern its name. For that classic Rail Fence look, I always cut each square into four identical strips.
Grab your rotary cutter and favourite ruler. You’ll want to slice each 10-inch square into four 2.5-inch by 10-inch strips. That’s it! This is the only cutting you need to do to get started. It’s a wonderfully repetitive and satisfying process.
To build your basic block, just pick three different strips—I find a mix of one light, one medium, and one dark works best—and sew them together along their long edges. You'll end up with a striped unit that measures 6.5 inches by 10 inches. And there you have it: your foundational Rail Fence block.
Want to Sew Faster? Try Chain Piecing
This is where the Rail Fence pattern really lets you fly. You can assemble your blocks at lightning speed using a technique called chain piecing. Instead of sewing one pair of strips, stopping, pressing, and then sewing the next, you create a little assembly line right at your machine.
Here's how I do it:
- First, I pair up the first two strips for all my blocks (say, the light and medium strips).
- Then, I feed them through the machine one after another, without cutting the thread between each pair. You’ll get a long, connected "chain" of pairs.
- Once all the pairs are sewn, just snip them apart.
- Finally, add the third strip (the dark one) to each pair, chain piecing them exactly the same way.
This method is a game-changer. It cuts down on so much stopping and starting, letting you power through your stack of strips. You’ll be shocked at how quickly your quilt top comes together.
Lay It Out and Create Some Movement
Once your blocks are all pieced, the real fun begins. The magic of a Rail Fence quilt is all in how you arrange the blocks. Just by rotating them, you can create an incredible sense of movement and depth.
The impact of these simple patterns is huge in the quilting world. In Ontario, for example, layer cake quilt patterns have become a community favourite. The Barrie Quilters' Guild shared that over 150 quilts at their 2023 show were made with precuts—that's 40% of all entries! It’s no surprise when 73% of local guild members said they could finish a twin-sized quilt in under 20 hours using layer cakes. If you want to see just how versatile these precuts are, it's worth exploring the huge variety of free layer cake quilt patterns available online.
Popular Ways to Arrange Your Blocks
Before you sew your blocks together into rows, lay them out on a design wall or even just a clean floor. Playing with the layout is key! Here are a few classic arrangements to try:
- Horizontal or Vertical Rows: This is the simplest layout. Just arrange all your blocks so the strips run in the same direction, either all horizontally or all vertically. It creates a very clean, striped effect.
- Classic Zig-Zag: This one has great energy. You alternate the orientation of each block. So, in the first row, you might have a vertical block, then a horizontal, then vertical, and so on. In the next row, you'd start with a horizontal block. This creates a beautiful, cascading zig-zag.
- Boxed In or Stair Step: Here, you arrange four blocks to form a square, with the "rails" creating a frame-like design. Repeating this four-block unit across the quilt results in a dynamic, geometric pattern that looks far more complicated than it actually is.
My best advice? Play around! The key is to pay attention to the light, medium, and dark values in your layer cake. A thoughtful placement can draw the eye across the quilt, creating flow and a truly captivating design from nothing more than simple strips of fabric.
Finishing Your Quilt: From Top to Treasure
So, your quilt top is a beautiful mosaic of colour and pattern, all pieced and pressed to perfection. It’s a huge accomplishment! But we're not quite at the finish line yet. These next steps are what turn that lovely top into a durable, treasured quilt that can actually be used and loved for years to come.
This is where the real magic happens. We're talking about layering, quilting, and binding—each one crucial for the final look, feel, and longevity of your quilt. Trust me, taking your time here is just as important as getting that perfect quarter-inch seam.
Adding Borders and Building the Sandwich
Before you even think about quilting, you might want to frame your work with borders. Borders can add a beautiful finishing touch, but if they aren't attached correctly, you can end up with wavy, distorted edges that are impossible to fix.
Here’s a tip from experience: never just cut a long strip of fabric and sew it on, hoping for the best.
Instead, measure your quilt top right through the centre, from top to bottom. Cut your side border strips to that exact length. Pin them on, easing the quilt top to fit the border as you go, and then sew. Repeat the process by measuring horizontally through the middle for your top and bottom borders. This simple trick forces the quilt top to conform to the borders, preventing that frustrating stretching and waviness.
With your top all done, it’s time to build the "quilt sandwich." It's the classic three-layer construction every quilt needs:
- Backing Fabric: Spread this out on a large, flat surface (the floor works great!), wrong side up. Use painter's tape to pull it taut and secure it smoothly.
- Batting: Lay your batting over the backing, smoothing out every little wrinkle.
- Quilt Top: Finally, centre your finished quilt top, right side up, over the batting.
Once everything is layered, you have to baste it all together so nothing shifts while you're quilting. You can use special curved safety pins placed every few inches, a temporary spray adhesive made for fabric, or even long, hand-sewn basting stitches if you're feeling traditional.
Choosing Your Batting and Quilting Style
The batting you choose has a huge impact on your quilt's personality. Its loft—or thickness—determines how puffy your quilting stitches will look, and the material itself affects warmth and drape. For a soft, traditional feel, you can’t go wrong with a low-loft cotton batting.
When you're deciding on a batting, think about the quilt's final purpose. For a cozy lap quilt, you'll want something with a bit of warmth. You can explore our selection of Pellon batting by the meter to find the perfect weight. On the other hand, for a wall hanging, a thinner batting is usually better to help it hang nice and flat.
Now for the fun part: how are you going to quilt it?
For most of us working on a domestic machine, straight-line quilting with a walking foot is the easiest and most reliable way to go. It gives a clean, modern look and does a fantastic job of securing the layers. You can stitch "in the ditch" (right along the seam lines) or create a simple grid pattern across the whole top. If you're feeling a bit more adventurous, you could even give free-motion quilting a try!
Sending your quilt to a long-arm quilter is another fantastic option. They have specialized machines that can stitch incredible, all-over designs. If you go this route, just remember to make your backing and batting at least four inches larger than your quilt top on all four sides.
Finishing with a Professional Binding
The final step is the binding. This is what encases the raw edges of your quilt, giving it a durable and polished finish. For quilts that are going to get a lot of love and use, machine binding is a fast and sturdy method.
Typically, you'll cut 2.5-inch wide strips of fabric, join them together to create one continuous strip, and press it in half lengthwise. This double-fold binding is then sewn to the front of the quilt, wrapped around to the back, and stitched down. That final seam is what truly declares your quilt complete, ready for its new home.


