

A Crafter's Guide to Cross Stitch Christmas Ornaments
There’s something truly special about hanging a cross stitch Christmas ornament on the tree that you’ve made with your own hands. It’s more than just a decoration; it’s a tiny, stitched memory that you get to revisit every single year. This guide is your go-to resource for turning that idea into a reality, walking you through everything from picking a pattern to putting on the final, professional-looking touches.
Your Guide to Crafting Festive Keepsakes
So, you’re ready to dive into the wonderful world of handmade holiday decorations? Fantastic. Think of this as your personal roadmap, designed to take you from a simple piece of fabric and a few threads to a beautiful ornament you’ll be genuinely proud of.
Our first stop is always the most fun: finding the perfect pattern. We’ll look at how to choose designs that match your style, but more importantly, how to get creative. You don't need a pattern specifically labelled "ornament." We'll explore how you can pull a tiny snowman or a single festive word from a larger chart and turn it into the star of its own show.
From Fabric to Finishing Touches
Once you've got a design you love, it’s time to gather your supplies. I’ll help you navigate the choices between different fabrics, like Aida and evenweave, and pick thread colours that will make your stitching sing with festive cheer. We'll also cover some simple stitching tips to keep your work looking clean and professional, even if this is your very first project.
But let’s be honest, the real magic happens at the very end. The way you finish your ornament is what turns it from a stitched square into a proper decoration. We'll dive into several popular methods so you can find one that fits both your skill level and the look you’re going for.
Here’s a little peek at what we’ll cover:
- Adapting Patterns: Learn my tricks for isolating small motifs from bigger charts to create perfectly sized ornaments.
- Essential Supplies: Get a complete checklist of the fabric, threads, and tools you’ll need to set yourself up for success.
- Polished Stitching: I'll share my favourite tips for making your stitches look even and keeping the back of your work from becoming a tangled mess.
- Multiple Finishing Methods: We'll go step-by-step through creating felt-backed, stuffed pillow, and classic hoop-framed ornaments.
This handy little decision tree can help you figure out which finishing method might be the best fit for the project you have in mind.
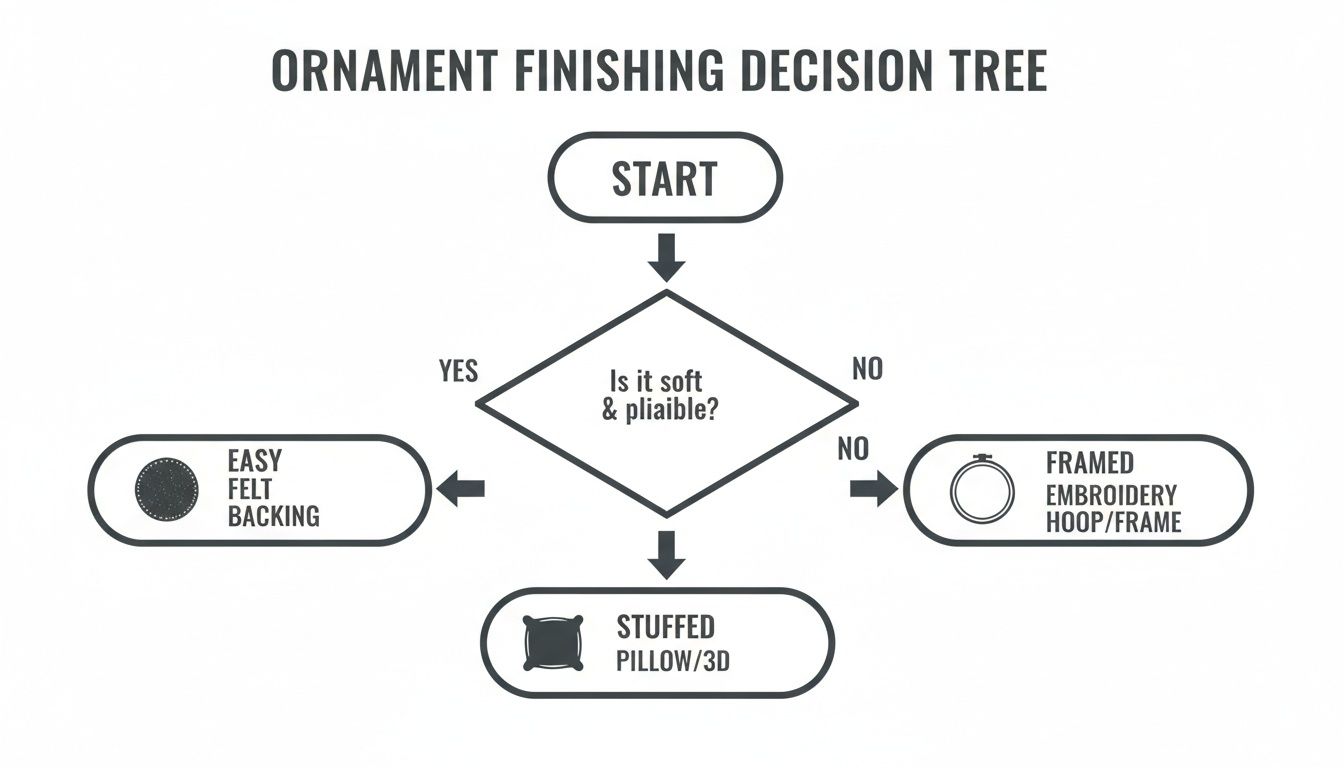
As you can see, choosing between a soft, squishy ornament and a more rigid, framed one often just comes down to personal preference and how much time you want to spend on the finishing.
A Quick Comparison of Finishing Styles
Deciding how to finish your ornament can feel like a big choice! To make it easier, here’s a quick breakdown of the most common methods.
Choosing Your Ornament Finishing Style
| Finishing Method | Difficulty Level | Materials Needed | Best For |
|---|---|---|---|
| Felt-Backed | Easy | Felt, craft glue, ribbon, sharp scissors | Quick projects, flat designs, and beginner-friendly results. |
| Stuffed Pillow | Medium | Backing fabric, stuffing (polyfill), needle & thread | Creating a 3D, plush look. Great for showcasing slightly larger designs. |
| Mini Hoop Frame | Easy | Small embroidery hoop (3-4"), glue, felt for backing | A classic, rustic look that frames the stitching beautifully. Minimal sewing required. |
Each style has its own charm, so don't be afraid to experiment with a few different ones to see what you enjoy making the most.
Creating Lasting Memories
For anyone who loves holiday crafts, cross stitch is a uniquely personal and relaxing way to add to the festive spirit. Every ornament you create captures a little piece of your holiday season.
Think of each ornament not just as a decoration, but as a future heirloom. The care you put into creating it today will bring joy to family gatherings for decades, becoming a cherished part of your holiday tradition.
Alright, let's get our needles threaded and start this festive journey. It’s time to create something you’ll be excited to hang on the tree this year, and for many years to come.
Gathering Your Essential Crafting Supplies
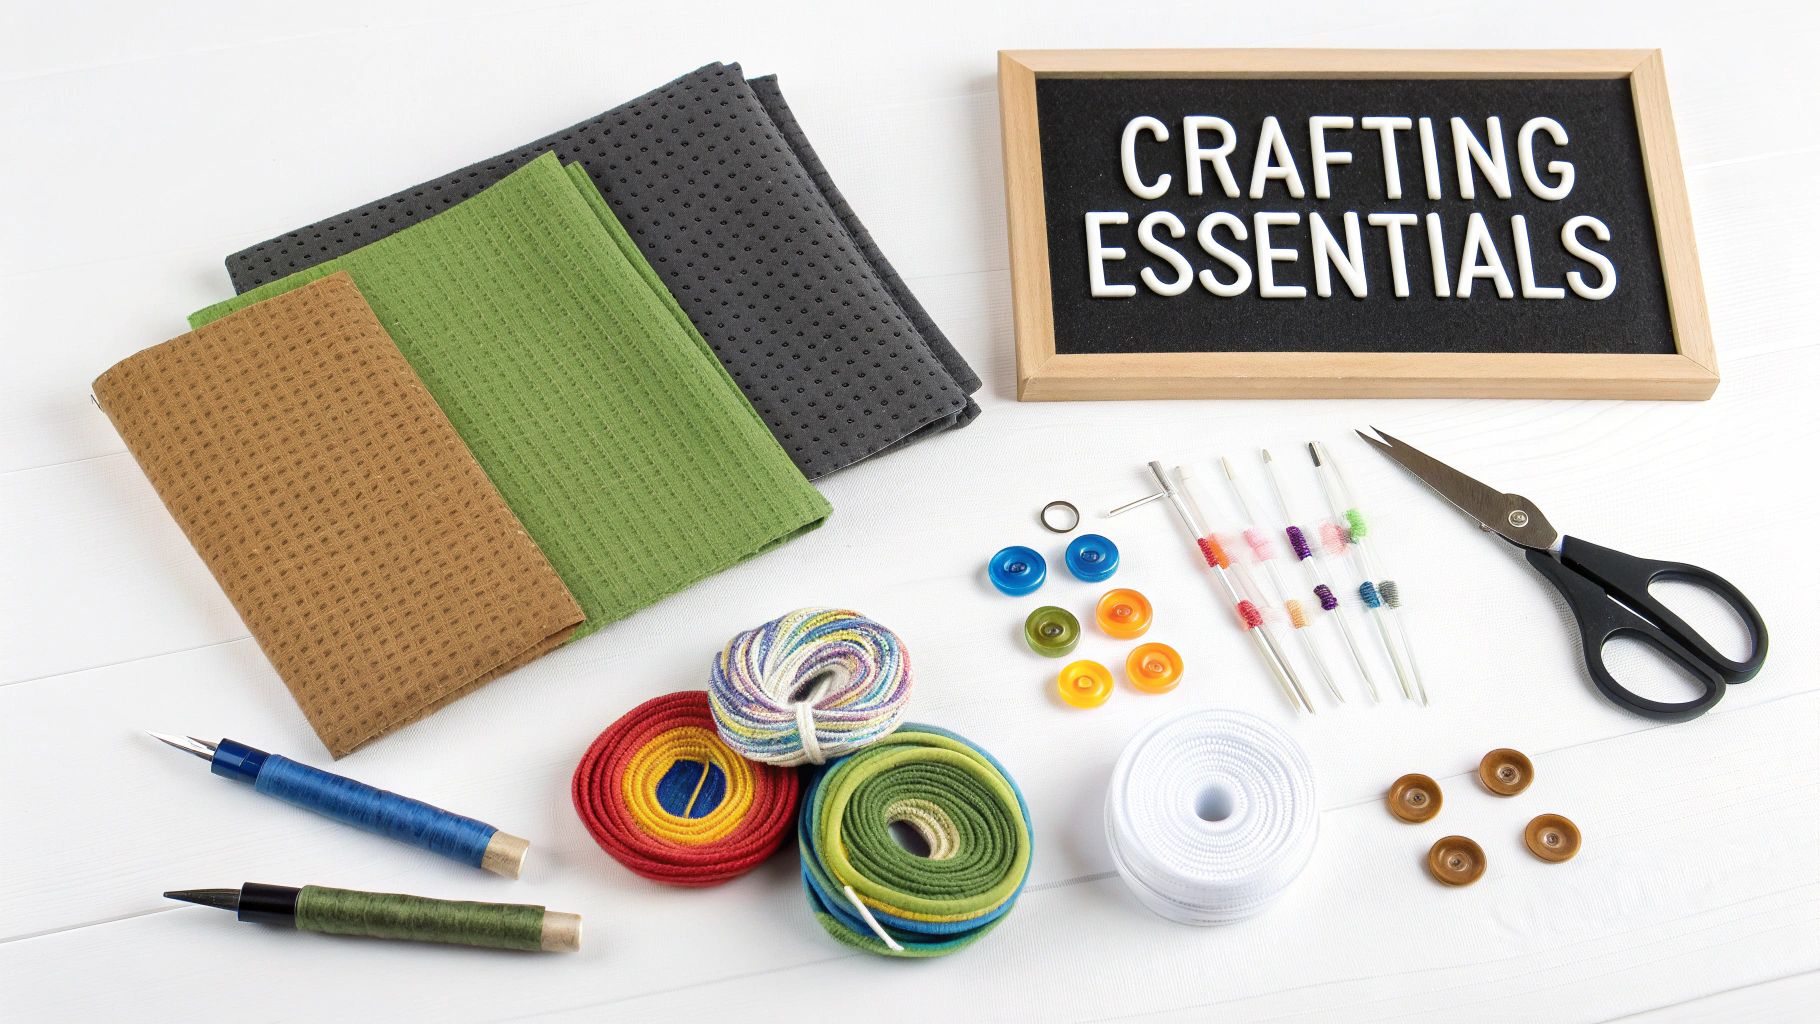
Before you even make the first stitch, getting your supplies in order is the secret to a joyful and stress-free project. Once you've got a pattern picked out, think of this step like gathering ingredients for a favourite recipe. It's a foundational process you'll find in almost any craft, much like the prep work described in this handy guide to making wearable art.
Let’s walk through building the perfect toolkit for creating your cross stitch Christmas ornaments.
Choosing Your Fabric
The fabric is literally the foundation of your ornament, and the one you choose really sets the tone for the final piece. Each option offers a slightly different look and feel, so it's worth thinking about what kind of character you want your ornament to have.
-
Aida Cloth: This is the undisputed champion for beginners and a reliable favourite for experienced stitchers. Why? Its clearly woven grid of squares makes it a breeze to count and place your stitches. For ornaments, a 14-count or 16-count Aida is the sweet spot—it gives you lovely detail without making you squint.
-
Evenweave Fabric: If you're aiming for a more refined, heirloom look, evenweave fabrics like linen or Jobelan are a beautiful choice. The threads are woven evenly, creating a much smoother background than Aida. Your stitches will look incredibly elegant on this.
-
Perforated Paper or Plastic Canvas: Want something super sturdy that won't fray? These are your go-to. They provide a rigid base that's incredibly easy to cut and finish, making them perfect for flat, felt-backed ornaments or even cool 3D designs.
The fabric count—which is just the number of squares per inch—has a big impact on your ornament's final size. A higher count (like 18-count) gives you a smaller, more detailed piece. A lower count (like 11-count) makes for a larger, bolder design.
Threads, Needles, and Hoops
Okay, you've got your canvas. Now it's time for the colour and the tools that bring it all together.
Embroidery floss is your paint palette. You can stick to the colours your pattern suggests or go rogue and pick a scheme that perfectly matches your Christmas tree decor. Just remember to separate the strands before you start stitching! Using two or three strands is pretty standard for 14-count Aida and gives you great, full coverage.
A good needle and hoop are your best friends here. You’ll want a tapestry needle, which has a blunt tip and a large eye. It's designed to slip easily through the holes in the fabric without splitting the threads. And to keep your fabric tight and your stitches even, a small hoop is a must-have. An embroidery frame small 100x100mm (4"x4") is the perfect size for most ornament projects.
Finishing Touches and Embellishments
This is where the real magic happens! These final materials are what will take your stitched piece from a simple square of fabric to a treasured ornament ready for the tree.
Think about adding a little extra sparkle to make your ornament pop.
- Tiny beads can look like glistening snow or festive berries.
- Metallic threads add a shimmer that catches the tree lights perfectly.
- Miniature charms dangling from the bottom add a whimsical touch.
Finally, you’ll need a few things to pull it all together. Grab some backing felt in a colour that complements your design, a bit of polyester stuffing if you're making a puffy ornament, and some nice ribbon or cord for the hanger. Having this all ready to go makes that final assembly step so much more satisfying. These small, personalized projects are incredibly popular, especially within the Canadian crafting scene, and it's easy to see why.
Bringing Your Ornament Design to Life
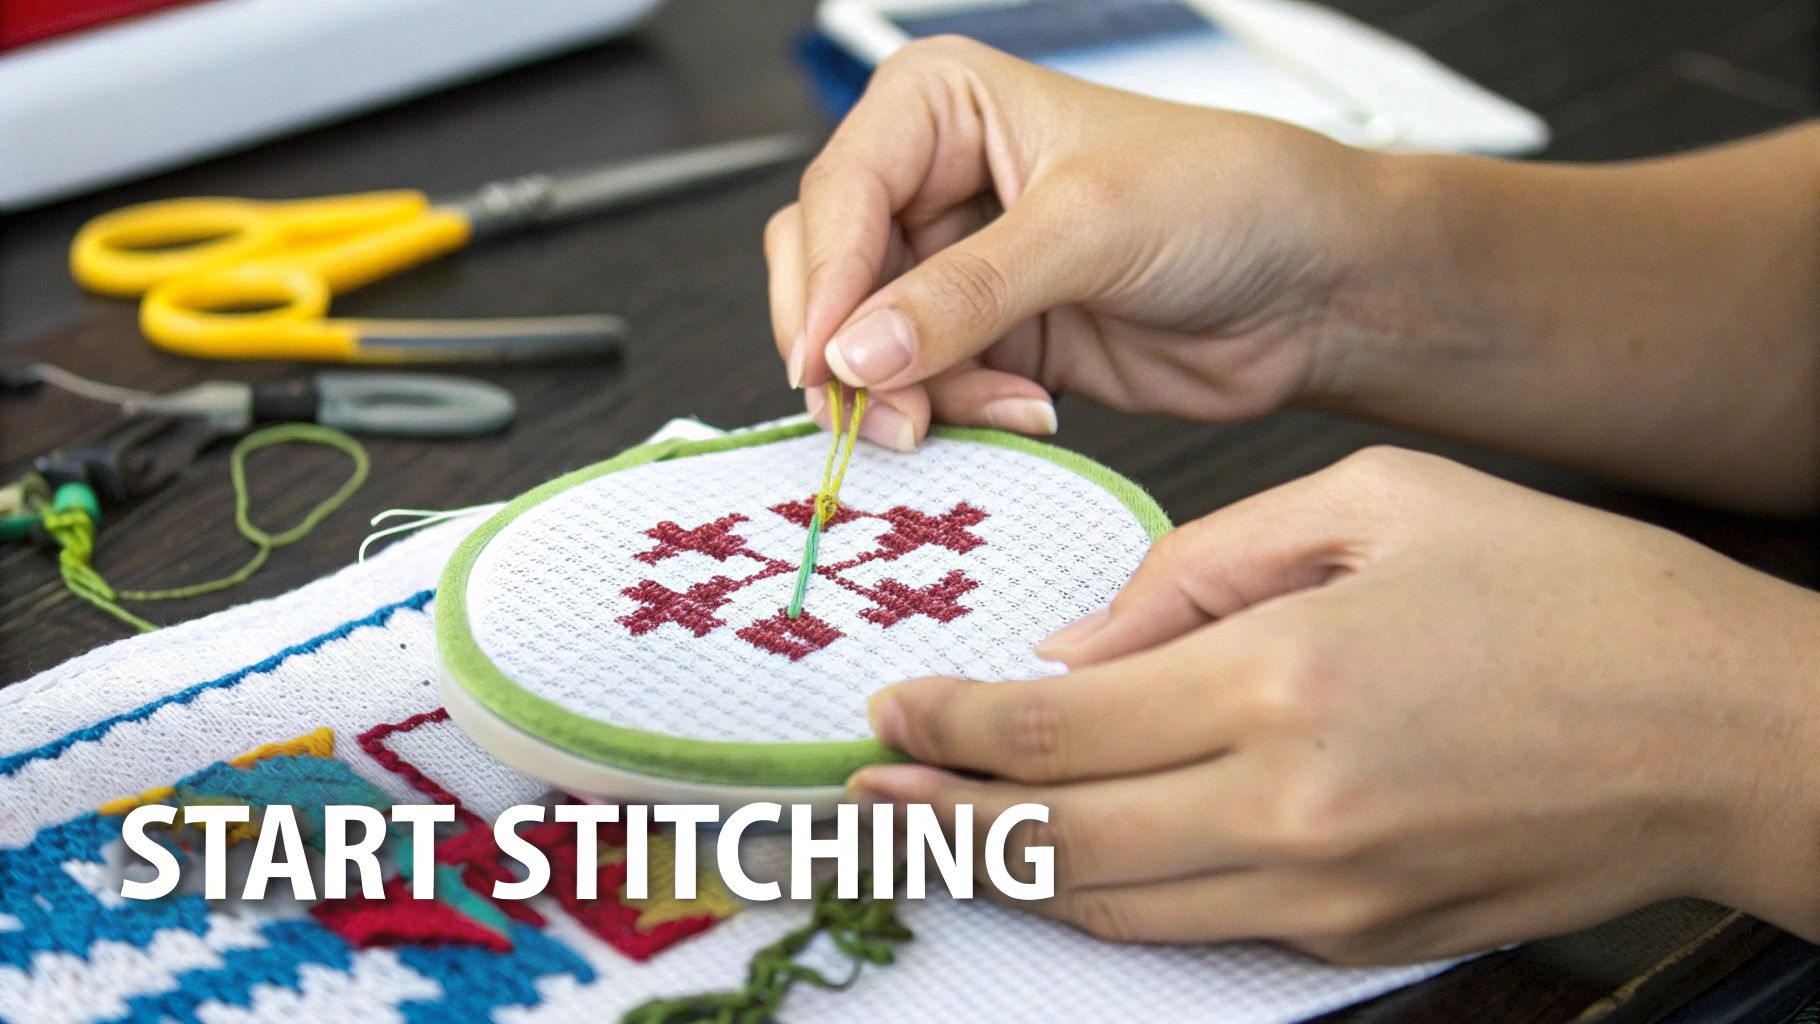
This is the part I love most—when the fabric and thread finally come together and start to look like the keepsake you've been picturing. Stitching should be a relaxing, rhythmic activity, not a source of stress. Let's walk through how to make sure your stitching is as beautiful as your finished ornament.
First things first, let's prep the fabric. Aida and evenweave love to fray, so it’s smart to serge the edges or just run a line of masking tape along them. This tiny bit of prep work will save you a headache later by keeping those unravelling threads from getting tangled in your work.
Next, find your centre point. This is crucial for making sure your design ends up exactly where you want it. For the fabric, just fold it in half one way, then the other, and give the corner a gentle pinch. That crease is your starting point. Your pattern chart will almost always mark the centre with arrows or a bolded line, making it easy to match everything up.
Starting Your First Stitch
The secret to a truly neat-looking ornament—especially one that might be seen from both sides—is to skip the bulky knots. Instead of tying off your floss, we'll use a much cleaner method to anchor those first stitches.
Two of my favourite knotless techniques are:
- The Loop Start: This is brilliant when you're stitching with an even number of strands, like two. Take one long strand of floss, fold it in half, and thread the two cut ends through your needle. You'll have a loop at the other end. Bring your needle up from the back, but don't pull it all the way through. Flip your work over, pass the needle through the loop on the back, and pull gently. Your thread is now perfectly secure.
- The Waste Knot: If you're using an odd number of strands, just tie a simple knot at the end of your thread. From the front of your fabric, push your needle through about an inch away from your starting point, leaving that little knot sitting on the surface. As you make your first few stitches toward it, make sure you catch the "tail" of the thread on the back. Once you've secured the tail with three or four stitches, you can just snip the waste knot off the front.
Both methods keep the back of your cross stitch Christmas ornament flat and tidy, which is a game-changer for getting a professional finish.
Mastering the Basic Cross Stitch
Consistency is everything in cross stitch. That polished, uniform look comes from making every single stitch the same way. What does that mean? The top leg of every "X" should always slant in the same direction.
My personal rule is that the bottom stitch always goes from bottom-left to top-right ( / ), and the top stitch always goes from bottom-right to top-left ( \ ). It really doesn't matter which way you choose, as long as you stick with it for the whole project.
When you're working a row of the same colour, it's often much faster to stitch it in two passes. First, go down the line making all the half stitches (////), then work your way back, completing the crosses (\\). This helps you get into a smooth rhythm and maintain even tension.
And on the topic of tension, you're aiming for stitches that lay flat but don't pull or pucker the fabric. The grid of your Aida should stay perfectly square, not warped.
Handling Colour Changes and Backstitching
Ornament patterns are full of colour changes. When you're done with one colour or need to jump to a new area, just run your needle under the last three or four stitches on the back of your work before snipping the floss. If you want to dive deeper into managing your palette, our guide on colour mixing charts has some fantastic advice.
Backstitching is the final flourish that makes your design pop. It’s used for outlines, lettering, and all those little details that add character. Think of it as drawing with thread. Always do this step last, after all the cross stitching is done. You'll be amazed at how it brings the whole ornament to life with a crisp, defined look.
Mastering Three Popular Finishing Techniques
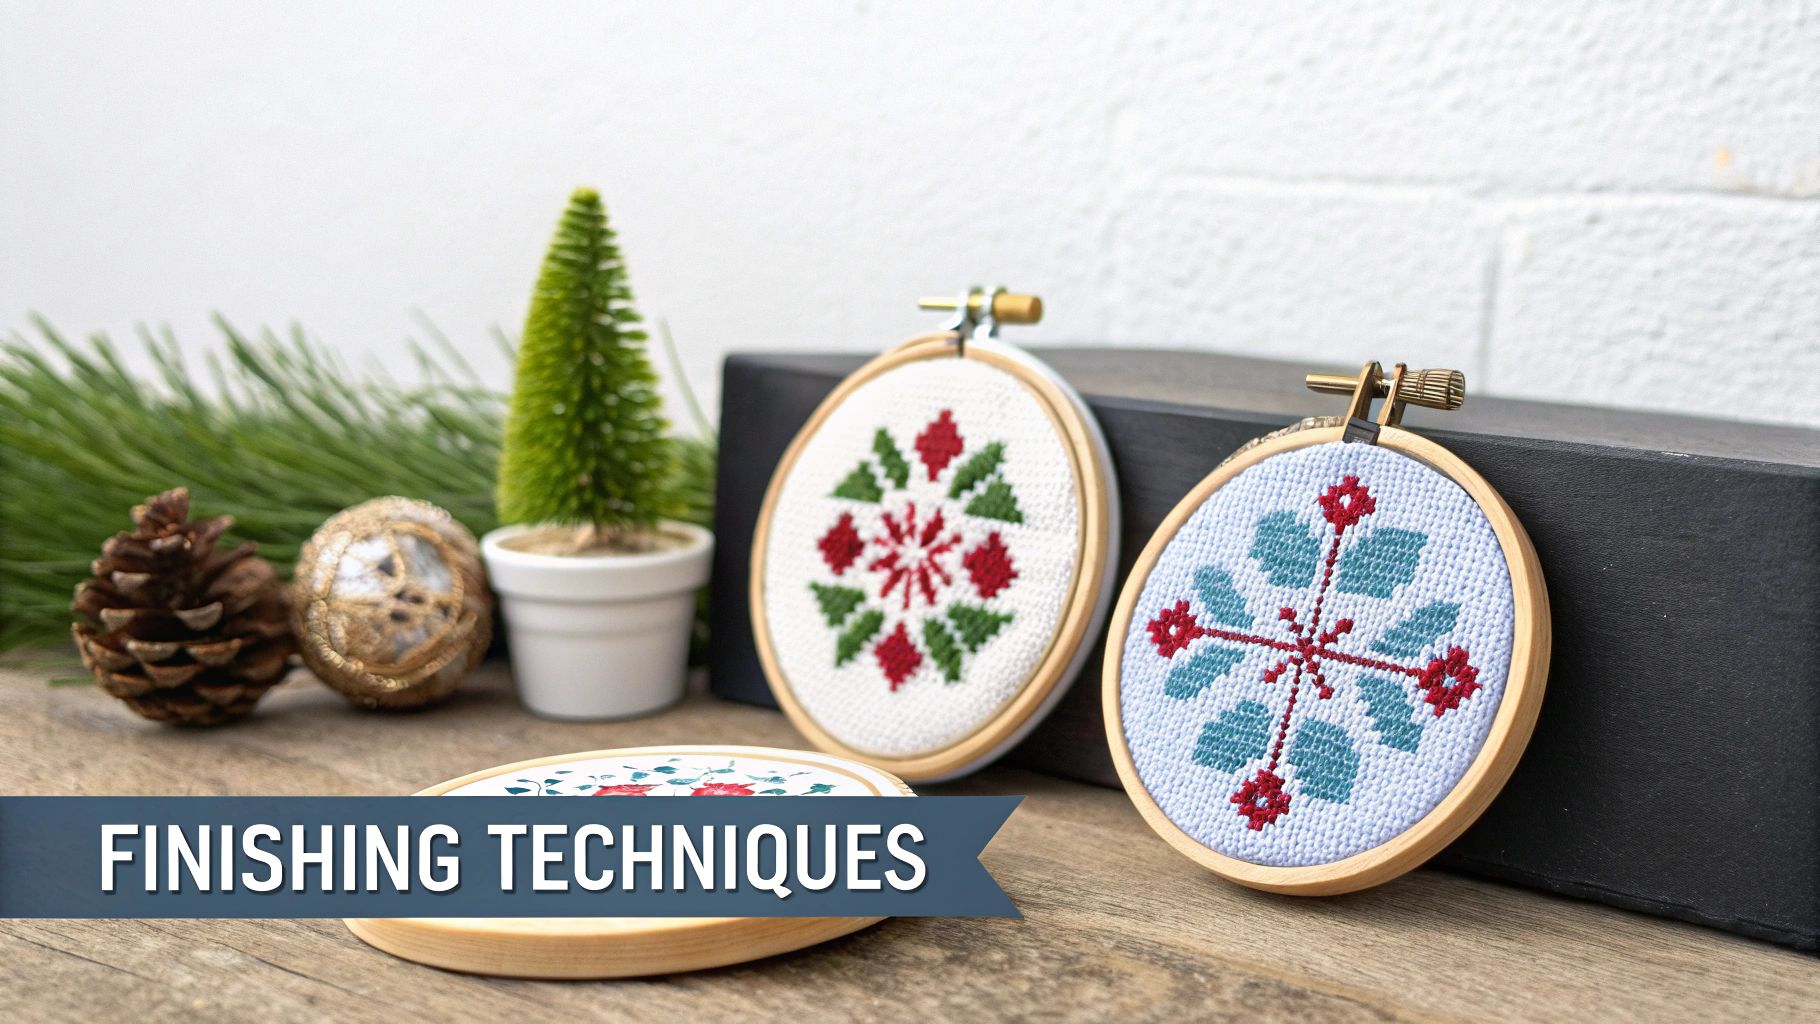
This is where the magic really happens. A beautifully finished piece is what turns your stitching from a fun little project into a cherished cross stitch Christmas ornament that you'll be proud to hang on the tree.
Let's walk through three of my favourite, most reliable methods. Each one gives your ornament a completely different feel, but all of them look polished and professional. Don't worry, they're all straightforward, but taking your time with the little details will make a world of difference.
Ready to give your stitched design the beautiful finish it deserves? Let’s dive in.
The Classic Felt-Backed Ornament
This is a fantastic starting point. It's quick, very forgiving, and gives you a classic, flat ornament that looks incredibly neat. Honestly, it’s my go-to when I’m making a whole batch of gifts at once.
First things first, give your completed stitching a good press with an iron to smooth out any hoop marks or wrinkles. Next, carefully trim your Aida fabric, leaving about a half-inch to a full inch of blank space around your design. Don't get too close just yet!
Now, cut a piece of stiff cardstock or thin cardboard just a little bit smaller than your stitched design. This is what gives the ornament its firm structure. Wrap the edges of your fabric around the back of the cardstock and secure them with a dab of craft glue or some double-sided tape.
Time for the backing.
- Lay your fabric-wrapped cardstock onto a piece of felt and trace its outline.
- Cut the felt shape out, trimming just inside the line. You want it to be a tiny bit smaller than your stitched piece.
- Place the felt against the back of your ornament. Using a single strand of matching embroidery floss, use a small whipstitch or blanket stitch to neatly sew the felt to the Aida all the way around the edge.
Just before you stitch it completely closed, slip the ends of a folded, 6-inch piece of ribbon between the layers at the top. A few extra stitches right there will lock your hanger firmly in place.
The Charming Stuffed Pillow Ornament
If you’re after a more three-dimensional, plush look, this is the technique for you. It turns your stitching into a soft little pillow that looks absolutely perfect nestled among pine needles. There’s something so traditional and comforting about a stuffed ornament.
For this, you’ll need two pieces of fabric: your stitched piece and a backing fabric of the same size. A festive cotton print works beautifully for the back, but a solid piece of felt is a great choice, too. Place the two pieces with their "right" sides facing each other.
Carefully pin them together so they don't shift. You can use a sewing machine or stitch by hand with a simple backstitch, sewing around the edge of your design. Leave about a one-quarter inch seam allowance. The most important part? You have to leave a small 1.5-inch gap open along one of the straight sides.
Through that little gap, turn the ornament right-side out. This is a key step: use something blunt, like a chopstick or a knitting needle, to gently poke out the corners and seams. Getting them crisp and defined is what keeps your ornament from looking like a lumpy blob.
Now for the fun part! Gently push small bits of polyester fibrefill through the opening until the ornament is plump and evenly stuffed. A word of caution: don't overstuff it, or you'll put too much strain on your seams.
To finish it off, just fold the raw edges of the opening inward and sew it shut using a ladder stitch, which will be nearly invisible. Attach a ribbon hanger to a top corner with a few secure stitches, and your plush ornament is ready for its debut.
The Simple and Elegant Hoop Ornament
Looking for a fast, stylish finish that frames your work like a tiny piece of art? The mini embroidery hoop is your best friend. This method requires almost no sewing and adds a lovely rustic, farmhouse-chic vibe to your cross stitch Christmas ornaments.
Start by placing your finished stitching into a small embroidery hoop—a 3 or 4-inch one is usually perfect. Take your time getting the design perfectly centred before you tighten the screw at the top. You'll want to pull the fabric taut all the way around, making sure there are no puckers or saggy spots.
Once you’re happy with how it looks, trim the excess fabric on the back of the hoop, leaving about a one-inch border.
To cover up the back and make it look clean, you have two great options:
- The Running Stitch: With a needle and some strong thread, sew a simple running stitch around the edge of the excess fabric. When you pull the thread tight, it will gather all the fabric neatly toward the centre.
- The Felt Circle: Trace the inner circle of your hoop onto a piece of felt and cut it out. Squeeze a thin line of craft glue around the inside edge of the hoop (on the back) and press the felt circle firmly into place.
Either way, you get a professional look from every angle, with all the tidy (or not-so-tidy) work hidden away. Just tie a festive ribbon around the hoop's tightening screw, and you’re done
Creative Ideas to Personalize Your Ornaments
Once you've got the hang of stitching and finishing, the real fun can begin. This is where you get to go beyond the basic pattern and add those personal touches that turn a simple craft into a cherished keepsake. Making your cross stitch Christmas ornaments truly your own is what makes them so special.
A fantastic way to start is by raiding your existing pattern collection. You don't need a chart designed specifically as an ornament. Look through your larger cross stitch patterns for small, standalone motifs—a single reindeer, a sprig of holly, or a festive star can easily be lifted from a bigger scene and stitched on its own.
This approach gives you an almost endless library of potential ornament designs. Just make sure the motif you choose is a manageable size, usually around 40-60 stitches wide, to create a finished piece that won’t weigh down a tree branch.
Add a Personal Touch with Lettering
One of the easiest and most meaningful ways to personalize an ornament is by adding text. Stitching a name, a special year, or a simple set of initials instantly creates a custom piece that’s perfect for gifting.
You don't need a complicated alphabet pattern. Simple block letters or a delicate script can be found in countless free charts online. Adding "2024" to the back of an ornament, for example, turns it into a beautiful little time capsule. For some great tips on stitching letters cleanly, check out our guide on how to embroider letters—the advice works perfectly for cross stitch, too.
Introduce Sparkle with Embellishments
To give your ornaments that extra festive magic, think about adding a few embellishments. These small additions catch the light beautifully on the Christmas tree and bring wonderful texture and dimension to your work.
- Metallic Threads: Try swapping one strand of your regular floss for a metallic one to add a subtle shimmer. It's perfect for stars, snowflakes, or any element you want to highlight. Trust me, a little goes a long way!
- Beads: Tiny seed beads are perfect for mimicking berries on a wreath, ornaments on a stitched tree, or just adding a bit of sparkle. You can attach them with a single half-stitch using a matching or transparent thread after all your cross stitching is done.
- Tiny Charms: A small silver star or a tiny bell charm sewn to the bottom of your ornament adds a whimsical finishing touch and a lovely bit of movement.
Don’t be afraid to mix and match these elements. An ornament with a name, the year, and a few well-placed beads becomes a deeply personal and multi-dimensional piece of art.
The love for unique, handmade decorations is huge. In fact, Canada exported C$6.42 million worth of Christmas decorations, a number that really shows our national passion for festive crafting. This thriving market includes all the beautiful artisanal items created by sewists using supplies from shops like All About Sewing. With quality BERNINA and Brother embroidery machines, crafters across Canada are turning their passion into treasured family heirlooms. You can learn more about Canada's impressive holiday craft exports and see how big the demand is.
Experiment with Different Materials
While Aida cloth and evenweave are the classic choices, don't forget about other materials that can make finishing your ornaments so much easier.
Perforated paper and plastic canvas are fantastic alternatives. Because these materials are rigid, you don't need a hoop for stitching. More importantly, they will not fray when cut. This makes them ideal for creating ornaments with intricate shapes without having to worry about messy edges.
For the best results, look for a 14-count perforated plastic with round holes, as this gives the best stitch coverage. Once your design is finished, you can simply cut around it, leaving one unstitched bar of plastic as a border to keep all your stitches securely in place.
Got Questions? I've Got Answers
Once you start stitching your own cross stitch Christmas ornaments, you'll inevitably run into a few little questions. It happens to everyone! Think of this as your go-to spot for troubleshooting the most common sticking points that crafters face. Getting these details right is what separates a project you're proud of from one that feels a bit frustrating.
Let’s get those questions sorted so you can keep your festive crafting fun and on track.
What’s the Best Fabric to Use for Ornaments?
This really comes down to the style you're going for. There isn't one single "best" choice, but each fabric type has its own personality and works better for different finishing techniques.
-
Aida Cloth: If you're just starting out, you can't go wrong with 14 or 16-count Aida. The grid is so clear and easy to see, which helps keep your stitches looking uniform and neat. It’s a fantastic all-rounder that works for pretty much any finishing style.
-
Evenweave: For that polished, heirloom look, an evenweave fabric like linen or Jobelan is just beautiful. It gives your stitches a smoother backdrop, making the finished ornament look incredibly professional.
-
Perforated Paper & Plastic Canvas: These are absolute game-changers if you can't stand dealing with frayed edges. They give you a rigid base that’s a dream to cut into any shape you can imagine. This makes them perfect for those flat, felt-backed ornaments that don't need any sewing to finish.
My rule of thumb? For soft, puffy ornaments, stick with Aida or evenweave. For crisp, uniquely shaped designs, perforated paper and plastic canvas are your best friends.
How Can I Turn a Big Pattern into a Tiny Ornament?
This is my favourite trick for building an amazing ornament collection! You absolutely do not need to buy patterns specifically labelled "ornament." The secret is to find a small, charming motif within a larger cross stitch chart and isolate it.
Scan a larger design for a single character, a festive symbol, or a little cluster of elements. You're looking for something that will look great as a finished piece that's around 2 to 4 inches. Then, just stitch that little section.
Here's the most important part: leave a generous border of unstitched fabric around your finished stitching. I always aim for at least a 1.5 to 2-inch margin on all sides. That extra fabric is non-negotiable for pretty much every finishing method, whether you're putting it in a tiny hoop, sewing on a felt back, or making a little stuffed pillow.
How Should I Clean and Store My Ornaments?
These little creations are true keepsakes, and a little care goes a long way in making them last for years. The golden rule is to avoid washing them if at all possible. If you get a small spot, you can gently dab it with a slightly damp cloth, but never, ever submerge the whole thing in water.
When it's time to pack them away, just follow these simple steps:
- Wrap each ornament by itself in acid-free tissue paper. This keeps dust off and stops any thread colours from bleeding onto other decorations.
- Pop them into a sturdy, crush-proof box. It's a good idea to keep them separate from your heavier, store-bought ornaments.
- Store that box somewhere with stable temperatures, like a bedroom closet or under a bed. Attics and basements are a no-go; the humidity and temperature swings can damage the fabric and threads over time.
What's the Best Way to Attach a Hanger?
A strong hanger is the final, crucial touch. The best method really depends on how you finished your ornament.
-
For Felt-Backed or Stuffed Ornaments: Grab a 6 to 8-inch piece of ribbon and fold it into a loop. Just before you sew the ornament completely shut, tuck the two raw ends of the ribbon loop into the top seam. A few tight, hidden stitches will lock it in place so it's nice and strong.
-
For Hoop Ornaments: This one couldn't be easier! Just tie a pretty ribbon directly onto the tightening screw at the top of the mini hoop. Done!
-
For Perforated Paper or Plastic Canvas: The material already has holes, which makes this super simple. Just thread a piece of ribbon or floss through one of the holes at the top of your design and tie a secure knot.
At All About Sewing, we have all the high-quality fabrics, threads, and tools you need to bring your festive ornament ideas to life. From beginner kits to professional-grade supplies, we're here to support your creative journey. Explore our collection of stitching supplies.


