A Crafter's Guide to Your First DIY Baby Mobile
Creating a DIY baby mobile isn't just another craft project. It’s a chance to pour your love and personality into your nursery, making a beautiful heirloom for your new baby. This guide will help you turn simple materials into a stunning centrepiece that will capture your little one’s attention and support their visual development. Whether you're dreaming of whimsical felt animals or clean, modern shapes, you'll find the joy in making something truly your own.
Why Create a Handmade Baby Mobile
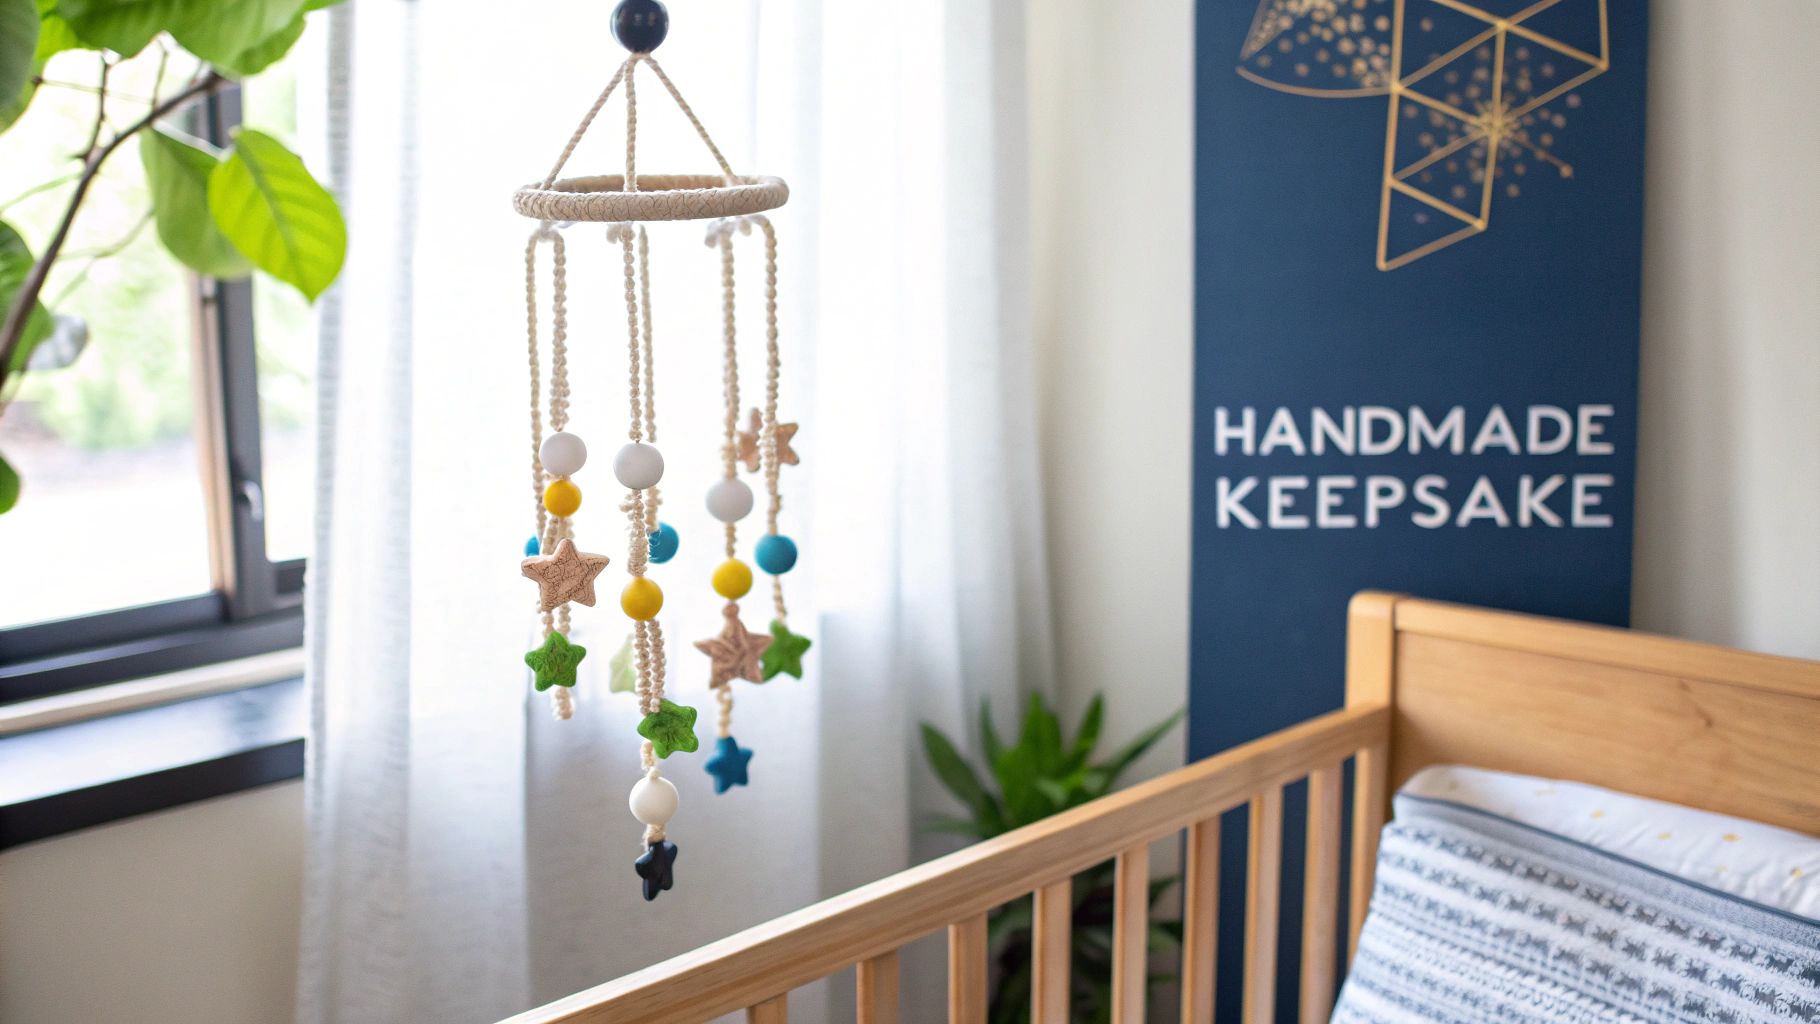
When you make a baby mobile yourself, you unlock creative possibilities that you just can't find in a store. It gives you the freedom to perfectly match your nursery’s theme, colour palette, and overall vibe, making sure every little detail is just right. This isn’t just about decorating; it’s a true act of love.
Handcrafting baby items is becoming more and more popular. In Canada, the demand for DIY nursery projects has blossomed within our thriving craft community. In fact, a 2022 report from Statistics Canada revealed that over 1.2 million Canadians enjoy sewing and needlework, with nursery projects being a big part of that. Another report from 2023 noted that DIY mobiles and other nursery crafts accounted for 15% of sewing machine usage among hobbyists, which is a big jump from only 9% back in 2019.
The Benefits of a DIY Project
Beyond looking great, making your own mobile has some really wonderful advantages.
- A Personal Connection: Every stitch you make and every knot you tie is filled with your care and excitement. This turns a simple mobile into a keepsake with deep sentimental meaning.
- Total Creative Freedom: You’re in complete control of the design. You can hand-pick high-quality fabrics and threads from All About Sewing and choose a theme that’s special to your family.
- Supports Baby's Development: You can design the mobile with purpose, using high-contrast colours and interesting shapes to help stimulate your newborn's developing eyesight.
Crafting a baby mobile is a beautiful way to slow down and connect with the creative process before your little one arrives. It’s a project that combines practicality with heartfelt expression, resulting in a piece that will be treasured for years.
There's a special kind of satisfaction that comes from making things by hand, whether it's a mobile or a set of simple receiving blankets. If you're looking for more handmade baby essentials, you might want to check out our guide on the ideal size for receiving blankets to round out your nursery crafting.
Of course, the mobile is just one piece of the puzzle. As you plan your baby’s first room, other elements like baby nursery wall stickers can add another layer of personality and charm that perfectly complements your handmade creation.
Getting Your Tools and Materials Ready
Before you even think about threading a needle, let's get all your supplies in one place. Trust me, there's nothing more frustrating than getting into a creative groove only to realize you're missing the one colour of thread you desperately need. Think of it as your sewing mise en place—a little prep work now makes the actual crafting process smooth, fun, and so much more relaxing.
We’ll walk through the essentials for a few different mobile styles, so you know exactly what to grab.
The Core Crafting Toolkit
No matter what kind of mobile you're dreaming up, some tools are just plain essential. These are the workhorses of your sewing box that you’ll use for this project and countless others.
- Sharp Fabric Scissors: A good, sharp pair of scissors used only for fabric is a game-changer. They’ll give you those clean, crisp edges that make your finished pieces look so professional.
- The Right Needles: Don’t underestimate the power of a good needle! For sewing felt by hand, you'll want something sharp with an eye big enough for your thread without a struggle.
- Strong Thread: A durable, 100% cotton or polyester thread that matches your fabric is a must. I also love using embroidery floss for decorative stitches and for hanging the little figures—it’s strong and comes in every colour imaginable.
- Pins or Fabric Clips: These little guys are your best friends for holding tiny pieces together while you sew, stopping any frustrating slipping and sliding.
- Measuring Tape or Ruler: A balanced mobile is a happy mobile. A simple ruler is key for cutting your hanging strings to just the right length.
When you're working with felt, the right needle makes all the difference. Felt is much thicker than your average cotton, and a regular needle can make the work feel like a chore. We always recommend a specialty set, like the Schmetz Felt Craft Needles Combo Pack, to make those stitches glide through effortlessly.
DIY Mobile Project Supply Checklist
To make things even clearer, here’s a quick-glance table comparing the specific supplies you'll need for three popular mobile designs. It’s a great way to see what you might already have and what you’ll need to pick up.
| Item | Felt & Fabric Mobile | Wooden Hoop Mobile | Papercraft Mobile |
|---|---|---|---|
| Main Elements | Felt sheets, cotton fabric scraps | Felt balls, wooden beads, small yarn pom-poms | Heavy cardstock (65 lb / 176 gsm or more) |
| Structure | Embroidery hoop or mobile hanger | Wooden embroidery hoop | Quilting hoop or wooden dowels |
| Filler/Details | Fibrefill stuffing | N/A | N/A |
| Adhesive/Fastener | Thread | Thread, clear fishing line, or fine cord | Strong craft glue, adhesive dots |
| Specialty Cutting Tool | Fabric scissors | Scissors | Craft knife and cutting mat |
| Patterns | Printable templates | N/A (based on pattern) | Printable templates for 3D shapes |
This checklist should help you build your shopping list with confidence. Now, let’s dive into the specifics for each project.
Materials for Your Chosen Style
Here’s where you get to pick your path! Each of these mobile styles has its own unique charm and a slightly different shopping list.
For a Classic Felt Animal Mobile
This is such a sweet, traditional choice for a nursery. They're soft, cuddly, and endlessly charming.
- Felt Sheets: Grab a beautiful palette of colours to bring your little creatures to life. A wool-blend felt has a lovely, high-quality feel and is a dream to sew with.
- Fibrefill Stuffing: This is what gives your felt animals that wonderful, puffy, 3D look.
- Embroidery Hoop: A simple wooden hoop makes the perfect frame. Anything from 8 to 14 inches in diameter works beautifully.
- Printable Templates: You can find tons of adorable patterns online, or get creative and sketch your own!
For a Modern Wooden Hoop Mobile
If you love a clean, minimalist aesthetic, this one's for you. It often features simple geometric shapes or colourful felt balls.
- Wooden Embroidery Hoop: Since the hoop is a key part of the design, pick one made from a nice quality wood.
- Felt Balls or Wooden Beads: These are your main event! You can string them in endless colour combinations and patterns.
- Strong, Thin Cording: Clear fishing line is fantastic for this style. It creates the magical illusion that your shapes are just floating in mid-air.
For a Papercraft and Quilting-Inspired Mobile
This style is wonderfully delicate and lightweight. You can create intricate 3D shapes or patterns that look like classic quilt blocks.
- Heavy Cardstock: You'll want paper that's at least 65 lb (176 gsm). This ensures your shapes are sturdy and won't curl over time.
- Craft Knife and Cutting Mat: For getting those super precise, clean cuts on more detailed paper designs.
- Glue or Adhesive Dots: A good, strong craft glue is essential to make sure your 3D elements hold their shape permanently.
- Quilting Hoop or Wooden Dowels: These form the structure from which your delicate paper creations will hang.
My Pro Tip: To make life easier, look for curated project bundles. We often put together kits at All About Sewing with everything you need—like coordinating felt sheets, the right needles, and matching embroidery floss—all in one package. It takes the guesswork out of shopping and lets you dive straight into the fun part: creating
Creating Your Felt Animal Mobile Step by Step
Alright, this is where the magic really happens. We're about to turn those simple sheets of felt into a crew of adorable animals that will float and dance above the crib. It's an incredibly satisfying process, and I'll walk you through it from start to finish. Even if you're new to sewing, you've got this.
From Pattern to Perfect Pieces
First things first, let's get our shapes cut out. How well you do this part really sets the tone for the whole project. Go ahead and print your animal templates, then carefully cut out the paper patterns.
Pin those paper shapes securely onto your felt sheets. Now, grab a good, sharp pair of fabric scissors—seriously, don't skimp here. A sharp pair is the secret to getting clean, crisp edges that won’t fray later on. It makes the sewing part a million times easier. For each little creature, you'll need to cut two identical pieces, a front and a back.
The Art of the Hand Stitch
With all your felt pieces ready to go, it’s time to start sewing. For that lovely, handmade charm, you can't beat the blanket stitch. It creates a beautiful, secure border around the animal shapes and just gives the whole thing a polished, crafted look.
Thread your needle with embroidery floss and tie a solid knot at the end. To start, tuck the knot away by pushing the needle up from between the two layers of felt, so it pops out near the edge of one piece. From there, you can begin your blanket stitch, working your way around the animal.
Not familiar with the stitch? It's simple:
- Push your needle through both layers of felt, from front to back, about a quarter-inch from the edge.
- Before pulling the thread all the way through, loop the needle through the slack.
- Gently pull the stitch snug. You'll see a neat line of thread form right along the edge.
Just remember to leave a small opening, about an inch or two wide, so you can add the stuffing later.
A Quick Tip on Thread: Don't be afraid to use a contrasting colour for your embroidery floss. Imagine a soft grey elephant with pale yellow stitching—it adds a delightful pop of colour and really shows off your beautiful handiwork.
Machine Sewing for a Faster Finish
If you'd rather speed things up, a sewing machine is your best friend. Sewing small, curvy pieces just takes a bit of patience, but it's totally doable. Machines from brands like BERNINA or Brother are fantastic for this kind of detailed work.
Set your machine to a short stitch length; it gives you much better control around the curves. Take it slow, and don't be shy about lifting the presser foot (with the needle down in the fabric!) to pivot as you tackle those tight corners. A walking foot can also be a game-changer here, as it feeds both layers of felt through evenly and prevents any annoying puckering. Just like hand sewing, leave a small gap for the stuffing!
Bringing Your Animals to Life
This is the fun part—giving your flat felt shapes some personality! Take small pinches of fibrefill and gently push them into the animal through the opening you left. I find a chopstick or a knitting needle works perfectly for nudging the stuffing into smaller spots like ears and tails.
The goal is to stuff firmly enough to get a nice, plump shape, but not so much that you're straining the seams. You want the animal to be soft and cuddly, not hard as a rock. Once you're happy with how it looks, just sew the opening closed with the same stitch you used before.
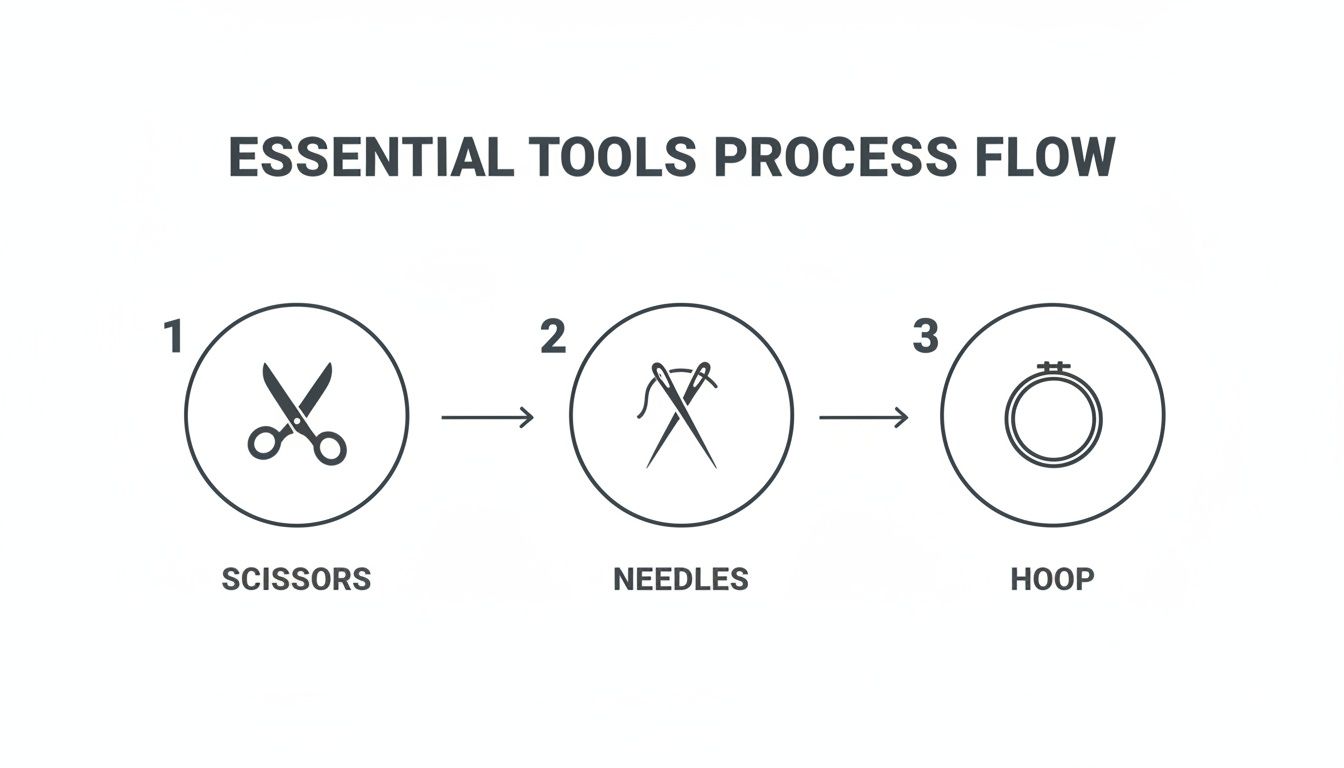
This little diagram shows the core tools for this project: scissors, needles, and a hoop. Having quality versions of these essentials on hand makes every step, from the first stitch to the final assembly, feel so much smoother and more enjoyable.
Adding Those Final Charming Details
Your animals are stuffed and sealed, so now it's time for the finishing touches that truly make them special. Simple embroidered details can completely change their look. With some black or dark brown embroidery floss, you can stitch a few simple lines to create sweet, sleeping eyes. A French knot is another great technique for little dot eyes.
You could also add whiskers, a tiny smile, or even rosy cheeks with a different colour of floss. These little details are what give each creature its unique character. It's no surprise that detailed crafting for nurseries is on the rise. In Ontario alone, sewing retailers have seen a 22% increase in embroidery machine sales for projects just like this DIY baby mobile since 2020. This lines up with Canada's growing birth rate, which hit 347,000 infants born in 2023. A 2024 survey also revealed that 68% of crafters are investing in quality tools like sergers and embroidery hoops from brands such as Ricoma and Husqvarna Viking for their baby projects. You can dive deeper into these trends with these insights into modern crafting.
Assembling Your Mobile Frame
We're on the home stretch! The final step is getting everything hanging beautifully from your wooden hoop. First, figure out how you'll hang the mobile itself. A simple and sturdy way is to cut two long pieces of embroidery floss, cross them over the hoop to make an 'X', and tie them securely where they meet in the centre. That central knot becomes your main hanging point.
Next, cut the strings for your felt animals. I like to vary the lengths to create a more dynamic, interesting look. A nice layout is to have one animal hanging down from the centre and four others spaced evenly around the hoop.
Tie one end of a string securely to the top of a felt animal. I usually pass the needle through the top seam a few times just to be extra sure it's strong. Then, tie the other end to the wooden hoop. Play around with the lengths until you get a balanced look you love. Once you're happy with the placement, put a tiny dab of clear craft glue on each knot on the hoop. This ensures they'll never come undone.
And there you have it! Your charming, handmade felt animal mobile is ready to enchant your little one.
Assembling Your Mobile with Nursery Safety in Mind
You’ve made all the adorable little pieces, and now it’s time for the magic to happen. Putting it all together is incredibly rewarding, but this is also where we need to be extra vigilant about safety. Let's get this mobile assembled securely and hung in just the right spot.
The most important thing to remember is that a mobile is a piece of art for your baby to look at, not a toy for them to touch. Every single knot and attachment has to be rock-solid.
Attaching and Balancing Your Elements
Getting a mobile to hang perfectly level can feel a bit tricky, but there’s a simple method to it. The secret is to work in pairs, adding weight evenly as you go.
First, hang your empty hoop or frame from a doorknob or a temporary hook. This way, you can see exactly how it hangs in real-time. Start by attaching the central element—this is usually the longest one. From there, add the outer pieces in opposing pairs. For instance, if you hang a cloud on one side, hang another piece of similar weight directly opposite it. Pause after adding each pair to check your balance.
- Make small adjustments: If one side is hanging a little low, you can shorten the string on that side just a touch. Tiny changes make a big difference.
- Vary your string lengths: For a more whimsical, dynamic look, cut your strings to different lengths before you even start. This also helps keep the little felt animals or paper shapes from bumping into each other.
- Use temporary knots first: I always use simple slip knots to begin with. This lets me slide things around and adjust the lengths until everything looks just right.
Think of it like an old-fashioned balancing scale. Once you're happy with how it hangs, you can go back and make every single knot permanent.
Securing Knots and Hardware
A secure knot is absolutely non-negotiable. A tight double knot is a good start, but for total peace of mind, I always add a tiny dab of clear, non-toxic craft glue right onto the knot. This ensures it will never, ever come undone.
When you're ready to hang the finished mobile, you've really got two main options: a ceiling hook or a crib-mounted arm.
Ceiling Hook Installation
This is by far the most secure way to hang a mobile. The key is to screw the hook directly into a ceiling joist, not just the drywall. Grab a stud finder—it’s the best tool for this job. Anchoring it into a joist means it’s completely stable and can’t be pulled down.
Crib-Arm Attachment
If you opt for a crib arm, make sure you buy one that’s specifically designed for baby mobiles and clamps firmly onto the rail. Follow the manufacturer’s instructions to the letter and give it a little wiggle test every now and then to make sure it’s still tight.
Following Health Canada Safety Guidelines
This is the most critical part of the entire project. Health Canada has very clear guidelines designed to prevent any risk of entanglement or choking, and we need to follow them closely.
The number one rule is all about height and placement. Your mobile needs to be hung well out of your baby’s reach.
- The Right Height: The lowest-hanging piece of your mobile should be at least 40 cm (16 inches) above the surface of the crib mattress.
- The Right Spot: Hang the mobile over the centre of the crib, or even a little toward your baby's feet. Don't hang it directly over their head, as this can strain their neck.
As your baby gets stronger and more mobile, you have to stay one step ahead. The moment your baby can push up on their hands and knees (usually around four or five months), it’s time to take the mobile down. It's served its purpose above the crib, and you can hang it in a corner of the room to be enjoyed as a beautiful decoration for years to come.
Thinking about the mobile’s safety is a great reminder to check the rest of the nursery, too. It’s always a good idea to secure furniture to the wall to prevent tipping accidents. Taking these extra steps ensures your handmade creation is only a source of joy and wonder, never a hazard.
Making It Your Own: Creative Ideas for a Personalized Mobile
This is where the real fun begins. You've got the basic plan down, but now it's time to turn your craft project into a genuine family heirloom. Personalizing your diy baby mobile is all about pouring your own style and love into it, creating something that truly reflects your family and fits perfectly in the nursery. Let’s get creative and make your mobile one-of-a-kind.
The best place to start is with a theme that feels special to you. Forget the standard store-bought ideas and think about what makes your family smile.
- Celestial Dreams: You can't go wrong with this classic! Imagine soft felt moons, twinkling stars, and maybe a tiny astronaut or a friendly rocket ship drifting by.
- Whimsical Hot Air Balloons: For a touch of adventure, picture gentle, colourful balloons floating between fluffy white clouds. It's pure magic.
- Woodland Wonderland: Bring a bit of the charming forest indoors with sweet foxes, curious bears, little mushrooms, and delicate oak leaves.
- Modern Geometric: If your nursery has a minimalist vibe, clean shapes like triangles, hexagons, and circles in a bold colour palette can make a real statement.
Finding the Perfect Colour Palette
Colour is your most powerful tool for setting the mood. The shades you pick can create a calming atmosphere and even help with your baby’s visual development. Newborns are drawn to high-contrast patterns, so a mix of black, white, and a pop of bright colour is both stylish and stimulating.
As their eyesight matures, they'll begin to appreciate softer tones. Here are a few approaches I love:
- Soothing Pastels: Think gentle mints, soft peaches, and dusty blues. These shades are perfect for creating a serene and calming space for sleep.
- Earthy Neutrals: A palette of cream, beige, ochre, and terracotta brings a warm, grounded feeling that works beautifully in bohemian or nature-inspired rooms.
- Vibrant and Bold: Don’t shy away from bright, happy colours! A rainbow-themed mobile can become a joyful focal point in the nursery.
My best tip is to pull colours directly from other items in the nursery, like a rug, the curtains, or a piece of wall art. It’s a simple trick that makes the whole room feel cohesive and professionally designed. If you need some extra help, you can explore detailed colour mixing charts for your next project.
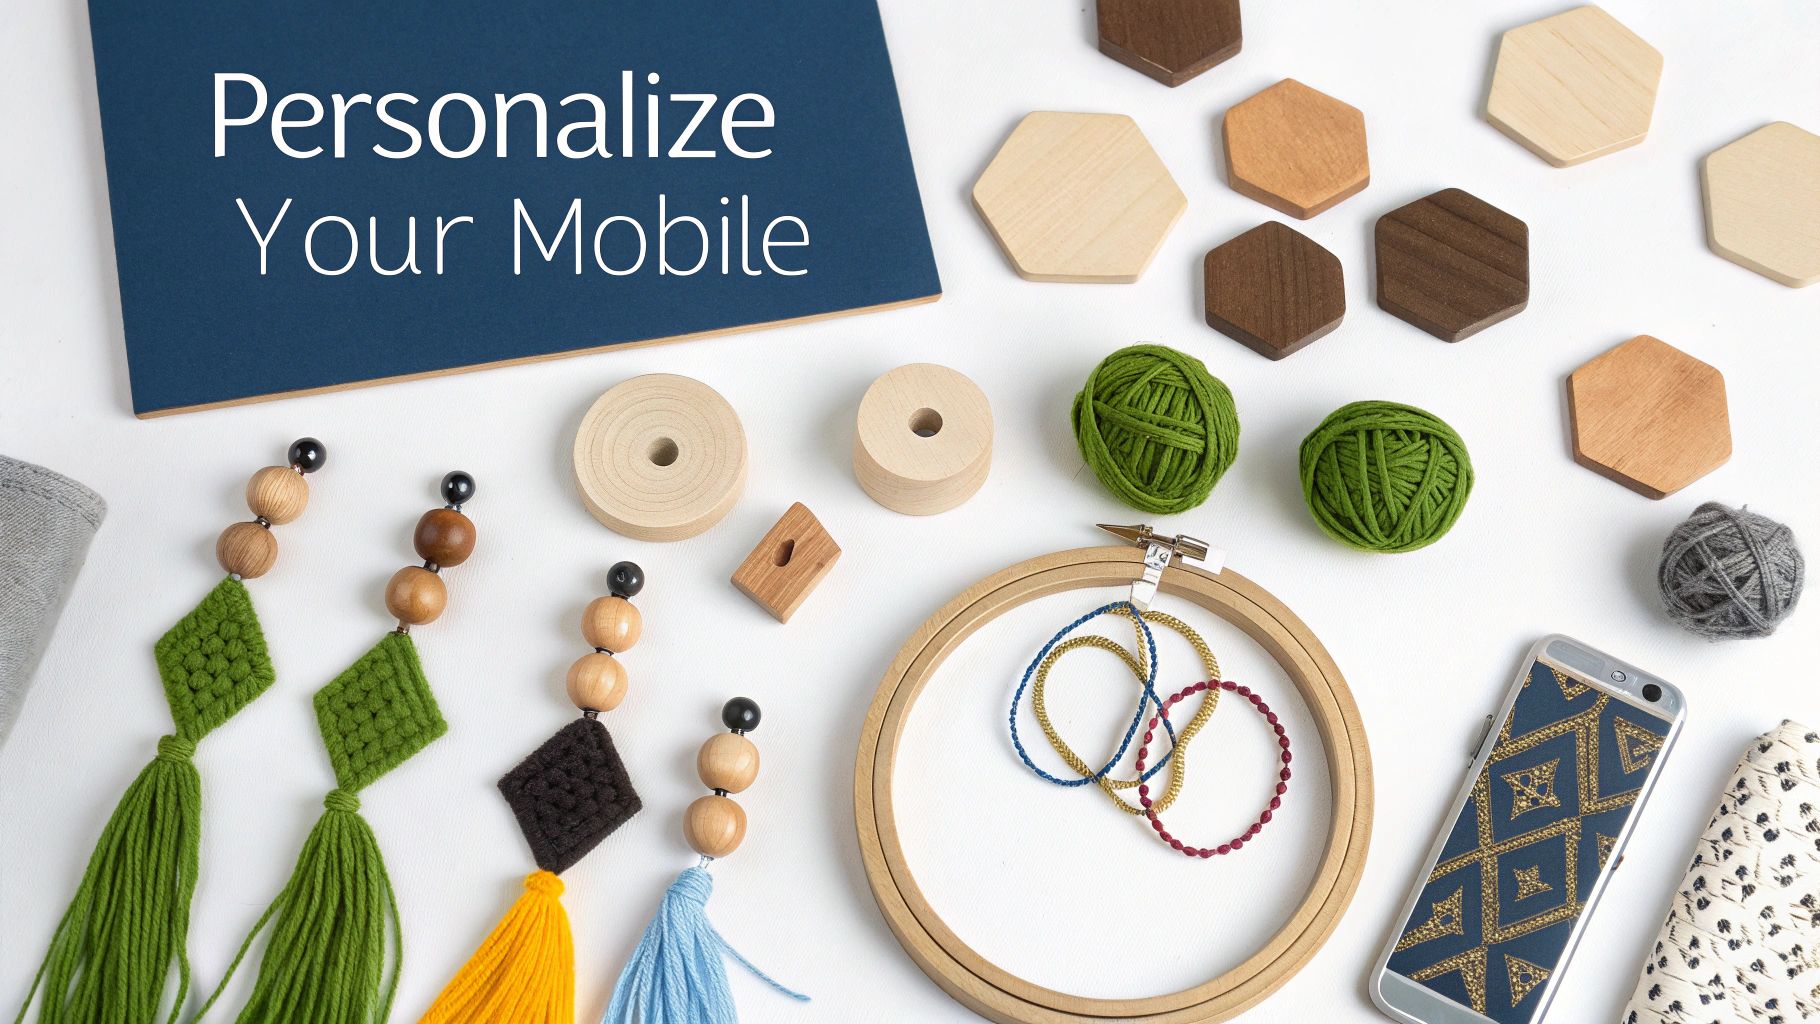
Playing with Textures and Materials
A truly engaging mobile is about more than just what the baby sees. By introducing different textures, you add depth and tactile interest that makes your creation feel extra special. The easiest way to do this is by mixing up your materials.
Try adding little details like:
- Yarn Tassels or Pom-Poms: These are so easy to make and add a soft, playful feel.
- Unfinished Wooden Beads: Stringing a few wooden beads between your felt shapes adds a lovely natural, slightly rustic touch.
- Different Fabrics: Don’t feel stuck with just felt! Little scraps of patterned cotton, corduroy, or even a bit of faux fur can create wonderful contrast.
This desire to craft unique items for little ones is part of a huge trend. In fact, the Canadian market for quilting and embroidery supplies is projected to reach $450 million nationally in 2024, with Ontario crafters alone making up $144 million of that. It's clear that handmade baby items are a real passion for many.
Adding That Final, Personal Touch
Sometimes, the smallest details make the biggest difference. If you have an embroidery machine, this is a great opportunity to add a truly custom element. Stitching the baby's initial onto a central shape—like a cloud or a star—instantly turns the mobile into a bespoke keepsake.
Even without a machine, a few simple hand stitches go a long way. A tiny embroidered heart, a few sparkly sequins on a moon, or some delicate French knots for eyes on a little animal—these details are what give your diy baby mobile its priceless, handmade charm.
Answering Your DIY Baby Mobile Questions
As you get your hands busy creating a beautiful diy baby mobile, you'll probably run into a few questions. That's totally normal! From picking the right materials to getting that perfect, gentle spin, I've seen it all.
Let's walk through some of the most common things crafters ask, so you can finish your project feeling proud and confident.
What Are the Best Materials for a Baby-Safe Mobile?
When you're making something for a baby, safety is everything. The goal is to choose materials that are non-toxic and won't present a choking hazard if any part were to somehow come loose.
I always recommend sticking with natural, breathable materials. They just feel better and give you peace of mind.
- Look for 100% pure wool felt or a quality cotton fabric for the little shapes you cut out.
- For the mobile frame or any decorative beads, stick with unfinished wood.
- If you’re stuffing your felt pieces, grab some hypoallergenic polyester fibrefill.
Just as important is knowing what to skip. Stay away from small, hard bits like plastic beads, buttons, or sequins. They can be a serious choking risk. Make sure every thread you use is strong and every knot is triple-checked to be tight and secure.
How Do I Get My Mobile to Hang and Balance Correctly?
Ah, the final challenge! Getting your mobile to hang perfectly level can feel a bit like a magic trick, but it really comes down to patience. It’s a tiny, delicate balancing act.
First, hang the empty frame from a temporary hook. This lets you see its natural balance point before you add any weight. Attach the central, longest string first, as your anchor. From there, start adding the other elements in opposing pairs. If you hang a cloud on the "north" side, add another piece of similar weight to the "south" side and check the balance. Then do the same for the "east" and "west" sides.
Here's a little trick I've picked up: use small clips or tie temporary knots to hold the strings while you work. Once you're happy with how it hangs, you can go back and tie permanent, secure knots. If one side still dips a little, try shortening the string on the lighter side just a tiny bit. It often does the trick!
When Should I Remove the Mobile from My Baby's Crib?
This is a really important safety question. Mobiles are meant for babies to look at, not to touch. Health Canada guidelines are clear: you should remove the mobile as soon as your baby can push up on their hands and knees or starts reaching for it.
This big milestone usually happens around four to five months old. The moment your little one can grab at it, the mobile becomes an entanglement risk. Its job above the crib is officially done! You can then move it to a higher spot in the room, well out of reach, where it can be admired as nursery decor for years to come.
Can I Add a Music Box or Motor to My DIY Mobile?
You absolutely can! Adding a soft melody or a gentle rotation can make your mobile even more magical. You can find wind-up music boxes and battery-operated motors designed specifically for baby mobiles.
Just be sure to choose one that is certified for baby products and meets Canadian safety standards. These kits are usually simple to install, attaching between your mobile's main hanging loop and the ceiling hook. Follow the manufacturer's instructions to the letter to make sure it's secure and operates safely. It's a simple touch that can turn your lovely creation into a truly soothing experience for your baby.
Feeling inspired to get started? At All About Sewing, we’ve got everything you need, from beautiful felt and strong threads to the best machines for those tiny details. Explore our collection of high-quality supplies for your DIY baby mobile and all your future sewing projects.


