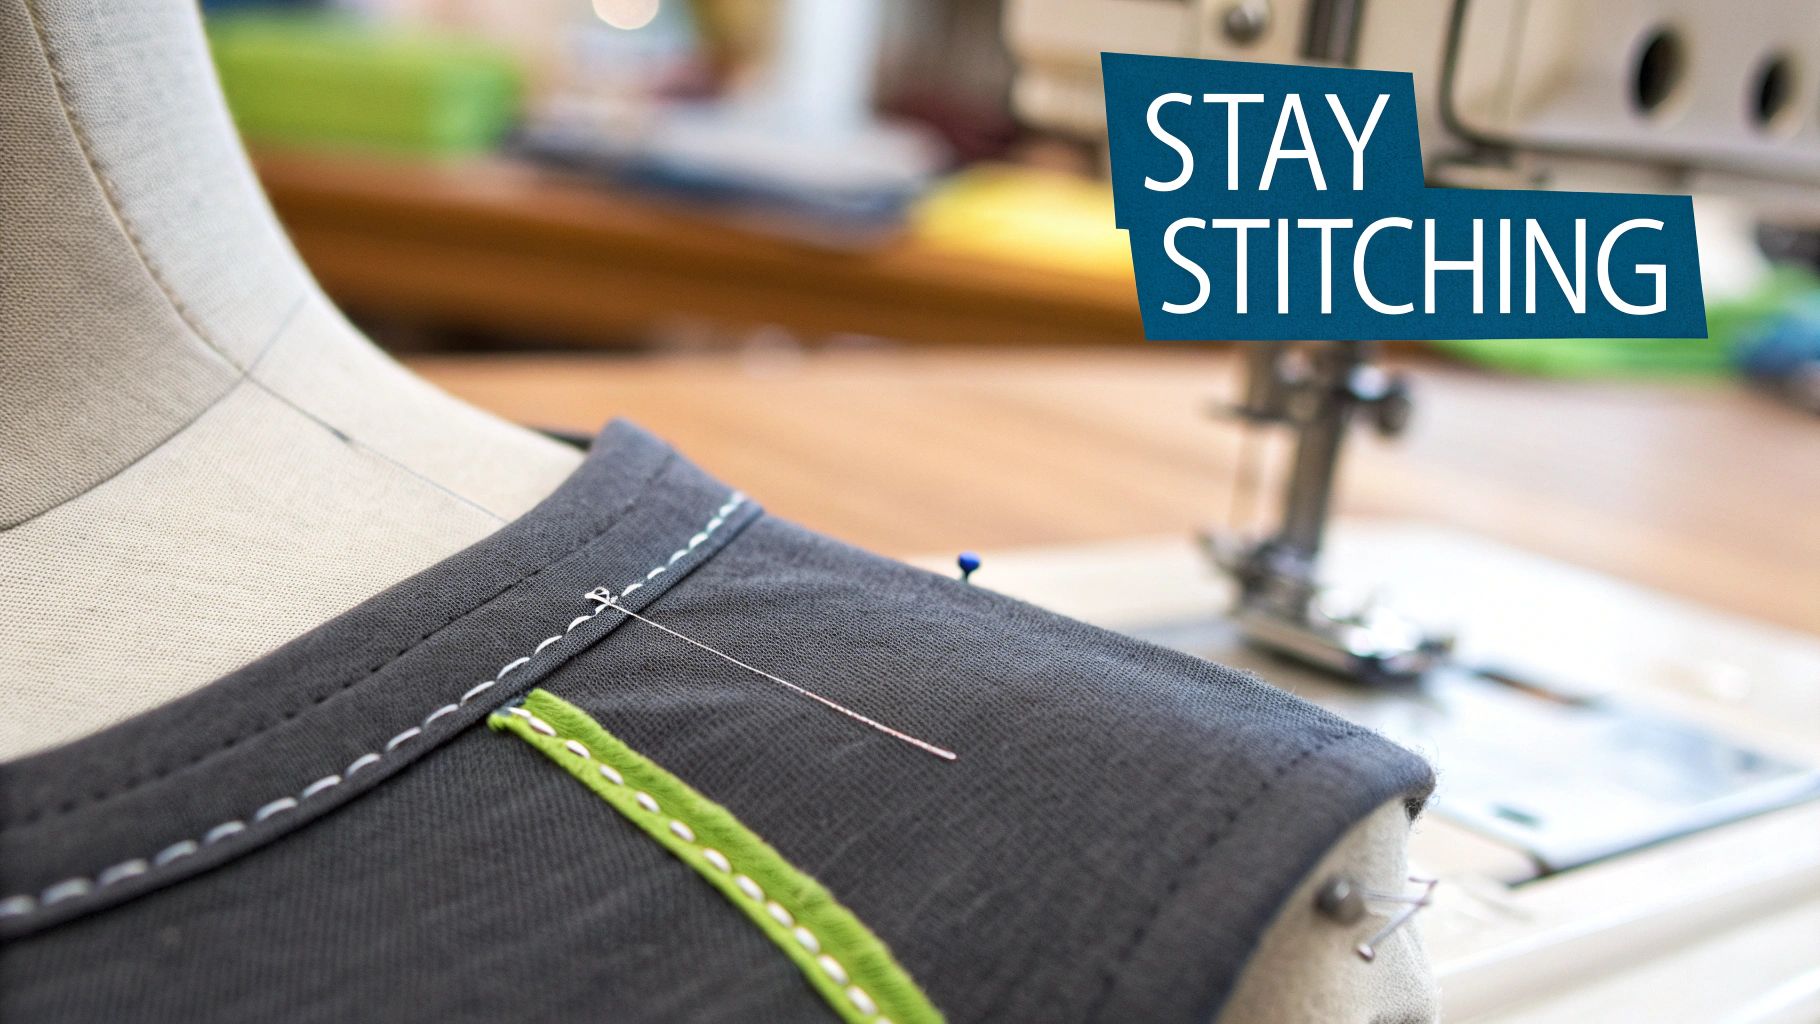
What is stay stitching: How this sewing trick prevents fabric stretch
Stay stitching is simply a straight line of stitches sewn through a single layer of fabric. It’s done just inside the seam allowance, so it will be hidden when the garment is finished. Think of it as a preventative measure—a little ‘guardrail’ for your fabric's edge—that stops delicate curves and bias-cut sections from stretching out of shape while you work.
Understanding What Stay Stitching Really Does
Imagine trying to build a house on a foundation that keeps shifting under your feet. That’s what it feels like to sew a curved seam without stay stitching first. Any fabric cut on a curve or on the bias—like a neckline, an armhole, or the swooping edge of an A-line skirt—is incredibly vulnerable. The threads along that edge are exposed and can easily stretch with just a little bit of handling.
This might not seem like a big deal at first, but that minor stretching can create major fit problems later on. Suddenly, your pattern pieces don't line up anymore. A neckline might gape awkwardly, or an armhole could end up looking wavy and distorted. Stay stitching provides the essential stability needed to prevent this distortion before it has a chance to happen.
Stay stitching isn't some fancy, complicated technique. It's a simple, foundational step that locks the fabric grain in place, ensuring the piece you carefully cut is the exact same shape and size when you're ready to sew the final seam.
This tiny step is a cornerstone of professional garment construction. In fact, a 2023 survey by the Ontario Crafts Council found that 68% of Canadian home sewists named fabric stretch as their top frustration, with 82% adopting stay stitching after taking classes to solve the issue. This simple stitch is often what separates a beautifully made garment from one that just looks homemade. For a deeper dive into its roots in Canadian textile arts, you can explore the history of quilting and fabric preservation in Canada.
Stay Stitching at a Glance
To really get a feel for what stay stitching is, it helps to break down its core characteristics. Unlike most other stitches that are meant to join fabric layers, its only job is stabilization.
Here's a quick summary of what makes stay stitching unique:
| Attribute | Description |
|---|---|
| Number of Layers | Always sewn on a single layer of fabric. |
| Placement | Stitched inside the seam allowance, about 1/8" (3 mm) from the final seam line. |
| Visibility | It is permanently hidden inside the finished seam and is never removed. |
| Stitch Type | A standard, straight machine stitch, typically a bit shorter than a regular seam stitch. |
So, you're always working with one piece of fabric, stitching close to where your final seam will be, and leaving it in for good. It's a quick, easy, and invisible step that makes a huge difference.
Where You Absolutely Need to Stay Stitch
Knowing what stay stitching is is one thing, but knowing exactly where to use it is what separates a beautifully finished garment from a frustrating, stretched-out mess. Think of it as your secret weapon against fabric distortion.
Any time you cut fabric on a curve or an angle, you’re exposing its bias—the stretchiest, most unstable part of the weave. Without a line of stay stitching to hold it in place, that edge is just waiting to stretch as you handle it.
The Most Vulnerable Spots on a Pattern
So, where are these danger zones? There are a few key areas on almost any garment that are practically begging for a line of stay stitching. Skipping it here is a gamble that rarely pays off.
Here are the top three places you should never skip this step:
- Necklines: This is the big one. V-necks, scoop necks, and cowl necks are notorious for stretching out and gaping if they aren't stay stitched right after being cut.
- Armholes: The curve of an armhole, especially on a sleeveless top or dress, can easily warp. This leads to a sloppy fit that no amount of pressing can rescue.
- Bias-Cut Edges: Think of the graceful drape of an A-line skirt or the front edge of a wrap dress. Those pieces are cut on the bias for a reason, but that same diagonal cut makes them incredibly prone to stretching before you even get them to your sewing machine.
Imagine spending hours on a gorgeous V-neck top, only to find the neckline has stretched into a sad, saggy "U" by the time you're ready to attach the facing. That's the exact disaster stay stitching prevents.
Putting in that quick line of stitches provides the structure needed to keep sharp V's sharp and smooth curves perfectly shaped. It ensures your pattern pieces fit together just as the designer intended, saving you from the headache of trying to ease a stretched-out armhole into a sleeve that suddenly seems way too small. A couple of minutes here really does save you from a world of trouble later on.
Your Step-By-Step Guide to Perfect Stay Stitching
Ready to get this simple but crucial technique down pat? Nailing a perfect stay stitch is easy and just takes a couple of quick tweaks on your machine. Following these steps will give your projects a stable, professional foundation right from the start.
Think of stay stitching as drawing a very precise line that tells your fabric, "Don't you dare stretch beyond this point." It’s a quiet but firm instruction that keeps your pattern pieces true to their original shape while you handle them.
Setting Up Your Sewing Machine
First things first, let's get your machine ready. The goal here is to create a stitch that's strong enough to do its job but won't add any bulk, since it will be hidden inside the final seam.
- Choose a Straight Stitch: Just your standard, everyday stitch.
- Shorten the Stitch Length: You'll want to dial this down to somewhere between 1.5 mm and 2.0 mm. This creates a much more secure line of stitching than you'd use for a regular seam.
- Use Standard Needle and Thread: No need for anything fancy. An all-purpose thread and a universal needle are usually perfect. You can match the thread colour if you want, but since it'll be hidden, it really doesn't matter.
This visual shows the key spots on a garment where stay stitching becomes your best friend.
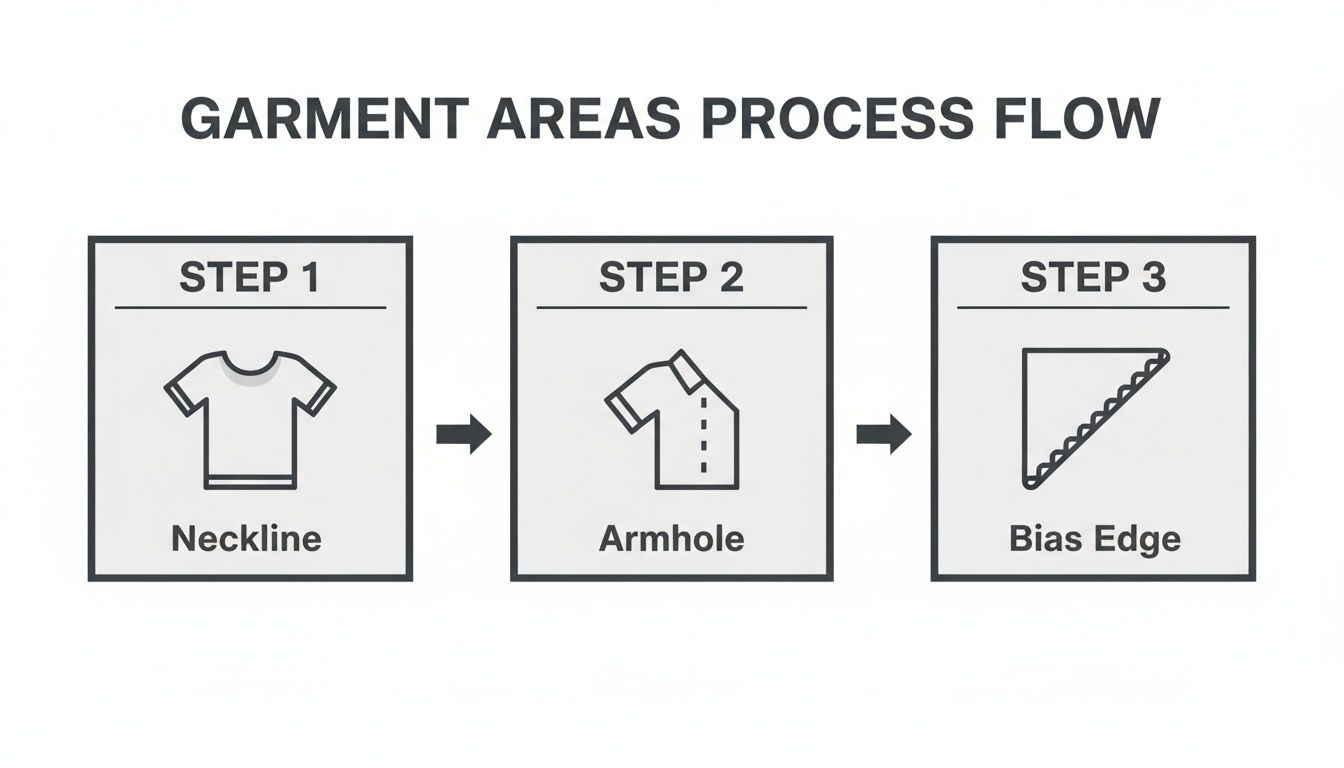
As you can see, it's all about supporting those vulnerable areas like necklines, armholes, and bias-cut edges that love to stretch out of shape.
The Stitching Process
Alright, you're all set to sew. The key here is to be precise and handle the fabric gently. Let the machine do the heavy lifting without you pushing or pulling.
Take your single layer of fabric and place it under the presser foot. You'll want to position your needle so the stitches land just inside the seam allowance. A good rule of thumb is to stitch about 1/8 inch (or 3 mm) away from your final seam line, toward the raw edge.
For example, if your pattern calls for a 5/8 inch (1.5 cm) seam allowance, you should place your stay stitching at the 1/2 inch (1.2 cm) mark. This clever placement guarantees your stay stitches get neatly tucked away inside the finished seam, never to be seen.
Guide the fabric smoothly as you sew, being extra careful not to stretch any curved or angled edges. For something like a V-neck, a pro-tip is to always stitch from the outer edge toward the centre point on both sides. This simple directional trick is what stops that crisp "V" from morphing into a saggy "U". Techniques like this have long been a part of Canadian textile arts, where stabilizing fabric is essential. You can learn more about the evolution of stabilizing stitches in Canadian conservation to see how deep these roots go.
Comparing Stay Stitching to Other Sewing Techniques
In the sewing world, it's easy to get tangled up in terms that sound alike but do completely different jobs. Knowing the difference between stay stitching and other common techniques like basting or understitching is crucial—it helps you grab the right tool from your kit at the right time. Think of it like cooking: you wouldn't use a whisk to chop vegetables, right?
While stay stitching's main gig is to stabilize a single layer of fabric, other stitches are built for joining, finishing, or just temporarily holding things together. This difference is what leads to those clean, professional-looking results we're all after. Getting them mixed up can result in stretched-out necklines or bulky, messy seams.
The real takeaway is this: Stay stitching is a preventative measure for one layer of fabric, while most other stitches are constructive, used to join or finish multiple layers. This basic purpose changes everything, from where you place the stitch to how long it should be.
When you know the specific job of each stitch, you can build your garments with more confidence and skill. It's a simple way to avoid common sewing headaches and really elevate the quality of your work.
Stay Stitching vs Basting and Understitching
Let's break it down and clear up any confusion. Each of these stitches has a very specific mission, and a hallmark of good sewing is knowing when to use which one. They're all important, but they definitely aren't interchangeable.
To help you see the differences at a glance, here’s a quick comparison of stay stitching against a few other common techniques.
Comparing Seam Stabilization and Finishing Stitches
Understanding the key differences between stay stitching, basting, understitching, and topstitching.
| Technique | Purpose | Placement | Visibility |
|---|---|---|---|
| Stay Stitching | To prevent a single fabric layer from stretching out of shape. | Just inside the seam allowance on one layer of fabric. | Hidden permanently inside the finished seam. |
| Basting | To temporarily hold two or more fabric layers together for fitting or sewing. | Can be on the seam line or within the allowance. | Always removed after the permanent seam is sewn. |
| Understitching | To keep a facing or lining from rolling to the outside of the garment. | Through the facing and seam allowances, very close to the seam line. | Hidden on the underside of the facing or lining. |
| Topstitching | To add decorative detail and structural reinforcement to a finished seam. | On the visible, public side of the garment, parallel to a seam. | Intentionally visible as a design element. |
As you can see, stay stitching is unique. It's the only one on the list designed to strengthen a single piece of fabric before you even think about joining it to anything else.
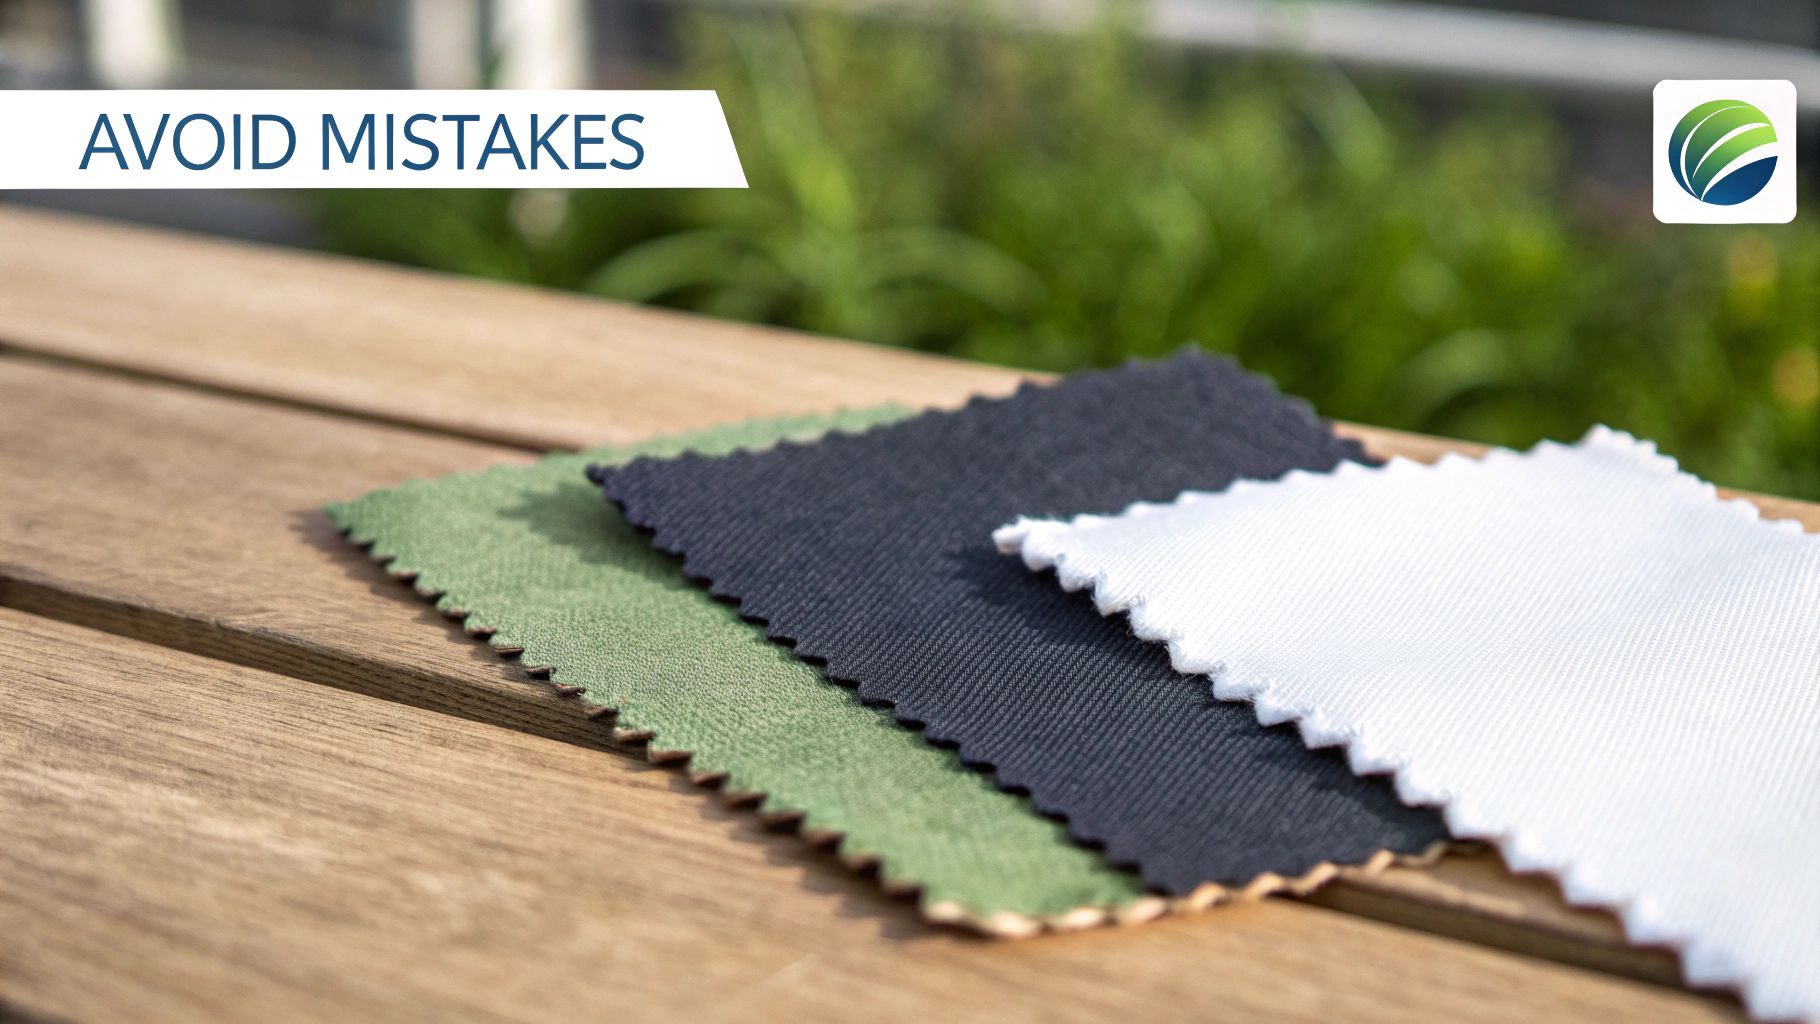
Common Stay Stitching Mistakes and How to Avoid Them
Even with a simple technique like stay stitching, it’s easy to make a few little mistakes that can throw off your project. But don't worry—once you know what to watch for, you'll be able to keep your sewing frustration-free.
The number one slip-up? Accidentally stretching the fabric while you’re stitching. This is the exact opposite of what you want to achieve! It completely defeats the purpose and locks that distortion right into your fabric. Always remember to just gently guide the fabric, letting the machine’s feed dogs do the heavy lifting.
Another classic mistake is putting the stitches in the wrong spot. If you sew directly on the final seam line, or even worse, outside of it, those little stitches will peek through on your finished garment. Make a habit of double-checking your pattern’s seam allowance and stitch about 1/8 inch (3 mm) inside that line.
Quick Fixes for Top Issues
Nailing this technique really comes down to being precise and having a light touch. If you keep a few key things in mind, you can dodge these common errors and keep your pattern pieces in perfect shape from start to finish.
Here are a few common problems and their super simple solutions:
-
Mistake: Using a standard stitch length (2.5 mm or longer). Stitches this long are just too loose to hold a delicate curve in place, leaving it vulnerable to stretching.
-
Solution: Always dial your stitch length down to 1.5 mm to 2.0 mm. This creates a tight, secure line of stitching that provides the stability the fabric edge needs.
-
Mistake: Waiting to stay stitch. The more you move your fabric pieces around—from cutting mat to ironing board to sewing machine—the more they're going to stretch out of shape, especially along those delicate bias and curved edges.
-
Solution: Make stay stitching the very first thing you do after cutting out pieces like necklines or armholes. Seriously, don’t even move them off your cutting table without it.
Think of your uncut fabric as being perfectly stable. The moment you cut into it, especially on a curve, you introduce an opportunity for it to distort. Stay stitching immediately is like closing that door before any stretching can sneak through.
Once you turn these simple fixes into habits, stay stitching will become a seamless part of your sewing routine. You’ll be rewarded with a much cleaner, more professional-looking finish every single time.
Your Stay Stitching Questions Answered
Even after you've got the basics down, a few questions always seem to come up. Think of this as a quick chat with a sewing friend who's been there, done that, and can clear up those last few details for you.
Getting these little things right is what gives you the confidence to jump into any project, no matter how tricky the fabric seems. Let’s tackle the most common questions.
Do I Really Need to Stay Stitch Every Curved Seam?
Honestly? Not every single one, but it’s a brilliant habit to get into. If you're working with fabrics that love to shift and stretch—think rayon, silk, or a drapey linen—it’s absolutely essential. You just can't skip it.
For sturdier materials like quilting cotton, you might get away with it on a gentle curve. But for a sharp V-neck or anything cut on the bias? That’s where stay stitching becomes your best friend. When in doubt, just do it. A quick line of stitches takes maybe two minutes, and it can save you a world of headaches later on.
What Happens If I Forget to Stay Stitch?
You’ll probably notice it when you start trying to piece your garment together. The curved edges will have stretched out from being handled, and suddenly your pattern pieces don’t line up anymore. This is what leads to gaping necklines or armholes that just won't sit flat, no matter what you do.
You can sometimes use a bit of steam to coax the fabric back into shape, but it’s nearly impossible to get it back to its original size perfectly. It's always, always easier to prevent the stretch in the first place.
Should I Remove the Stay Stitching When I'm Done?
Nope, never! The beauty of stay stitching is that it's sewn just inside the seam allowance. Once you sew your final seam, it gets completely hidden away inside the garment.
It becomes a permanent, invisible part of your garment's structure, quietly providing support for the life of the piece.
This is a huge difference from basting stitches, which are meant to be temporary and always get removed. As the name suggests, stay stitching is there to stay.
Can I Use a Serger for Stay Stitching?
I wouldn't recommend it. A serger has a blade that trims the fabric as it sews, and the last thing you want to do is accidentally slice off part of your seam allowance. Stay stitching is all about precise placement within that seam allowance.
For that kind of control, your standard sewing machine with a straight stitch is the right tool for the job.
This trusty technique is a staple in Canada's sewing community. In fact, recent data shows that 76% of sewing hobbyists in Ontario and Quebec rely on stay stitching, cutting down their seam-related problems by an incredible 42%. To learn more about our country's textile traditions, check out these insights on fabric arts history and trends.
Whether you're looking for the perfect machine to handle delicate fabrics or just need some friendly advice for your next project, All About Sewing is here to help you succeed. Explore our collection of machines and accessories today!


