20 Inspiring Workshop Bench Ideas for Your Creative Space
The best workshop bench ideas always start with a simple question: What do I actually need to create comfortably and efficiently? A great bench isn't just a slab of wood; it's a workspace custom-built for your craft, whether that’s sewing, quilting, or anything in between.
Planning Your Perfect Workshop Bench
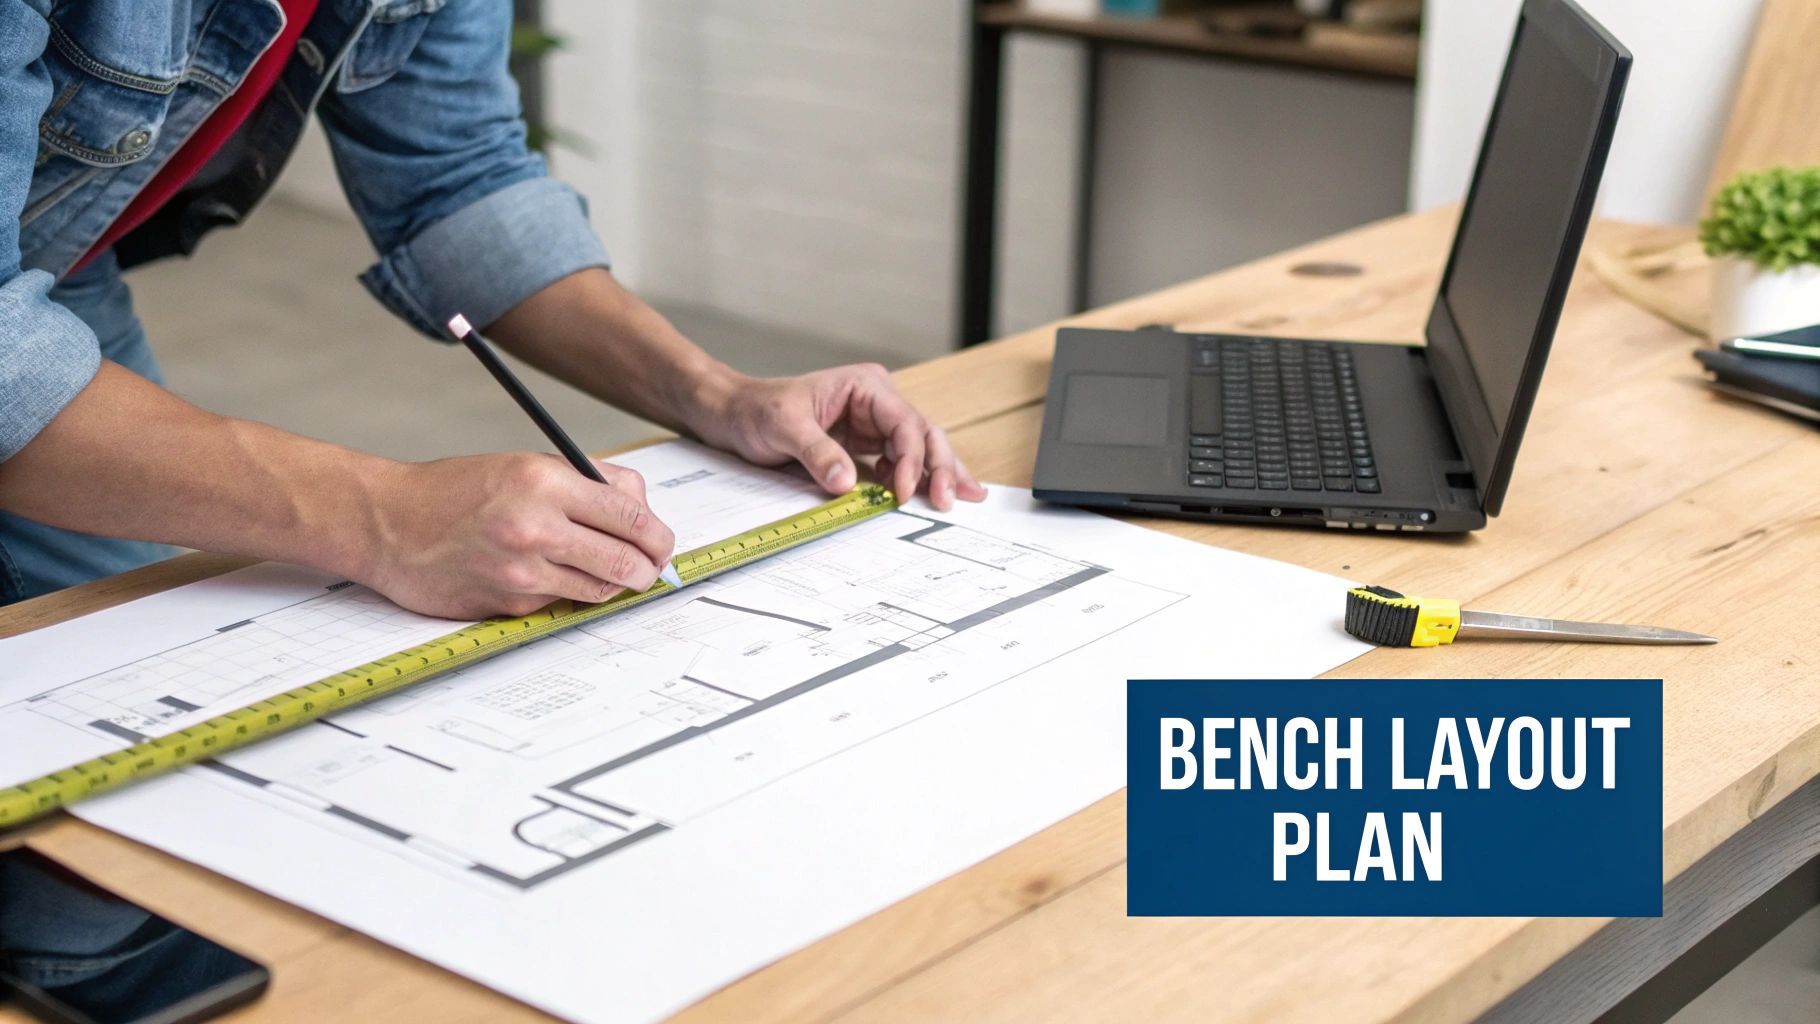
Before you start sketching designs or pricing out lumber, take a step back. A little thoughtful planning now will save you countless headaches later and turn a cluttered corner into a studio you love working in. The whole point is to translate your unique crafting habits into a practical, physical layout.
First things first, get honest about your space. Are you lucky enough to have a dedicated room where a massive, permanent bench can live? Or are you carving out a creative nook in a spare bedroom or basement? Grab a tape measure and get the real dimensions of your area. Remember to account for workflow—you'll need enough room to walk around, open drawers, and manoeuvre large quilts or bolts of fabric without bumping into everything.
Define Your Primary Tasks
The function of your bench should drive its design, plain and simple.
A quilter who dreams of a long-arm machine needs a huge, rock-solid bench with a top that’s perfectly level. On the other hand, a crafter who mostly works with small tools and materials might be better served by a compact, mobile cart with tons of built-in organizers.
This decision tree gives you a great visual starting point for figuring out how your space and main creative tasks should guide your bench design.
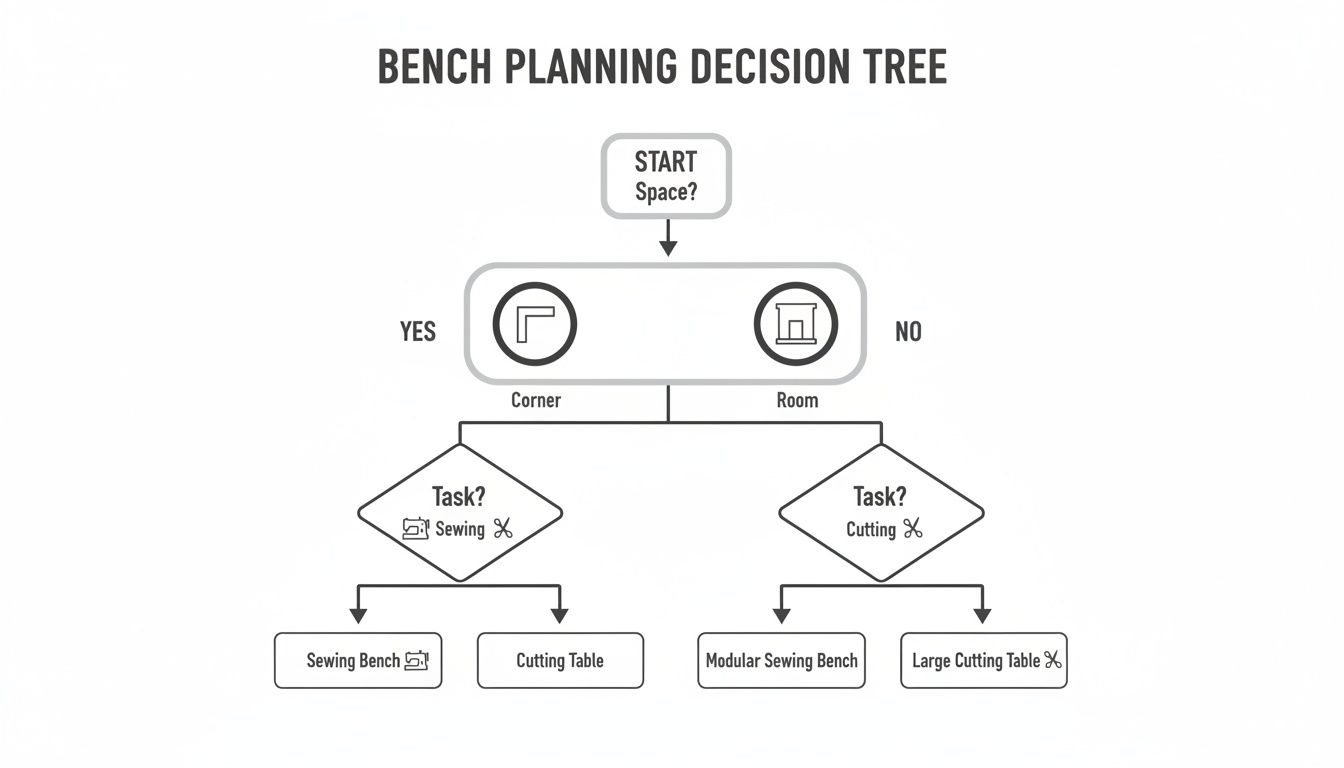
As you can see, your core needs—like a dedicated sewing station versus a massive cutting mat—are the biggest factors in shaping the bench from the ground up.
Finding the Right Dimensions
Let's talk about ergonomics. This isn't just a buzzword; a bench at the wrong height will lead to a sore back and achy shoulders after just a few hours. Getting the dimensions right is absolutely essential.
For a quick reference, I've put together a table with some go-to dimensions that work well for most crafters.
Bench Dimension Guidelines for Different Crafting Needs
| Activity | Recommended Height | Recommended Depth | Recommended Length |
|---|---|---|---|
| Sewing (Sitting) | 29–30 inches (74–76 cm) | 24–30 inches (61–76 cm) | 48 inches (122 cm) or more |
| Cutting (Standing) | 36–38 inches (91–97 cm) | 36 inches (91 cm) or more | 60–72 inches (152–183 cm) |
| General Crafting | 30–36 inches (76–91 cm) | 24–36 inches (61–91 cm) | 48–60 inches (122–152 cm) |
These are just starting points, of course. Your own height and preferences might mean you need to tweak them a bit.
Many crafters, myself included, find that having two different heights is the dream setup. A lower surface for your sewing machine allows your arms to rest at a comfortable 90-degree angle, while a separate counter-height bench at 36-38 inches is a lifesaver for cutting fabric without hunching over. If space is tight, a bench with adjustable legs is a fantastic compromise. You can even build your own perfect-height frame using a quality leg set for a large table to get it just right.
The push for these personalized creative spaces is growing. In the Canadian crafting world, the Fabric, Craft & Sewing Supplies Stores market has ballooned to $1.0 billion, showing a consistent climb as more and more people invest in making their home studios truly work for them.
If you really want to get into the nitty-gritty of workstation design, check out this comprehensive guide on planning, materials, and setup for workstations and tables. It's geared toward labs, but the core principles of creating an efficient, ergonomic space apply perfectly to any custom bench project.
Choosing the Right Materials and Surfaces
The materials you pick for your workshop bench are more than just a detail—they define its strength and how it feels to work on it every day. A solid frame keeps your machines steady and quiet, while the right worktop surface lets your projects glide along without a snag. Let's dig into the best options for a studio built for sewing, quilting, and crafting.
Think of the frame as your bench's skeleton. It has to be strong enough to hold a heavy sewing machine, stacks of fabric, and anything else you throw at it. Many of the same principles for choosing the best wood types for cabinets apply here, since you're looking for that same blend of strength and durability.
What to Use for the Frame
For a classic, rock-solid bench, you really can't beat solid wood. It's heavy, which is fantastic for dampening machine vibrations, and it's built to last. Something like pine or maple gives you a tough, reliable frame without breaking the bank.
If you're looking for a more wallet-friendly option that's easier to work with, plywood is a brilliant alternative. A good quality, multi-layered plywood (¾-inch or thicker) for the legs and supports creates a surprisingly sturdy base. Plus, it's less likely to warp than solid wood and you can cut it with just a few basic tools.
Of course, metal frames offer unbeatable strength and a sleek, industrial look. You can find them on repurposed work tables or as part of a kit. This is the way to go if you’re supporting seriously heavy equipment like a long-arm quilter or an industrial serger.
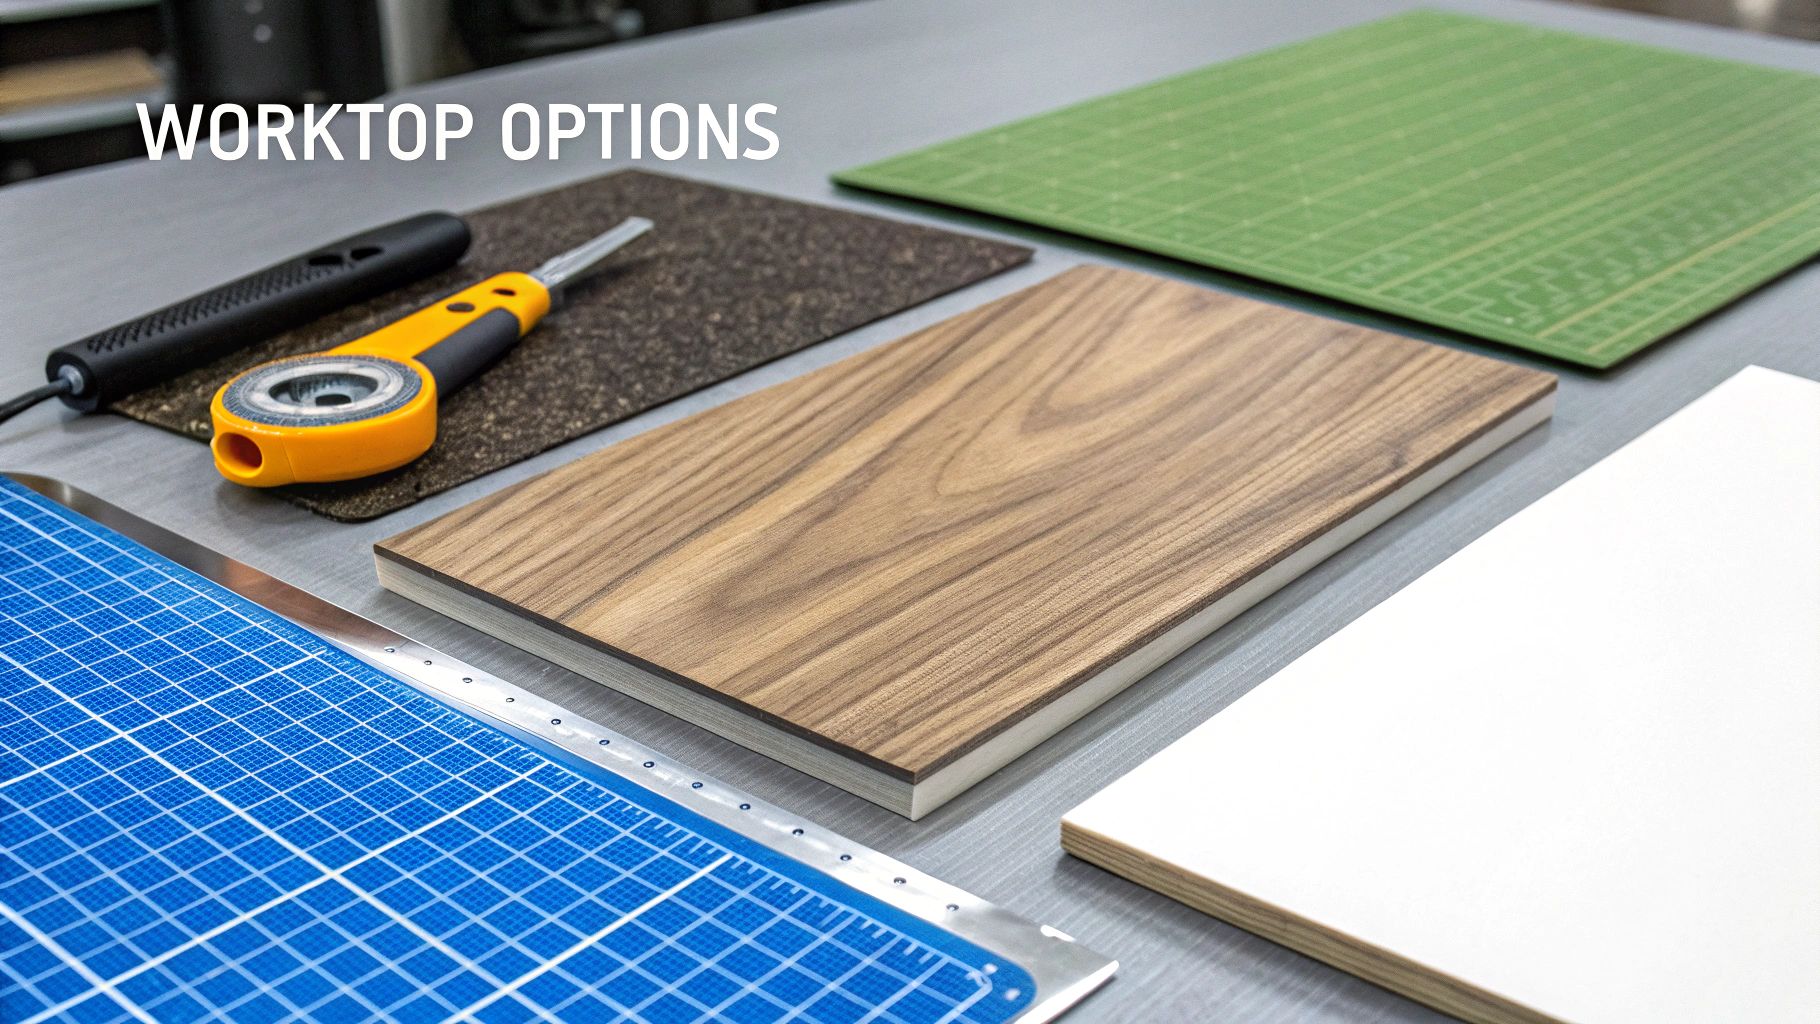
Finding Your Perfect Worktop
The worktop is where the magic happens, so it needs to be smooth, tough, and a breeze to clean.
Here are a few of my favourite go-to surfaces:
- Laminate: A high-pressure laminate countertop is a phenomenal all-rounder. Fabric slides over it beautifully without catching, and it holds up against scratches, glue, and even a bit of heat. Best of all, a quick wipe is all it takes to clean up.
- Solid Wood: A butcher block top is not only gorgeous but also incredibly stable. It’s a heavy-duty surface that gives you a solid foundation for any task. It does need a bit of care to keep it looking its best, though.
- Self-Healing Cutting Mat Overlay: This is a total game-changer. Covering your entire bench with a large self-healing mat instantly turns the whole space into a cutting station. It protects the surface underneath and makes working with a rotary cutter an absolute dream.
When you're working with fabric, a perfectly smooth surface is non-negotiable. Any little bit of texture or roughness can catch on delicate materials, potentially ruining a project. The goal is a workspace that feels like it’s working with you, not against you.
Integrating Smart Storage and Organization
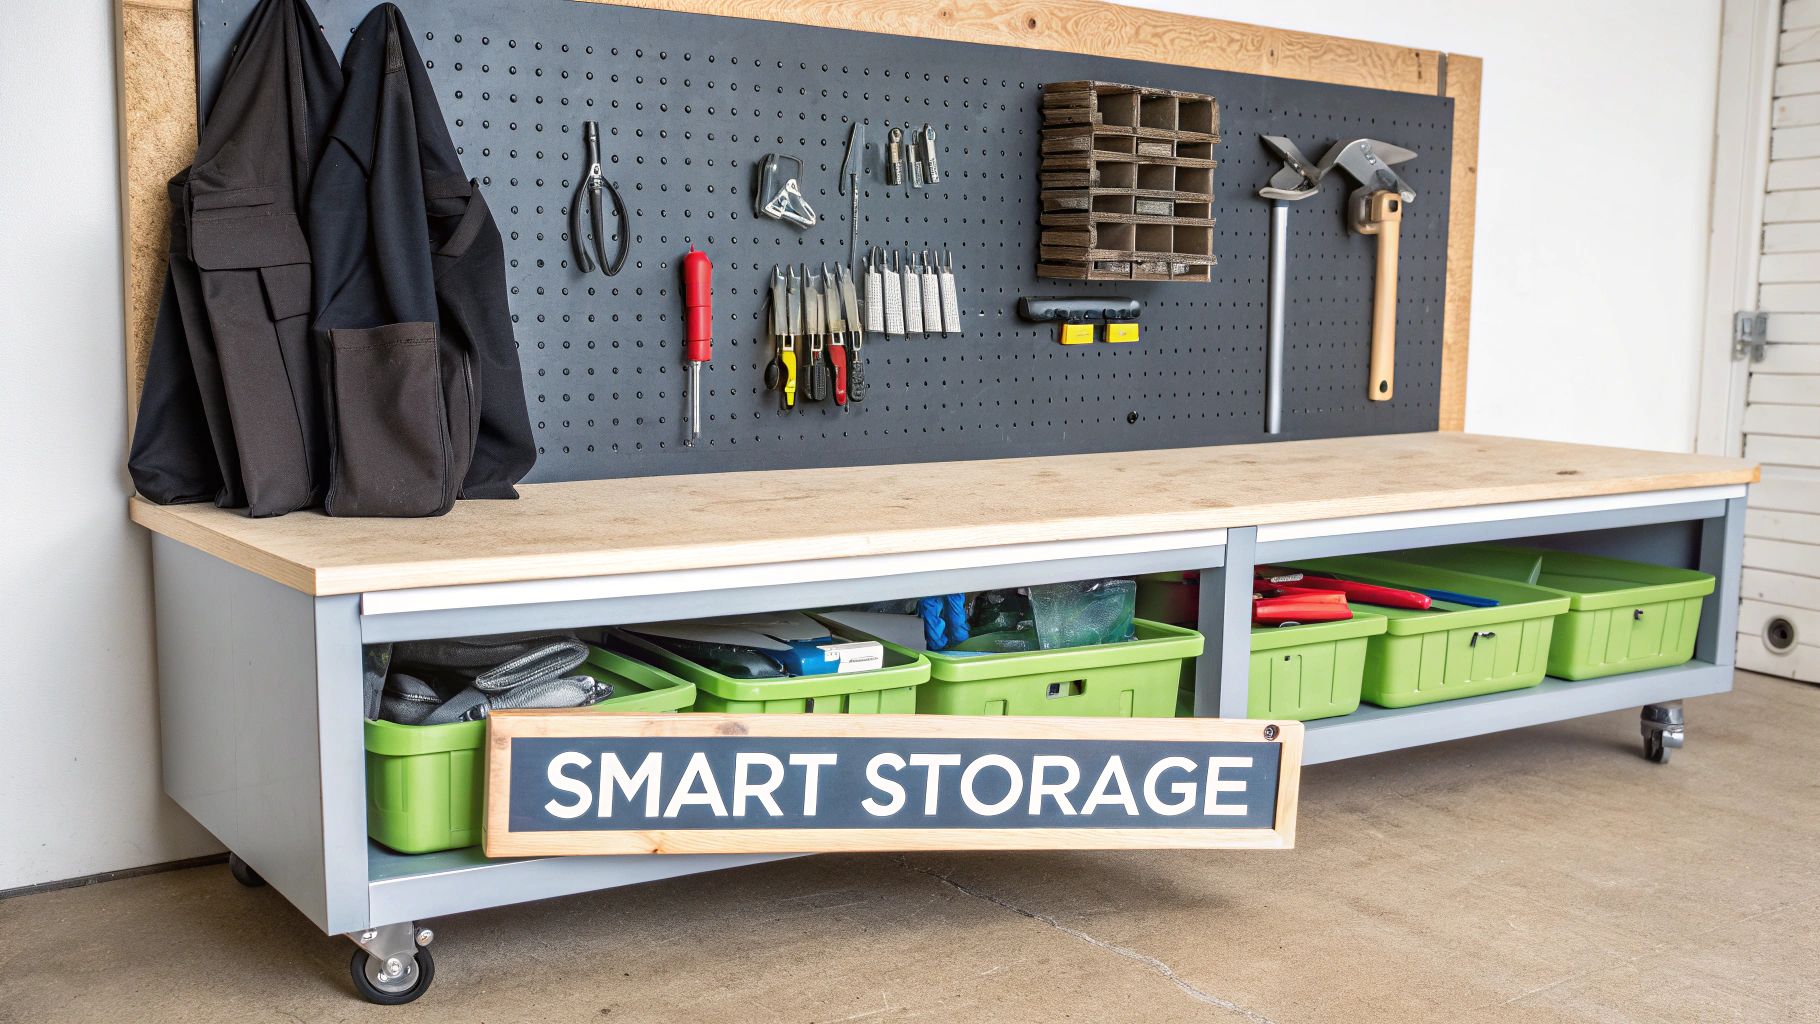
A great workshop bench is so much more than just a flat surface—it’s the command centre of your entire creative space. The real magic happens when you move beyond thinking of it as a simple table and start treating it as a smart storage unit. By building clever organizational features right into the bench itself, you’ll keep your essential tools at your fingertips and your workspace blissfully clutter-free.
Forget basic shelves for a moment and think about custom-built solutions. Picture built-in cubbies perfectly sized for your neatly folded fabric, making it easy to see exactly what you have. Imagine shallow drawers designed specifically for tiny notions like presser feet, bobbins, and seam rippers, so they never get lost in a cavernous bin again. This is how your bench becomes an active partner in your creative process.
Vertical and Accessible Storage Hacks
To really make the most of your space, you’ve got to think vertically. One of the best workshop bench ideas is mounting a pegboard directly to the back or side of your bench. Just like that, you have an instant, customizable home for all the tools you’re constantly reaching for, like your favourite rulers, rotary cutters, and fabric scissors.
Here’s another simple but brilliant trick: add magnetic strips along the front or side edges of the bench frame. They’re absolutely perfect for keeping pins, needles, and small metal tools from rolling away, all while keeping your main worktop clear. You can find everything you need to pull this off, from pegboard hooks to a handy sewing organizer, to round out your setup.
"Your most-used tools shouldn't be more than an arm's length away. Designing your bench with this principle in mind eliminates wasted motion and keeps you in the creative zone, rather than constantly searching for supplies."
Dedicated Thread Management
Anyone who sews knows that thread management can feel like a full-time job. With the apparel segment leading Canada's sewing thread market, having a proper system isn't just a nice-to-have; it's a serious upgrade to your efficiency. In fact, many crafters report that having integrated spool holders can speed up their workflow by up to 28%—a huge time-saver on any project. You can dig into more stats about the Canadian sewing thread market if you're curious.
Here are a couple of built-in solutions to consider:
- Integrated Spool Racks: Build or mount racks directly onto your bench’s backsplash or side panels. This keeps your entire colour palette visible and ready to go.
- Shallow Thread Drawers: Install shallow drawers and fit them with custom dowel inserts. This keeps spools neatly lined up and protects them from dust and sunlight, which can make thread brittle over time.
Ultimately, the goal is to create a workspace where every single item has a logical home, right where you need it. This kind of integrated organization puts an end to the frustrating hunt for tools and lets you focus all your energy on what you love to do.
DIY and Modification Ideas for Every Skill Level
You don't need a professional woodshop or a master carpenter's skills to create a fantastic workshop bench. In fact, some of the best, most functional benches I've seen were built or modified with just a bit of clever thinking. Let's look at some approachable ideas, whether you're starting from scratch or giving an old piece of furniture a new lease on life.
Many brilliant workbenches began as something else entirely. A sturdy second-hand dining table, an old office desk, or even a set of low kitchen cabinets can be the perfect foundation for a robust sewing station.
The secret is finding something with good bones. Look for solid wood construction and make sure it doesn’t wobble. A heavy base is your best friend—it will naturally absorb the vibrations from a sewing machine going full tilt.
Simple Mods, Big Results
Once you've found your base, a few simple upgrades can completely change how it works for you. These are perfect weekend projects that only require basic tools.
- Add Locking Caster Wheels: This is a game-changer. Suddenly, your static table is a mobile workstation you can roll out of the way for cleaning or rearranging. Just make sure they lock securely so your bench stays put while you work.
- Install Under-Bench Lighting: Good lighting isn't a luxury; it's a necessity. You can get inexpensive adhesive LED light strips online or at any hardware store. Stick them under the tabletop or an overhead shelf to light up your work area and reduce eye strain.
- Mount a Power Strip: I’m done with crawling under a desk to plug things in. Screw a power strip right onto a leg or the side of the bench. Now your machine, iron, and glue gun all have a convenient home.
My absolute favourite DIY upgrade is a custom-fit insert for a sewing machine. It allows the machine bed to sit perfectly flush with the tabletop. For quilters dealing with large projects, this creates a seamless, snag-free surface that makes a world of difference.
Building a Simple Frame from the Ground Up
If you can’t find the perfect piece to modify, building a simple frame is less intimidating than it sounds. You don't need to be an expert in joinery. A rock-solid frame can be built with construction-grade lumber and some heavy-duty screws or brackets.
Think of it as building a very sturdy box. For the top, I recommend gluing together two layers of ¾-inch plywood. This creates an incredibly strong and affordable surface that’s highly resistant to warping over time. Best of all, this approach means you can build a bench to the exact height and size your studio needs.
Choosing the right path depends on your budget, skills, and how much time you want to invest. Here's a quick rundown to help you decide.
DIY Bench Project Comparison
| DIY Approach | Estimated Cost | Skill Level | Pros & Cons |
|---|---|---|---|
| Repurposing Furniture | Low ($20–$100) | Beginner | Pro: Fast and budget-friendly. Con: Limited to the dimensions of the original piece. |
| Simple Modifications | Low ($50–$150) | Beginner | Pro: Adds huge functionality for minimal effort. Con: Depends on having a suitable base to start with. |
| Building from Scratch | Medium ($150–$300) | Intermediate | Pro: Fully customizable in size and features. Con: Requires more time, tools, and planning. |
Ultimately, any of these ideas can help you create a high-quality, personalized workspace without breaking the bank. The best bench is always the one that fits your unique workflow, and there's a special kind of satisfaction that comes from building it yourself.
Adding Finishing Touches for a Professional Feel
With the heavy lifting done and your bench built, it's time for the details that really make a difference. These are the small, thoughtful touches that elevate a simple table into a workspace that feels custom-built just for you. It's all about comfort and making your creative process smoother.
Let’s talk ergonomics. Standing on a hard floor for hours while cutting fabric is a recipe for an aching back. A good anti-fatigue mat is a game-changer, providing that much-needed cushioning for your feet and joints. When you're sitting, check your chair height—you want your arms to be at a relaxed 90-degree angle to your worktop to avoid strain.
Power and Lighting Where You Need It
One of my biggest pet peeves is hunting for a free outlet or tripping over extension cords. A simple but brilliant fix is to mount a power strip directly onto a leg or underneath the bench. This puts power right at your fingertips for your machine, iron, and glue gun, keeping cords tidy and out of the way.
Good lighting is just as crucial, especially for detailed work. Your main room light often isn't enough and can cast annoying shadows. This is where targeted task lighting comes in. For things like threading a needle or working on intricate stitches, you need a focused beam of light. I always recommend something highly flexible, like this Unique Flexible LED Lamp, which you can bend and aim precisely where you need it most.
A well-organised workspace isn't just about looking tidy; it’s about removing small frustrations that interrupt your creative flow. When every tool, plug, and light source is exactly where you need it, you can stay focused on your project.
Smart Add-Ons for a Custom Feel
Now, think about the little things you do over and over. Building solutions for these repetitive tasks directly into your bench is what makes it feel truly yours.
Here are a few ideas I've seen work wonders:
- Integrated Ironing Station: If you do a lot of quilting or sewing, having a small, heat-resistant ironing pad in a corner of your bench saves so much time. It's perfect for quick presses without setting up the full ironing board.
- Tablet or Pattern Stand: A simple stand or holder mounted to the bench keeps your digital patterns or instructions upright and easy to read. No more propping your phone against a pincushion!
- Cord Management: A few adhesive clips or a cable channel stuck to the underside of the bench can wrangle all those pesky wires, keeping them neat and safely out of your way.
These are the final touches that transform a functional bench into a truly inspiring space—one that actively helps you create.
Your Top Workshop Bench Questions, Answered
When you're setting up your dream creative space, a few key questions always pop up. Getting these details sorted out from the beginning can save you a lot of literal back pain and frustration down the road. Let's tackle some of the most common ones we hear from fellow sewists and crafters.
What’s the Best Height for a Sewing and Cutting Table?
This is a big one, and the honest answer is: it depends entirely on what you’re doing. Comfort is king here, and getting the ergonomics right will let you create for hours without feeling it in your back and shoulders.
For machine sewing, you'll most likely be sitting. The goal is to have your arms at a comfortable 90-degree angle when your hands are on the machine. For most people, a table height of about 29-30 inches (74-76 cm) hits that sweet spot, preventing you from hunching forward.
But for cutting fabric, you'll be on your feet. A standard kitchen counter height, around 36 inches (91 cm), is what you should aim for. This height lets you lean over your project and apply pressure with a rotary cutter without straining your lower back. Many crafters find that having two different height surfaces—or investing in an adjustable-height bench—is the ultimate game-changer.
How Can I Stop My Sewing Machine from Vibrating and Shaking?
Ah, the dreaded machine "walk." That constant vibration, especially from a powerful serger or a machine going at full tilt, is more than just annoying—it can be downright distracting.
First things first, check your bench’s stability. Is it wobbly? Make sure all the legs are level on the floor and give any bolts or screws a good tightening. A heavy, solid bench made from real wood or hefty plywood will absorb vibrations far better than a flimsy, lightweight table ever could.
A quick and surprisingly effective fix is to slide a dense anti-vibration pad under your machine. You can often find these sold for appliances like washing machines, and they are fantastic at soaking up the shakes and noise.
What’s the Most Durable Surface for a Workshop Bench I’ll Be Cutting On?
If your bench needs to be a true multi-tasker that can handle a lot of cutting, a high-pressure laminate surface is an excellent all-around choice. It’s perfectly smooth, so delicate fabrics can glide across without snagging. Plus, laminate is tough, scratch-resistant, and super easy to wipe clean of threads, dust, and the occasional glue spill.
The golden rule, however, is to never cut directly on the laminate itself. Always, always use a self-healing cutting mat. It will save your worktop from getting sliced up and keep your rotary cutter blades sharp.
For the serious quilter or garment maker, here's one of the best workshop bench ideas: cover the entire benchtop with a giant, high-quality self-healing mat. This turns your whole space into one massive, usable cutting area. No more piecing smaller mats together—just total freedom for those big projects.
At All About Sewing, we know that the right workbench is the heart of a productive studio. From specialized machine furniture to the essential accessories that bring it all together, our team is passionate about helping you build your perfect creative space. Explore our collection and get expert advice at https://all-about-sewing-canada.myshopify.com.


