

A Practical Guide to Free Motion Quilting Designs
Think of free-motion quilting designs as the beautiful patterns you "draw" with thread, turning your sewing machine into a pencil or a paintbrush. It’s what separates a functional quilt from a true work of art. Unlike the straight, rigid lines of traditional quilting, free-motion quilting (or FMQ, as you'll often hear it called) gives you the freedom to create anything from simple, playful stipples to elegant, complex feathers. It’s all about you guiding the fabric, adding your own personal touch of texture and movement.
Starting Your Free Motion Quilting Journey
So, you're ready to dive into the wonderfully creative world of free-motion quilting! It can seem a little magical, watching quilters effortlessly create those flowing patterns. If you've ever admired a quilt and wondered how on earth they did that, you've come to the right place. My goal here is to pull back the curtain and show you how to 'draw' with thread, giving your quilts a personality that’s all their own.
Embracing the Creative Freedom of FMQ
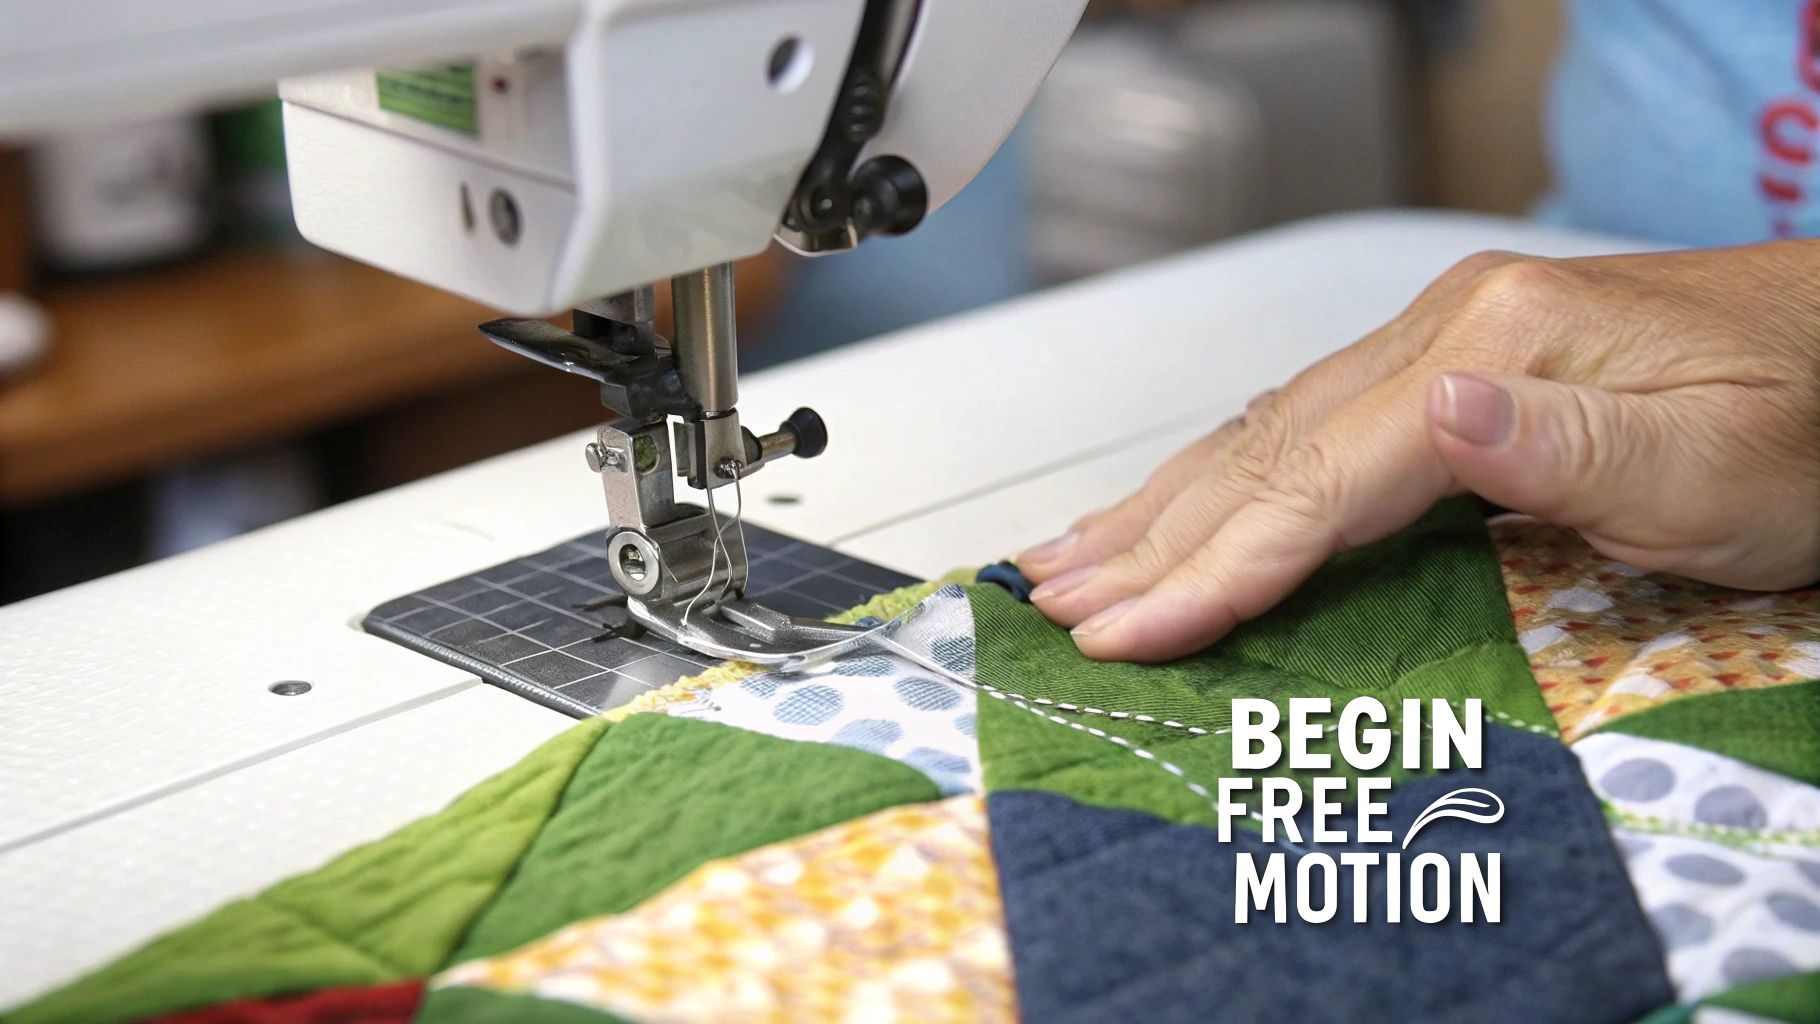
At its heart, free-motion quilting is all about you taking the wheel. The secret is disengaging (or covering) the feed dogs on your machine. Once those little teeth are out of the way, you’re no longer stuck sewing in straight lines. You can move the quilt sandwich in any direction—forward, backward, sideways, in circles—creating any shape you can imagine. This simple change transforms quilting from a structured, point-A-to-point-B task into a fluid, expressive art form.
The biggest mental hurdle for beginners is learning to embrace imperfection. Don't sweat the small stuff! Every wobble and slightly uneven stitch adds to the handmade charm and tells the story of your creative journey.
That initial freedom can feel a bit like driving without a steering wheel, but I promise it's incredibly rewarding once you get the hang of it. As you get comfortable with free-motion quilting, you might even find yourself interested in developing other practical skills that offer a similar sense of creative accomplishment.
Essential Tools to Begin Your Adventure
The good news is you don’t need a fancy, expensive setup to get started with free-motion quilting designs. A few key tools are all it takes to set yourself up for success and make that learning curve a whole lot smoother. It also helps to have a well-organized workspace; if you need some inspiration, take a look at these great workshop bench ideas.
Here are the absolute must-haves for your toolkit:
- A Darning or Free-Motion Foot: This special foot is non-negotiable. Often called a "hopping foot," it gently presses down on the fabric as the stitch is formed and then 'hops' up, allowing you to move the quilt freely. This prevents the fabric from bouncing with the needle and ensures your stitches are neat and even.
- Quilting Gloves: I know, they might seem a bit extra, but trust me, they are a total game-changer. The grippy fingertips give you incredible control over the quilt sandwich without having to use a death grip. This means less hand and shoulder fatigue and much smoother quilting lines.
- A Reliable Machine: You don’t need the most expensive machine on the market! The most important feature is the ability to drop or cover the feed dogs. If your machine can do that, you can free-motion quilt. It's the key that unlocks movement in any direction.
Setting Up Your Machine and Workspace for Success
Before you even think about stitching those beautiful, flowing designs, you need to set the stage. A great free-motion quilting session starts with a machine and workspace that are prepped and ready to go. Think of it like this: when everything is properly set up, you can get lost in the creative rhythm of quilting instead of wrestling with your equipment.
Let's get your space dialed in so you can quilt with confidence.
Getting Your Machine Ready for Free-Motion
In free-motion quilting, your machine has one job: to move the needle up and down. You're in charge of moving the quilt. For this partnership to work smoothly, a few key adjustments are essential. If you're ever unsure if your machine is up to the task, our guide on choosing the best sewing machine for quilting can help.
First things first, you need to disengage the feed dogs. These are the little metal teeth under your needle that usually pull the fabric forward. By dropping them, you take complete control, allowing you to move your quilt in any direction—sideways, backwards, or in beautiful curves. Most modern machines have a simple switch for this; older models might need a cover plate.
Next, find your stitch length setting and turn it all the way down to zero. Since you'll be creating the stitch length by how fast you move your hands, this setting tells the machine to stand down and let you do the driving.
Finally, you’ll need to attach a special foot—either a free-motion foot or a darning foot. This is non-negotiable. This foot "hops" up and down with the needle, giving you just enough clearance to glide the fabric underneath while still holding it down as the stitch is formed. I personally love an open-toe version because it gives me a much clearer view of my stitching line.
Needles and Thread: The Unsung Heroes
Don't make the mistake of overlooking your needle and thread. I've seen so many quilters get frustrated with skipped stitches, shredded thread, and constant breakage, all because of a bad needle and thread pairing. It’s a simple thing that can completely derail your creative momentum.
For needles, you can’t go wrong with a quilting needle or a topstitch needle. Quilting needles are specifically designed with a tapered point to pierce through the quilt sandwich (top, batting, and backing) without damaging the fibres. Topstitch needles are another fantastic option because they have a larger eye, which means less friction and stress on your thread. For most projects, a size 80/12 or 90/14 is the perfect place to start.
As for thread, a high-quality 40wt or 50wt 100% cotton thread is a reliable workhorse, especially when you're starting out. It's strong, looks beautiful on a quilt, and most machines handle it without any fuss. A pro tip? Use the same thread in your top spool and your bobbin. It makes getting your tension balanced so much easier.
Here’s something to remember: the needle makes the hole, and the thread passes through it. A fresh, sharp needle is your best friend for preventing skipped stitches and fabric snags. Make it a habit to change your needle after every 8-10 hours of quilting.
To make setup a breeze, here’s a quick checklist you can run through before every FMQ session.
Essential FMQ Machine Settings and Supplies Checklist
This table is your quick-start guide to ensure every component is ready for action, helping you avoid common frustrations and achieve beautiful, smooth stitches from the get-go.
| Component | Recommended Setting or Type | Why It Matters for Smooth Stitching |
|---|---|---|
| Feed Dogs | Disengaged (Dropped) | This gives you 100% control to move the quilt in any direction freely. |
| Stitch Length | Set to 0 | Prevents the machine from trying to move the fabric, reinforcing your control. |
| Presser Foot | Free-Motion or Darning Foot | "Hops" to allow fabric movement while securing the quilt for each stitch. |
| Needle | Quilting or Topstitch, Size 80/12 or 90/14 | A sharp, appropriate needle prevents skipped stitches and fabric damage. |
| Thread | 40wt or 50wt Cotton | A quality thread reduces breakage and tension issues. |
| Extension Table | Attached and Level | Supports the quilt's weight to prevent drag and ensure smooth movement. |
Once you've ticked off these items, you can be confident your machine is primed and ready to bring your quilting ideas to life.
Creating a Comfortable Quilting Space
Now that the machine is sorted, let's look at your quilting environment. Hunching over a quilt for hours is a recipe for a sore back and stiff shoulders. A few simple tweaks to your setup can make a massive difference in your comfort and stamina.
The single most valuable accessory for your quilting space is an extension table. It creates a large, flat surface that's level with your machine bed, supporting the entire weight of your quilt. Without it, the quilt will drag off the edge of your machine, and you’ll be fighting gravity with every stitch. This pull is what causes jerky movements and tired arms.
Your posture matters, too. Sit in a good chair with your feet flat on the floor and your arms relaxed at a comfortable 90-degree angle. Try to avoid leaning in or hunching over. It also really helps to take short breaks every 20-30 minutes to stand up and stretch. This keeps you from getting stiff and helps you stay focused longer, which is crucial for building the muscle memory needed for those gorgeous free motion quilting designs.
Mastering Your First Go-To Quilting Designs
Alright, this is where the magic really happens. We're about to take that lovely quilt sandwich you’ve prepared and start stitching it into a true work of art. This is all about building your personal library of free-motion quilting designs—the ones you'll come back to time and time again.
Forget about those super complex, show-stopping designs for now. Our focus is on mastering a few simple, versatile motifs that will become the backbone of your quilting. Think of these as your quilting ABCs; they work beautifully on just about anything, from a modern baby quilt to a traditional bedspread. We'll start with the essentials, focusing on finding a smooth, fluid rhythm.
The Meander: The Original All-Over Design
If there's one design every free-motion quilter learns first, it's the meander (often called stippling). It’s simply a wandering line that never crosses itself, filling the space with a wonderful, organic texture. The best way I can describe the movement is to think of it like you're drawing puzzle pieces or soft, rounded amoeba shapes that nestle up against each other.
The key here is to keep your hand movements smooth and flowing. You want to avoid any sharp turns or pointy corners. Just gently guide your quilt in soft, rounded curves and try to keep the spacing between your lines fairly consistent. The beauty of this pattern is that it's incredibly forgiving, which makes it the perfect place to start building your confidence and getting the feel for moving the quilt under the needle.
Before you even touch the fabric, let's think about the whole process.
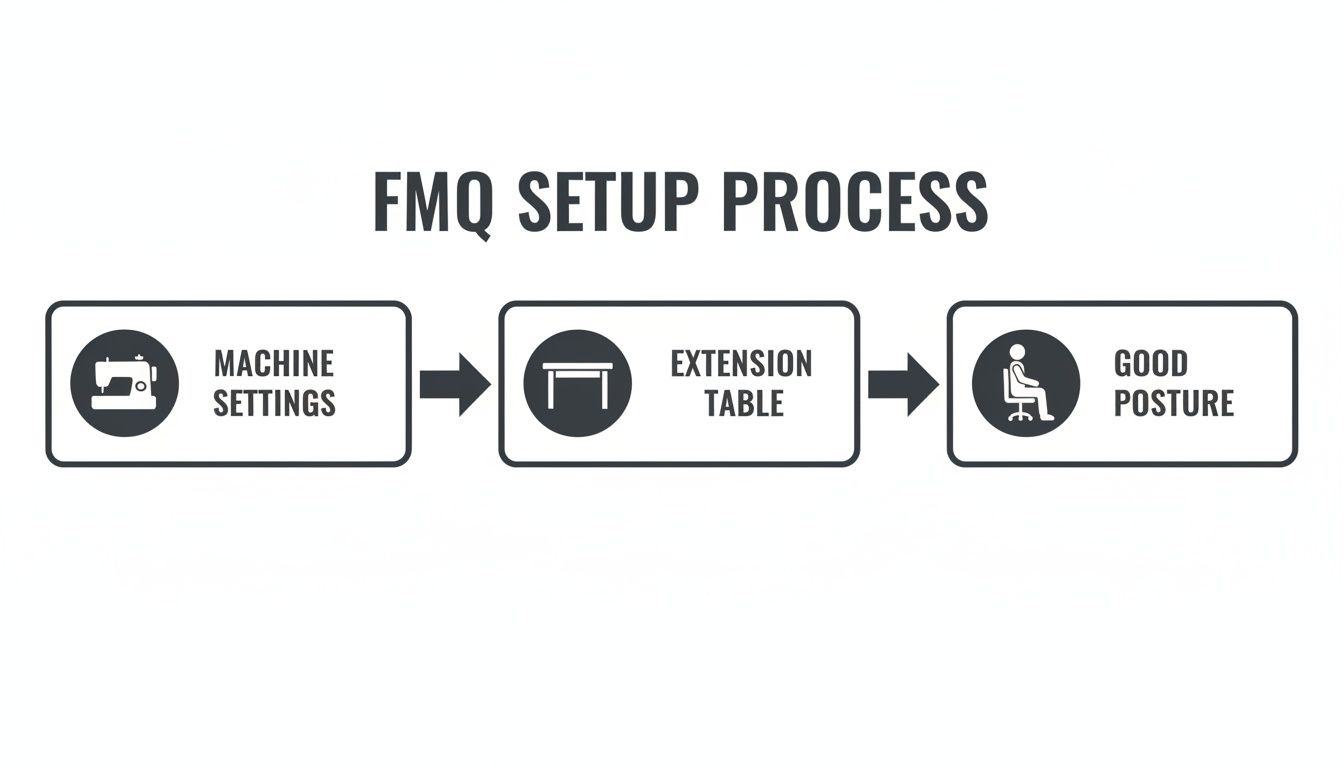
This little chart really breaks it down. Getting your machine settings right, having enough space to work, and sitting comfortably are the three pillars of a good quilting session. Nailing these is crucial for mastering even the most basic designs.
Loops and Swirls: Adding a Bit of Playful Movement
Once you've got the hang of that meandering line, adding a simple loop is a natural next step. A looping meander instantly adds a bit more personality and playfulness to your quilting. The motion is almost the same as a standard meander, but you'll intentionally cross your path to form charming, open loops as you travel across the quilt.
Swirls are another fantastic design to learn early on, and they introduce a slightly different hand motion. To make a swirl, you stitch a spiral inward, and then you echo your way back out before moving on to the next one. This "in-and-out" movement is a core skill in free-motion quilting that you'll find yourself using in more advanced designs down the road.
A common hiccup I see with beginners is making swirls too tight. When they're packed too densely, the quilt can become stiff. Aim for open, gentle spirals to keep your quilt soft and drapey.
Practising these two motifs is a fantastic way to improve your control. You'll be developing some key skills without even realising it:
- Travelling: This is the technique of stitching right over a previous line of quilting to get from one spot to another without having to cut your thread.
- Echoing: Stitching a consistent distance away from an existing line—a must-have skill for so many designs.
- Rhythm: Finding that sweet spot where your hand speed and your machine speed work together to create beautiful, even stitches.
Pebbles and Wood Grain: Creating Delicious Organic Textures
Ready for something a little more detailed? Pebbling is all about filling a space with densely packed circles of different sizes. This design adds an incredible texture and works beautifully as a background filler. The trick to nice-looking pebbles is to stitch each circle in one continuous motion, then travel along its edge just a little bit to start the next one.
It definitely requires more control than a meander, but the visual payoff is huge. And please, don't stress about making perfect circles! Slightly wobbly, irregular shapes look far more natural and organic, just like real stones on a riverbed. My advice? Start with larger pebbles and work your way down to smaller ones as you get more comfortable.
Another amazing texture to have in your back pocket is the wood grain. This design does exactly what it sounds like: it mimics the natural lines and knots in a plank of wood. You create it by stitching long, gently waving lines. Every so often, you can add a "knot" by stitching a tight oval or circle and then echoing around it before continuing on with your wavy line.
This pattern is especially good for adding a sense of direction and movement to a quilt. It’s also surprisingly fast to stitch once you get into the rhythm of those long, flowing lines.
Putting It All Together on a Real Quilt
So, how do you decide which of these foundational designs to use on your project? Often, the quilt top itself will give you the answer.
A really busy, colourful quilt might benefit from a simple, all-over meander. It will add texture without fighting with all the different fabrics. On the other hand, a quilt with big areas of solid colour is the perfect canvas to really show off a more detailed design like pebbles or swirls.
Here are a few real-world scenarios to get you thinking:
- For a Modern Baby Quilt: A playful looping meander is a perfect choice. It's fast, it's fun, and it adds a soft, cuddly texture that totally fits a modern vibe.
- For a Traditional Sampler Quilt: Try using a simple swirl in the background of your blocks. This will help the pieced "star" of each block really pop and will add a lovely sense of depth.
- For a Quilt with Nature-Themed Fabrics: A wood grain design is a no-brainer here. It enhances the theme of the quilt while adding beautiful, organic movement across the whole surface.
As you get more comfortable with these motifs, you might start craving designs with more structure and precision. When that day comes, looking into ruler work is a fantastic next step. Our comprehensive Rulerwork Work Book is designed to walk you through using quilting rulers to create perfectly straight lines, stunning curves, and intricate geometric patterns, all on your home machine.
Building a solid foundation with these simple, effective free-motion quilting designs is the most important thing you can do on your quilting journey. Practice them on scraps, doodle them on paper, and most importantly, have fun with it. Before you know it, you'll have a whole repertoire of patterns you can confidently stitch on any quilt that comes your way.
Building Your Skills With Practice Drills
Those beautiful, fluid free motion quilting designs you admire don't just happen by magic. They're built on muscle memory. Think back to learning cursive—it took practice for your hand and brain to get in sync, and quilting is no different. The drills here are all about building that connection to improve your control, smooth out your curves, and sharpen your points.
The key is consistency, but don't worry, that doesn't mean you have to spend hours at your machine. The real secret is short, focused sessions that feel totally manageable and build your confidence over time.
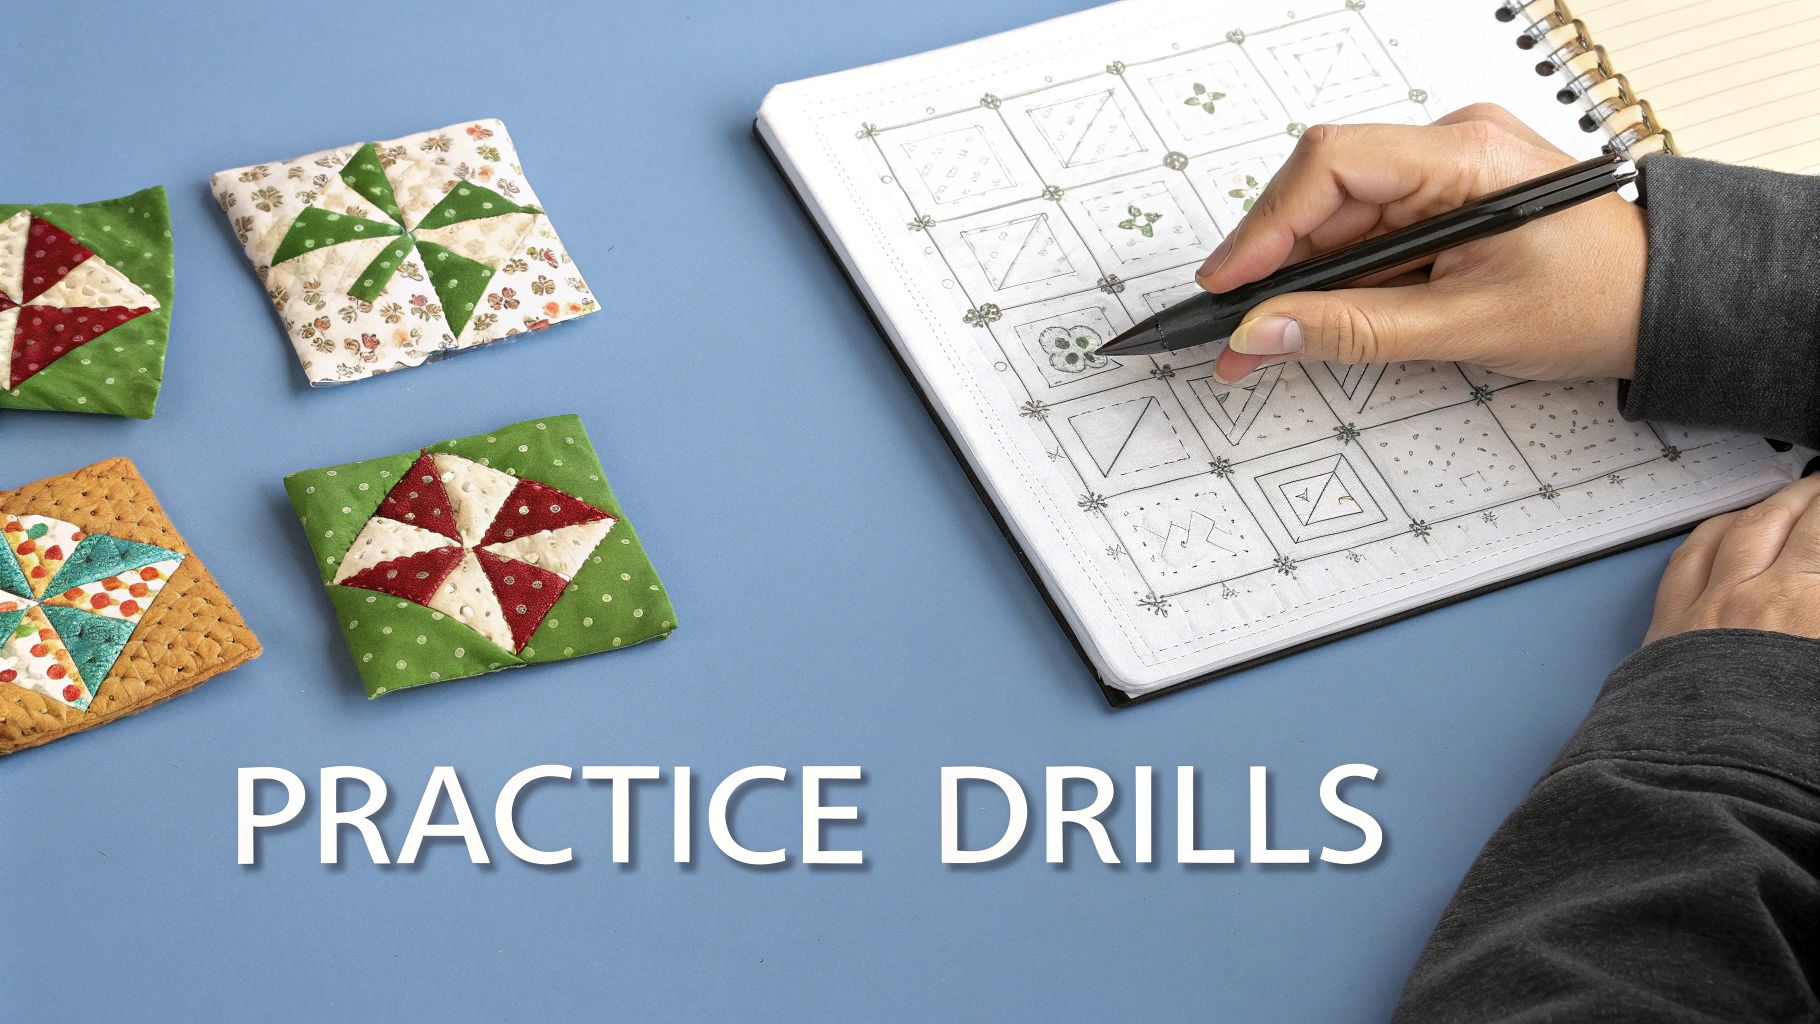
The Power of Doodling and Daily Practice
Before you even touch your sewing machine, your most powerful tool is a simple pen and paper. Doodling your quilting designs is one of the best ways I know to train your brain. You can get a feel for the path of a motif without the pressure of managing thread, fabric, and a fast-moving needle.
Just spend a few minutes tracing swirls, loops, or simple meandering lines. This simple act builds the foundational motor patterns, which makes your time at the machine so much more productive and way less intimidating.
This brings me to a strategy I swear by: the 15-minute daily practice method. All you have to do is find a quarter of an hour each day to work on your quilting. It's a low-commitment approach that helps you avoid burnout and makes it incredibly easy to stay consistent. Just grab a small quilt sandwich—a couple of fat quarters with some batting is perfect—and focus on one specific drill.
You will be absolutely amazed at how fast you see progress. Fifteen minutes a day adds up to nearly two hours of focused practice a week. Your skills and confidence will grow much faster than if you only do sporadic, marathon quilting sessions.
This method has become popular with quilters across Canada, from Barrie to Victoria, as experts champion these short bursts of practice to master everything from basic loops to straight lines. It’s a technique that fits perfectly into our busy lives. In fact, one survey showed that Canada’s quilters, who made up 5% of over 37,000 respondents, start about 11 projects a year and finish nine—often using free motion techniques to get that polished look. You can read more about how Canadian quilters are honing their skills on chatterboxquilts.com.
Fundamental Drills for Better Control
Ready to start building that muscle memory? These drills are designed to target the core movements you'll use in almost every free motion design out there. Grab a small practice sandwich and concentrate on a smooth, even motion.
- Smooth Curves: Start by stitching gentle, rolling waves across your fabric. Your goal is to make the curves symmetrical and evenly spaced. This drill is fantastic for developing the fluid hand movements you need for meanders and swirls.
- Sharp Points: Next, stitch a continuous zigzag line, really focusing on pivoting cleanly at each point. Try to get your points sharp and your lines straight. This is essential for designs like stars, leaves, and other geometric fillers.
- Consistent Shapes: Fill a small square with circles of roughly the same size (this is called "pebbling"). In another square, practice stitching continuous loops. The goal isn't perfection; it's about getting more uniformity in your size and spacing.
Beyond these exercises, other fine motor activities for adults can also help improve the hand strength and coordination so vital for quilting.
Putting Your Drills Into Action
Once you start feeling more comfortable with these basic movements, it's time to start combining them. Try transitioning from a wavy line right into a loop, or stitch a swirl that finishes with a sharp point. This is how you begin to develop your own unique style and learn how to travel across the quilt top with confidence.
Just remember, every single stitch on a practice piece is one step closer to finishing your real projects with beautiful, personalized quilting.
Getting Unstuck: Your Guide to Common Quilting Frustrations
We’ve all been there. You’re in the zone, quilting away, when suddenly you’re staring at a tangled mess of thread that brings your creative flow to a screeching halt. It's frustrating, but don't worry—most free-motion quilting hiccups are easier to fix than you think.
Most problems boil down to just a few usual suspects. Once you learn to spot them, you can solve them quickly and get back to the fun part. Let's walk through the most common issues, from those notorious thread "bird's nests" to tension tantrums, and get your stitches looking beautiful again.
Decoding Thread Troubles
Is your thread shredding, breaking, or skipping stitches? It’s enough to make you want to pack it all in for the day. Before you throw in the towel, let’s run through a quick mental checklist. More often than not, the fix is surprisingly simple.
First things first, check your needle. A dull, bent, or wrong-sized needle is the number one culprit behind thread problems. I make it a habit to change my needle every 8-10 hours of quilting, and I recommend you do the same. Make sure you're using a needle designed for quilting or topstitching; they have a larger eye and a deeper groove to protect the thread.
Next, give your thread path a once-over. Is the thread seated properly in every single guide and tension disc? A small miss can cause big problems. And don't forget the thread itself. Old, brittle, or cheap thread just can't handle the stress of high-speed stitching and is much more likely to break.
A few common scenarios:
- Skipped Stitches: This is almost always a needle issue. Pop in a fresh one. If that doesn't solve it, double-check that it's inserted correctly, with the flat side facing the back of the machine.
- Shredding or Breaking Thread: This often points to a dull needle or poor-quality thread. It can also happen if your top tension is cranked way too tight, putting too much strain on the thread as it moves.
Conquering Tension Imbalances
Ah, tension. It's probably the most misunderstood part of free-motion quilting, but getting it right is the secret to perfect stitches. What you're aiming for is a beautiful, balanced stitch where the top and bobbin threads meet right in the middle of your quilt sandwich.
Are you seeing ugly loops of thread—what we call "bird's nests"—on the back of your quilt? That's a classic sign your top thread tension is too loose. The bobbin thread is easily winning the tug-of-war, pulling loops of the top thread down. The fix is simple: increase your top tension a little at a time.
On the other hand, if you see little specks of your bobbin thread peeking through on the top of your quilt, your top tension is probably too tight. It's yanking that bobbin thread all the way up. To fix this, you'll want to gradually decrease the top tension.
My best advice? Always, always test your tension on a practice quilt sandwich before you touch your actual quilt. Use scraps of the exact same fabric and batting, stitch a sample of your design, and then inspect the front and back closely.
Managing Quilt Bulk and Preventing Puckers
Trying to manoeuvre a large quilt through your machine can feel like wrestling an octopus. All that drag and weight is a primary cause of puckers and wonky, inconsistent stitches. When the quilt's weight pulls against the needle, it can distort the fabric and mess up your beautiful work.
The best thing you can do is support the quilt's weight. An extension table that makes your machine's surface bigger is a game-changer. If you don't have one, you can get creative and build up the area around your machine with stacks of books or small tables to keep the quilt level and supported.
Think about your posture and hand position, too. Rest your hands on the quilt in a relaxed "C" shape, gently framing the area you're about to stitch. You're not trying to push or stretch the fabric. Instead, focus on gliding the quilt smoothly under the needle, using your arms and shoulders to move it, not just your wrists. This simple change reduces strain on you and your quilt, leading to much flatter, pucker-free results.
Answering Your Top Free Motion Quilting Questions
Jumping into free motion quilting designs can feel like learning a new language, and it's totally normal to have a few questions pop up. Whether you've been quilting for years but are new to FMQ, or you're just starting out, a little uncertainty is part of the process.
Let's walk through some of the most common things quilters ask. Think of this less as a set of hard rules and more as a conversation about the "why" behind it all, so you can figure out what works for you, your quilt, and your machine.
Do I Really Need a Super-Fancy Sewing Machine?
Honestly? No. This is probably the biggest myth holding people back. You absolutely do not need a pricey, top-of-the-line machine to do beautiful free motion quilting.
The single most important feature is the ability to drop or cover the feed dogs. That’s it. If your machine can do that, you're ready to go. Sure, a heavier machine might feel a bit more stable, but countless quilters create stunning work on basic, lightweight models. The real secret ingredient is practice, not the price tag on your gear.
Should I Be Marking My Quilt Top Before I Start?
This one is a mix of personal style and how complex your design is. For flowy, all-over patterns like a classic meander or simple loops, most quilters just dive right in without any marks. The charm of those designs is in their spontaneous, organic movement.
But when you're tackling something more geometric or a specific, repeating motif, marking can be a lifesaver. Using a stencil or a quilting ruler with a washout fabric pen gives you a roadmap, taking the stress out of getting those perfect shapes.
Think of it like this: marking is your GPS. You don't need it for a walk around your own neighbourhood, but it's a huge help when you’re trying to navigate a new city for the first time.
You'll probably find that the more you quilt, the less you'll rely on marking. It’s all about building that muscle memory and confidence.
What’s the Right Speed for My Machine?
Finding the right speed is a balancing act. It's that "Goldilocks" sweet spot where how fast you move your hands perfectly syncs with how fast your needle is moving. There’s no magic number to aim for.
- Going too slow on the pedal while moving your hands quickly? You'll end up with long, pulled-out stitches.
- Pressing the pedal down hard but moving your hands slowly? You'll get tiny, tight stitches that can make your quilt feel stiff.
My advice is to start at a comfortable medium speed and just focus on moving your hands in a smooth, even rhythm. You’ll eventually feel that perfect pace where your stitches look beautiful and consistent. It's like a dance between your hands and your machine, and it just takes a little practice to get the rhythm right.
Free motion quilting has really taken off here in Canada, and quilters are eager to build their skills. A recent survey of over 37,000 quilters showed that 5% of respondents were from Canada. We see this firsthand at shops like All About Sewing in Barrie, Ontario, where customers are investing in BERNINA and Handi Quilter long-arm systems built for FMQ. With stats showing the average quilter owns four sewing machines, and Canada's quilt market contributing to a projected $5 billion global industry, it's clear that locals are passionate about their craft. You can read more about these growing quilting market trends on craftindustryalliance.org.
At All About Sewing, we’re here for every part of your quilting journey. From helping you choose the right machine and accessories to offering expert advice when you get stuck, our team loves helping you bring your ideas to life. Come see our huge selection of quilting supplies and machines at https://all-about-sewing-canada.myshopify.com.


